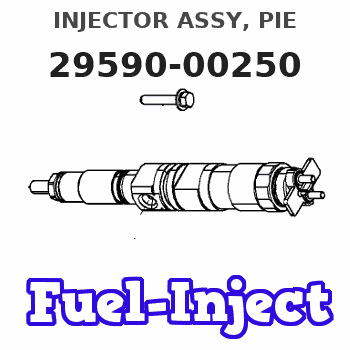
Information injector assy, pie
Rating:
Compare Prices: .
As an associate, we earn commssions on qualifying purchases through the links below

2959000250 2367039435 Original Parts Common Rail Fuel Injector 295900-0250 23670-39435 Compatible with Hilux 2KD (295900-0250 23670-39435)
Generic 2959000250 2367039435 Original Parts Common Rail Fuel Injector 295900-0250 23670-39435 Compatible with Hilux 2KD
Generic 2959000250 2367039435 Original Parts Common Rail Fuel Injector 295900-0250 23670-39435 Compatible with Hilux 2KD

Common Rail Diesel Fuel Injector 23670-39435 295900-0250 23670-30440
ZZNMPBEX Easy installation: This injector is designed for easy installation and can be seamlessly integrated into your vehicle fuel system. || High quality standard: This injector is manufactured according to strict quality control standards, ensuring reliable performance and durability. || Wide vehicle compatibility: it is suitable for various models including engines to enhance versatility. Make sure your vehicle fits perfectly. || Efficient fuel delivery: Optimized design to achieve efficient fuel delivery, this injector improves the performance and efficiency of the engine. || Common Rail Diesel Fuel Injector 23670-39435 295900-0250 23670-30440
ZZNMPBEX Easy installation: This injector is designed for easy installation and can be seamlessly integrated into your vehicle fuel system. || High quality standard: This injector is manufactured according to strict quality control standards, ensuring reliable performance and durability. || Wide vehicle compatibility: it is suitable for various models including engines to enhance versatility. Make sure your vehicle fits perfectly. || Efficient fuel delivery: Optimized design to achieve efficient fuel delivery, this injector improves the performance and efficiency of the engine. || Common Rail Diesel Fuel Injector 23670-39435 295900-0250 23670-30440

DIESEL PIEZO FUEL INJECTOR 295900-0200, 295900-0250, 23670-30440, 23670-39435
BSZBAS OEM NO. : 23670 39435, 2367039435 23670 30440, 2367030440 || The maintenance and upkeep of fuel injectors are very important || Fuel impurities may cause fuel injector blockage || It is recommended to drive 20000 kilometers or replace it every two years || Ensure its normal operation
BSZBAS OEM NO. : 23670 39435, 2367039435 23670 30440, 2367030440 || The maintenance and upkeep of fuel injectors are very important || Fuel impurities may cause fuel injector blockage || It is recommended to drive 20000 kilometers or replace it every two years || Ensure its normal operation
You can express buy:
USD 173.78
14-06-2025
14-06-2025
High Quality Common Rail Diesel Fuel Injector 23670-39435 295900-0250 23670-30440
USD 328.88
13-05-2025
13-05-2025
High Quality Common Rail Diesel Fuel Injector 23670-39435 295900-0250 23670-30440
USD 41.93
13-05-2025
13-05-2025
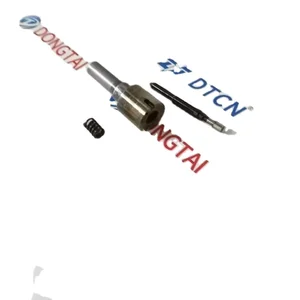
NO.591(10-3) Original Piezo Common Rail Nozzle G3P007 for Denso Injector 295900-0250, 23670-30440
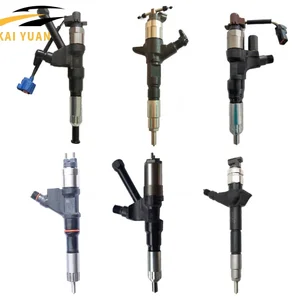
Images:
USD 80

[27-Oct-2022]
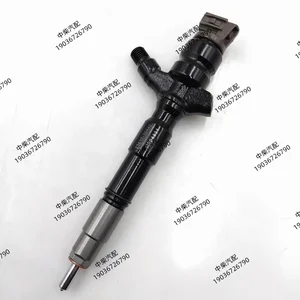
USD 245

[28-Jun-2019]
USD 229

[10-Nov-2022]
Components :
| 001. | INJECTOR ASSY, PIE | 29590-00250 |
Scheme ###:
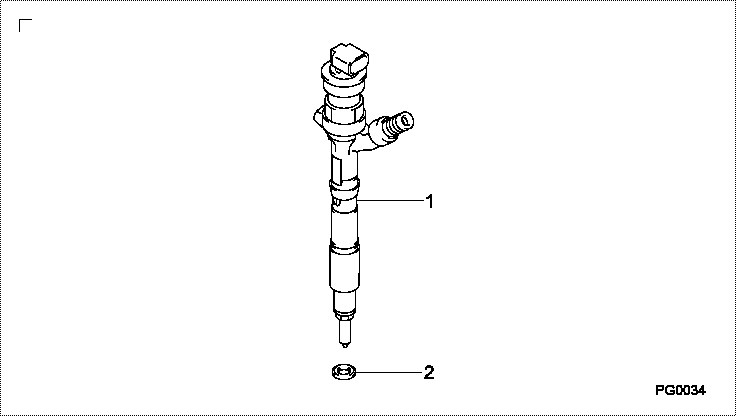
| 000. | [01] | 29590-00250 | INJECTOR ASSY, PIE | 23670-39435 |
| 001. | [01] | 29590-00200 | INJECTOR ASSY, PIE | 23670-30440 |
| 002. | [01] | 09313-30830 | GASKET | 11176-30011 |
Include in #3:
29590-00250
as INJECTOR ASSY, PIE
Cross reference number
| Part num | Firm num | Firm | Name |
| 29590-00250 | 23670-3943 | INJECTOR ASSY, PIE | |
| 23670-39435 | TOYOTA | INJECTOR ASSY |
Information:
Engine Oil and Filter(s)
Dipstick Calibration
The 3176 uses a dipstick that has a FULL RANGE zone versus other dipsticks that have the traditional FULL mark. This dipstick is used to account for variations in engine installations. Engine oil level will vary depending on angle and slant of OEM engine installation (angle = front to back tilt, slant = sideways tilt).To determine the correct FULL mark in the FULL RANGE zone and prevent overfilling or under filling the crankcase, it is important to calibrate (or verify the calibration of) the dipstick at the first oil change.To verify the ADD mark and establish the actual FULL mark in the FULL RANGE zone of the dipstick, use the following procedure. A convenient time to calibrate the dipstick is at the first oil change.Drain Oil
The vehicle must be parked on a level surface to perform this maintenance procedure.
Refer to the Lubricant Specifications section of this manual for the recommended oil to use for this engine.Drain the crankcase with the oil warm and the engine stopped to allow for the draining of waste particles that are suspended in the oil.Failure to follow this recommended procedure would result in these waste particles being recirculated through your engine lubrication system with the new oil.1. Operate the engine until it reaches normal operating temperature.2. Stop the engine. 3. Drain the oil. An oil sample can be obtained for S O S (Scheduled Oil Sampling) analysis at this time. Remove the crankcase drain plugs. Plugs from both the deep and shallow portions of the oil pan should be removed to allow the oil to drain.4. Install both crankcase drain plugs and tighten them to 50 10 lb ft (70 14 N m).Replace Filter(s)
1. Use a 2P8250 Filter Wrench to remove the oil filter (A) and optional bypass oil filter (B) (if equipped).
Element with debris.2. Use a 4C5084 Oil Filter Cutter (which replaced the former 6V7905 Service Tool) to cut the oil filter open. Spread pleats apart and inspect the element for metal debris. An excessive amount of debris in the oil filter element may be indicative of early wear or a pending failure.Use a magnet to differentiate between the ferrous and non-ferrous metals found in your oil filter element.Ferrous metals may indicate wear on the steel and cast iron parts of your engine. Non-ferrous metals may indicate wear on the aluminum, brass or bronze parts of your engine, such as main and rod bearings, turbocharger bearings and cylinder head wear.Due to normal wear, friction, etc., it is not uncommon to find small amounts of debris in your oil filter element. Consult your Caterpillar dealer to arrange for further analysis if an excessive amount of debris is found in your oil filter. 3. Wipe the sealing surface of the filter mounting base. Make sure all of the old gasket is removed. Change oil filter(s) at every oil change. Make sure to use the correct Caterpillar oil filter(s) for your engine arrangement.
Caterpillar oil filters are built to Caterpillar