Information injector assy, pie
Rating:
Compare Prices: .
As an associate, we earn commssions on qualifying purchases through the links below

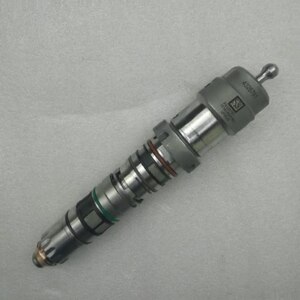
Diesel Engine Injector Nozzle 295900-0430 295900-0180 295900-0060 23670-26070 23670-29115 23670-0R100
Generic
Generic

$663.08
07 May 2023
0.0022[0.00] Pounds
CN: 987667890
PARPIS New Diesel Common Rail Fuel Injector 295900-0430, 295900-0180, 295900-0060, 23670-26070, 23670-29115, 23670-0R100
PARPIS - Easy to install, easy to use and operate. || - High efficiency fuel injection and high impedance coils enable fast start-up in cold environments with low fuel consumption and good performance. || - Use compressed air to rotate in a test tube and mix the atomized droplets of the impact. || - Nozzles help control airflow and pressure to adjust spray flow, Angle, and size. || - Solid structure, durable, not easy to rust, can be used for a long time.
PARPIS - Easy to install, easy to use and operate. || - High efficiency fuel injection and high impedance coils enable fast start-up in cold environments with low fuel consumption and good performance. || - Use compressed air to rotate in a test tube and mix the atomized droplets of the impact. || - Nozzles help control airflow and pressure to adjust spray flow, Angle, and size. || - Solid structure, durable, not easy to rust, can be used for a long time.
You can express buy:
USD 203.6
25-11-2022
25-11-2022
High performance Fuel injector 23670-26070 236700R100 2367029115 2959000180 2959000430

USD 470
07-10-2022
07-10-2022
Common rail Injector 295900-0080 295900-0090 23670-29115 295900-0180
Components :
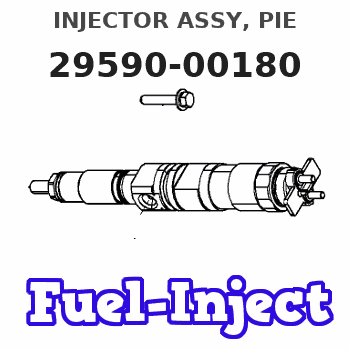
| 001. | INJECTOR ASSY, PIE | 29590-00180 |
| 002. | INJECTOR ASSY, PIE | 29590-00060 |
Scheme ###:
| 000. | [01] | 29590-00180 | INJECTOR ASSY, PIE | 23670-29115 |
| 001. | [01] | 29590-00060 | INJECTOR ASSY, PIE | 23670-26070 |
| 002. | [01] | 09313-30850 | GASKET | 11176-26020 |
Include in #3:
29590-00180
as INJECTOR ASSY, PIE
Cross reference number
| Part num | Firm num | Firm | Name |
| 29590-00180 | 23670-2911 | INJECTOR ASSY, PIE | |
| 23670-29115 | TOYOTA | INJECTOR ASSY, PIE |
Information:
Typical air cleaner indicator shown.Your engine may be equipped with a different indicator.A service indicator (if equipped) may be mounted on your dashboard or in the engine compartment. A colored piston showing in the window indicates the need for servicing the air cleaner.Observe the air cleaner service indicator. Clean or replace the air cleaner element when the yellow diaphragm enters the red zone, the red piston locks in the visible position or 25 inches (635 mm) H2O.As the air cleaner element becomes plugged, the difference of air pressure between the inlet side (dirty side) and the engine side (clean side) will increase.If your air cleaner element becomes plugged, the air can split the element filter material. Unfiltered air will drastically accelerate internal engine wear.Your Caterpillar dealer has air filter elements to service most popular makes of trucks. Contact your Caterpillar dealer for the correct filter element to fit your truck.Cleaning Caterpillar Air Cleaner Elements
The Caterpillar air filter element can be cleaned several times before replacement. The element, when cleaned, should be thoroughly checked for rips or tears in the filter material. Replace the primary element at least every year even though it has been cleaned less than the maximum recommendation.Refer to Guideline for Reusable Parts-Procedures to Inspect and Clean Air Filters, form SEBF8062 for information on inspecting, cleaning and reusing Caterpillar air filter elements.
Clean or replace elements at intervals recommended by the air cleaner OEM or truck manufacturer's recommendations and operating (dust, dirt and debris) conditions, or when required by the restriction indicator.Never service the air cleaner with the engine running since this will allow dirt to enter the engine.
Check the precleaner (if equipped) daily for accumulation of dirt and debris. Remove any dirt and debris as needed.Remove and Install Air Cleaner Elements
1. Loosen the retaining bolts and remove the end cover on the air cleaner housing.2. Remove and inspect the element for damaged pleats, gaskets or seals. Replace the element if damaged.3. Clean the inside of the housing.4. Replace the element in the housing.5. Install the end cover on the housing.6. Reset the service indicator by pushing the piston plunger in.Inspecting Element
7. Insert a light inside of the clean, dry element. Inspect it for rips and tears. Discard the element if damaged.8. Wrap and store good elements in a clean, dry place.