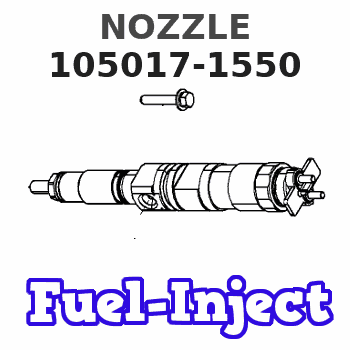
Information nozzle
BOSCH
9 432 610 326
9432610326
ZEXEL
105017-1550
1050171550
ISUZU
8942479372
8942479372

Rating:
Compare Prices: .
As an associate, we earn commssions on qualifying purchases through the links below
$189.89
08 Apr 2024
KR: Adabus
Injector nozzle 12 Pieces L068PBA L129PBA L159PBA DLLA160P624 DLLA151PN086 DLLA154PN155 diesel nozzle - (Color: DLLA160P624)
Generic Color: DLLA160P624 || Is customized: No || Material type: Metal || Item length: 8 || Origin: Mainland China
Generic Color: DLLA160P624 || Is customized: No || Material type: Metal || Item length: 8 || Origin: Mainland China
$184.29
25 Mar 2024
KR: Adabus
Injector Nozzle 12 Pieces DLLA155P125 DLLA154PN208 DLLA154PN186 DLLA154PN185 DLLA154PN155 Diesel Pump Nozzle - (Color: DLLA154PN186)
Generic Color: DLLA154PN186 || Is customized: No || Material type: Metal || Item length: 8 || Origin: Mainland China
Generic Color: DLLA154PN186 || Is customized: No || Material type: Metal || Item length: 8 || Origin: Mainland China
$62.99
26 Mar 2023
0.88[0.40] Pounds
CN: lutong part plant
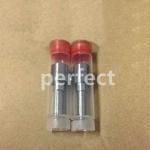
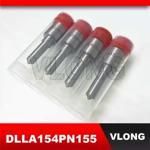
6Pcs Fuel Injector Nozzles 105017-1550 DLLA154PN155 Fits for ISUZU Elf NKR NHR 4JB1(TC)
DICSCL PARCS Fuel Injector Nozzle Tips 105017-1550 DLLA154PN155 fits for ISUZU 4JB1 Engine 6pcs/set || Material: Made of high quality for longer durability and strength.100% quality inspection to ensure the high quality. Upgraded packaging to avoid damage. || Easy Installation:No further modification to direct replacement. || OEM Part Number:DLLA154PN155 || Estimated Time of Delivery from China: 5-10 working days.Customer satisfaction is always our top priority, we are standing by ready to provide you with reliable assistance with any questions you may have
DICSCL PARCS Fuel Injector Nozzle Tips 105017-1550 DLLA154PN155 fits for ISUZU 4JB1 Engine 6pcs/set || Material: Made of high quality for longer durability and strength.100% quality inspection to ensure the high quality. Upgraded packaging to avoid damage. || Easy Installation:No further modification to direct replacement. || OEM Part Number:DLLA154PN155 || Estimated Time of Delivery from China: 5-10 working days.Customer satisfaction is always our top priority, we are standing by ready to provide you with reliable assistance with any questions you may have
You can express buy:
USD 58.98
14-06-2025
14-06-2025
For ISUZU ELF 4JB1 4JB1TC 6x Fuel Injector Nozzle Tips 105017-1550 DLLA154PN155
Images:
USD 25

[24-Jun-2019]
USD 4.17

[21-Jun-2019]
Include in #1:
101492-0660
as NOZZLE
Include in #2:
104740-1780
as NOZZLE
Cross reference number
Zexel num
Bosch num
Firm num
Name
Information:
Illustration 6 g06613192
Gray locking wedge removed from ECM connector
Remove gray locking wedge from 86-pin connector to provide access to release the DT Pins.Note: Circuit U937 to be removed from pin location number 24 and transferred to pin location 73.Note: Cloth tape will need to be removed to the split in the harness main bundle.Note: The U937 wire can then be routed into the opposite branch to gain enough free length to make the connection.Note: The U939 wire removed from pin location 73 has adequate length to be loaded into location 16.
Transfer and relocate the wires as detailed in Table 2.
Reinstall the locking wedge (B) when all wires have been transferred and relocated.
Illustration 7 g06613197
View of back of ECM connector with connector cover (D) removed
Apply cloth tape to both wire branches from the main bundle of wires up the branches to the harness strain relief strap location.
Illustration 8 g06613199
Connector cover (D) reinstalled with harness secured
(1) 3S-2093 Cable Strap
(D) Connector cover
Reinstall connector cover (D) and secure the harness branches using two cable straps (1).
Use caution when re-engaging the connector with the ECM.
Tighten allen head screw (A).Note: In certain cases, U937 may require lengthening to provide adequate strain relief when relocated in pin 73.Note: Refer to "Soldered Splice","Deutsch connector", or "Sealed Mechanical Splice" for the proper way to extend circuit U937.Soldered Splice
A soldered spliced can be made to extend the wire. Soldered connection will need to be insulated using an appropriately sized adhesive head shrink sleeve.
Illustration 9 g06613210
U937 removed
Remove U937 from ECM connector.
Cut pin off end of wire.
Strip wire 7.5 mm (0.30 inch).
Illustration 10 g06613213
Additional wire soldered to circuit U937
Solder to additional wire to extend U937 and install appropriate sized adhesive head shrink sleeve.
Install pin on end of U937.
Insert U937 into pin 73.
Refer to "Procedure to Change Connector Plug Assembly Pins" for the proper method to reinstall ECM connector.Deutsch connector
Table 3
Required Parts
Qty Part Number Part Name
1 115-8109 Wire Splice Note: The deutsch connector is a field serviceable alternative to permanent splices. It is made from the same high-quality silicone elastomer as used for the Deutsch connector seals and grommets. The splice body houses a contact retention system that secures a mated pair of contacts in a compact environmentally sealed unit. This splice can also be serviced with standard deutsch connector tools.
Illustration 11 g06613218
Deutsch connector section view
Illustration 12 g06613221
Deutsch connector splice installed
Illustration 13 g06613224
Sufficient strain relief for deutsch connector
Refer to "Procedure to Change Connector Plug Assembly Pins" for the proper method to reinstall ECM connectorSealed Mechanical Splice
Table 4
Required Parts
Qty Part Number Part Name
1 136-4877 Wire Splice Note: Sealed mechanical splices have head-shrinkable, environmentally sealed sleeves.
Illustration 14 g06613205
Sealed mechanical splice
Select appropriate splice size.
Strip wire 7.5 mm (0.3 inch).
Insert stripped wire into sealed mechanical splice.
Crimp sealed mechanical splice.
Apply heat to the crimped splice until tubing re-covers and adhesive flows.
Refer to "Procedure to Change Connector Plug Assembly Pins" for the proper method to reinstall ECM connector


