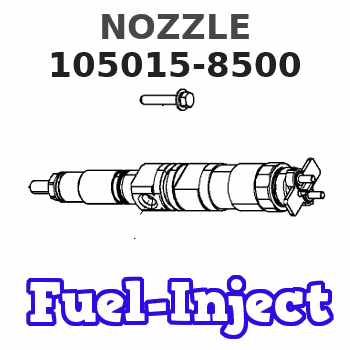
Information nozzle
BOSCH
9 432 611 174
9432611174
ZEXEL
105015-8500
1050158500
MITSUBISHI
ME727003
me727003

Rating:
Compare Prices: .
As an associate, we earn commssions on qualifying purchases through the links below
$69.00
20 Feb 2023
CN: lutong part plant
Diesel Fuel Injector Tips Nozzle DLLA160SN850 1050158500 SN Injectors Nozzles 105015-8500 Engine Parts Fits for Mitsubishi 8DC9T2 Truck Bus 16031Cc
DICSCL PARCS Diesel Fuel Injector Nozzle fits for Mitsubishi 8DC9T2 Engine || Diesel Fuel Injector Nozzle fits for Mitsubishi Truck Bus 16031Cc Vehicles || Manufacturer Part Number: 105015-8500 OEM Number: DLLA160SN850 || If you don't know which model to choose, Please contact us. || Material: Made of high quality for longer durability and strength.100% quality inspection. Upgraded packaging avoid damage.
DICSCL PARCS Diesel Fuel Injector Nozzle fits for Mitsubishi 8DC9T2 Engine || Diesel Fuel Injector Nozzle fits for Mitsubishi Truck Bus 16031Cc Vehicles || Manufacturer Part Number: 105015-8500 OEM Number: DLLA160SN850 || If you don't know which model to choose, Please contact us. || Material: Made of high quality for longer durability and strength.100% quality inspection. Upgraded packaging avoid damage.
$51.00
20 Feb 2023
CN: lutong part plant
Diesel Fuel Injector Tips Nozzle DLLA160SN850 1050158500 SN Injectors Nozzles 105015-8500 Engine Parts Fits for Mitsubishi 8DC9T2 Truck Bus 16031Cc
DICSCL PARCS Diesel Fuel Injector Nozzle fits for Mitsubishi 8DC9T2 Engine || Diesel Fuel Injector Nozzle fits for Mitsubishi Truck Bus 16031Cc Vehicles || Manufacturer Part Number: 105015-8500 OEM Number: DLLA160SN850 || If you don't know which model to choose, Please contact us. || Material: Made of high quality for longer durability and strength.100% quality inspection. Upgraded packaging avoid damage.
DICSCL PARCS Diesel Fuel Injector Nozzle fits for Mitsubishi 8DC9T2 Engine || Diesel Fuel Injector Nozzle fits for Mitsubishi Truck Bus 16031Cc Vehicles || Manufacturer Part Number: 105015-8500 OEM Number: DLLA160SN850 || If you don't know which model to choose, Please contact us. || Material: Made of high quality for longer durability and strength.100% quality inspection. Upgraded packaging avoid damage.
Cross reference number
Zexel num
Bosch num
Firm num
Name
Information:
1. Install tooling (A) on the BrakeSaver housing and rotor. Tooling (A) holds the BrakeSaver housing and rotor assembly together at installation. This prevents damage to the rotor rings and seals.2. Install a 3/8" - 16 NC forged eyebolt in the top of the BrakeSaver housing, and fasten a hoist to it.3. Install two 5/8" - 18 guide bolts (9) in the crankshaft as shown. Make sure dowel (8) is in alignment with the dowel hole in the rotor assembly, and put BrakeSaver housing (7) in position in the flywheel housing.4. Install the three bolts that hold the BrakeSaver housing to the flywheel housing. Remove tooling (A) and guide pins (9). 5. Connect the oil line to fitting (5).6. Inspect the O-ring seals for damage, and make replacements if needed. Install O-ring seals (10) and (11). Put clean engine oil on the O-ring seals.7. Install manifold (12) into the BrakeSaver control valve, and install the four bolts that hold the manifold to the BrakeSaver housing. 8. Connect BrakeSaver lubrication oil line (1) to the fitting in the BrakeSaver housing.End By:a. install flywheel (BrakeSaver)Disassemble BrakeSaver
Start By:a. remove BrakeSaver1. Remove tooling (A) from the BrakeSaver housing and rotor. Tooling (A) prevents damage to the rotor seals and rings during removal of the BrakeSaver housing. 2. Remove bolts (1) from gear plate (2). Remove the plate. 3. Put alignment marks on stator (3) and housing (4) for assembly purposes. Remove bolts (5) and the stator. 4. Turn the stator over, and remove spiral ring (6). 5. Turn the stator over again. Remove sleeve assembly (9). Remove O-ring seal (7) and lip-type seal (8) from the sleeve. 6. Remove O-ring seal (11) and the six smaller O-ring seals from the oil holes on the housing.7. Remove rotor assembly (12).8. Remove seal ring (10) from both sides of the rotor. 9. Remove carrier (13) and wear sleeve (14) with tooling (B) from both sides of the rotor. 10. Remove spiral ring (15). Turn the housing over, and remove sleeve assembly (17). Remove the lip-type seal and O-ring seal (16) from the sleeve.Assemble BrakeSaver
1. Inspect the O-ring seals for damage, and make replacements if needed. Put clean engine oil on the O-ring seals. 2. Install O-ring seal (16) on sleeve (17).3. Install the sleeve in the BrakeSaver housing. Make

