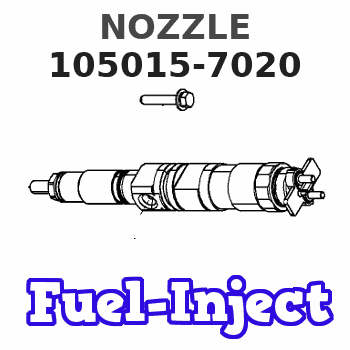
Information nozzle
BOSCH
9 432 610 311
9432610311
ZEXEL
105015-7020
1050157020
HINO
236401540A
236401540a

Rating:
Compare Prices: .
As an associate, we earn commssions on qualifying purchases through the links below
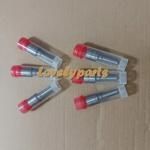
105015-7020 Fuel Injection Nozzle 6Pcs
DFGUFG [Product compatibility]: The OE number of this product is 105015-7020 || [Enhanced Fuel Efficiency & Power Output: Precision-engineered fuel injectors optimize spray patterns for improved combustion efficiency, directly boosting mileage while maintaining stable engine performance across all RPM ranges || [Easy to install and affordable]: Each fuel injector meets factory standard specifications, is simple and convenient to install, has higher combustion efficiency, and can effectively reduce fuel consumption || [High-quality materials for better performance]: The injectors are made of high-quality materials and advanced manufacturing processes to ensure durability and service life, allowing your engine to run smoothly for a long time || [Guaranteed Engine Performance]: This product is one of the key components of electronic fuel injection engines, helping to improve engine performance
DFGUFG [Product compatibility]: The OE number of this product is 105015-7020 || [Enhanced Fuel Efficiency & Power Output: Precision-engineered fuel injectors optimize spray patterns for improved combustion efficiency, directly boosting mileage while maintaining stable engine performance across all RPM ranges || [Easy to install and affordable]: Each fuel injector meets factory standard specifications, is simple and convenient to install, has higher combustion efficiency, and can effectively reduce fuel consumption || [High-quality materials for better performance]: The injectors are made of high-quality materials and advanced manufacturing processes to ensure durability and service life, allowing your engine to run smoothly for a long time || [Guaranteed Engine Performance]: This product is one of the key components of electronic fuel injection engines, helping to improve engine performance
$56.99
21 Feb 2023
0.88[0.40] Pounds
CN: lutong part plant
6Pcs Fuel Injector Nozzles DLLA150SN702 105015-7020 Fits for HINO SN702 Engine Parts
DICSCL PARCS Fuel Injector Nozzle Tips DLLA150SN702 105015-7020 fits for HINO SN702 6pcs/lot || Material: Made of high quality for longer durability and strength.100% quality inspection to ensure the high quality. Upgraded packaging to avoid damage. || Easy Installation:No further modification to direct replacement. || OEM Part Number:DLLA150SN702 || Estimated Time of Delivery from China: 5-10 working days.Customer satisfaction is always our top priority, we are standing by ready to provide you with reliable assistance with any questions you may have
DICSCL PARCS Fuel Injector Nozzle Tips DLLA150SN702 105015-7020 fits for HINO SN702 6pcs/lot || Material: Made of high quality for longer durability and strength.100% quality inspection to ensure the high quality. Upgraded packaging to avoid damage. || Easy Installation:No further modification to direct replacement. || OEM Part Number:DLLA150SN702 || Estimated Time of Delivery from China: 5-10 working days.Customer satisfaction is always our top priority, we are standing by ready to provide you with reliable assistance with any questions you may have
$43.99
21 Feb 2023
0.66[0.30] Pounds
CN: lutong part plant
Diesel Fuel Injector Nozzle Tips DLLA150SN702 105015-7020 Fits for HINO SN702 4pcs/lot
DICSCL PARCS Diesel Fuel Injector Nozzle Tips DLLA150SN702 105015-7020 fits for HINO SN702 4pcs/lot || Material: Made of high quality for longer durability and strength.100% quality inspection to ensure the high quality. Upgraded packaging to avoid damage. || Easy Installation:No further modification to direct replacement. || OEM Part Number:DLLA150SN702 || Estimated Time of Delivery from China: 5-10 working days.Customer satisfaction is always our top priority, we are standing by ready to provide you with reliable assistance with any questions you may have
DICSCL PARCS Diesel Fuel Injector Nozzle Tips DLLA150SN702 105015-7020 fits for HINO SN702 4pcs/lot || Material: Made of high quality for longer durability and strength.100% quality inspection to ensure the high quality. Upgraded packaging to avoid damage. || Easy Installation:No further modification to direct replacement. || OEM Part Number:DLLA150SN702 || Estimated Time of Delivery from China: 5-10 working days.Customer satisfaction is always our top priority, we are standing by ready to provide you with reliable assistance with any questions you may have
You can express buy:
Images:
USD 41.99

[14-Jun-2018]
Include in #1:
106671-8072
as NOZZLE
Cross reference number
Zexel num
Bosch num
Firm num
Name
Information:
13. Install spring (16), bellcrank (17). and retaining ring (15) on cover assembly (14). 14. Install gasket (24) bellcrank assembly (14) and two bolts (13) on timing advance housing. 15. Install timing advance housing (11) on the timing gear cover. Remove the screwdriver. 16. Check the position (protusion) of ball detent (25) in tool (B). It should protrude only slightly into the grooved area. During the following steps, tool (B) and the area of installation cannot be seen. The cutaway views are shown for better photo illustration. 17. Install tool (B) with grooved side toward the engine, between the power piston bearing and bellcrank (17) so that ear (26) is in an approximate 9 o'clock position. 18. Apply slight hand pressure and push tool (B) towards the engine and rotate counterclockwise slowly until ear (27) is in an approximate 9 o'clock position. A slight resistance as the tool starts to seat can be felt.19. Continue to rotate tool (B) counterclockwise until ear (27) is in an approximate 6 o'clock position. 20. Carefully install timing position sensor (6), spring (28), damping washer (29), bracket (8), collar (10) and locknut (9). Do not tighten locknut (9) at this time.21. Connect the wiring harness from the timing position sensor to the wiring harness on the engine. (P7/J7 connector). Be sure that the wiring harness from the PEEC control module is connected to the engine wiring harness. (P2/J2 connector).22. Disconnect the PEEC data link connector (the short pigtail out of the top of the PEEC control module - (P1/J1 connector) from the truck wiring harness and connect either tool (C) or tool (D) to the PEEC data link connector (J1 connector). Damping washer (29) must be installed above the flange om sensor (6). The aluminum surface of the damping washer (29) faces collar (10).23. Turn power on to the PEEC control module. Select "Timing Position Sensor Calibration" the main menu of tool (C) or (D). See special Instructions, Form No's. SEHS8742 and/or SEHS8743.
Do not engage the starter, or damage to the engine will be the result.
24. Adjust collar (10) on timing position sensor until the bar graph on tool (C) or (D) is centered and indicate the timing position sensor is calibrated.25. Tighten locknut (9) to 55 7 N*m (41 5 lb.ft.).26. Check the timing position calibration reading on tool (C) or (D) to insure that the timing position sensor is still in calibration after tightening the locknut.27. Turn off power to the PEEC control module.28. Disconnect tool (C) or (D) from the PEEC control module. Connect the PEEC data link connector (J1 connector) to the truck harness (P1 connector).29. Remove tool (B) from between the power piston and the bellcrank.30. Use tool (E) to rotate the engine in the clockwise direction to release the pressure on tool (F). Remove tool (F). 31. Lubricate O-ring seal (31) with engine oil and install on timing solenoid (5).32. Install timing solenoid (5) into the timing advance housing. Be sure lever (32) is


