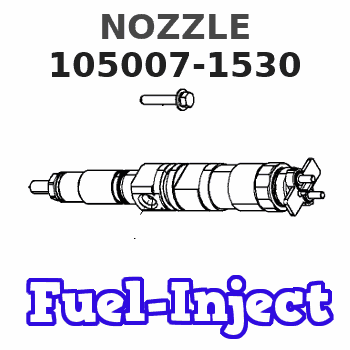
Information nozzle
BOSCH
9 432 610 437
9432610437
ZEXEL
105007-1530
1050071530
Rating:
Compare Prices: .
As an associate, we earn commssions on qualifying purchases through the links below

1PCS Diesel fuel PDN injector nozzle DN0PD650 DN15PD48 DN15PD609 DN0PD20 DN4PD3 DN4PD38(DN4PD3)
ZFBBM High precision: able to control the time, pressure, and quantity of fuel injection with extremely high precision, ensuring the accuracy and consistency of fuel injection. || Adjustability: the fuel injector can adjust the flow rate and injection angle of liquid materials as needed to achieve the best effect. || Excellent: Our tools are made of excellent steel with high hardness, high stability and high strength, exceeding OEM standards and helping you save money in the long run. || Fuel-Efficient Injector: High efficient fuel sprays and High Impedance Coil enable fast start up in the cold environments, low fuel consumption, and better performance. || Commodity confidence: Each product has been professionally inspected and professionally packaged to ensure the integrity of the product.
ZFBBM High precision: able to control the time, pressure, and quantity of fuel injection with extremely high precision, ensuring the accuracy and consistency of fuel injection. || Adjustability: the fuel injector can adjust the flow rate and injection angle of liquid materials as needed to achieve the best effect. || Excellent: Our tools are made of excellent steel with high hardness, high stability and high strength, exceeding OEM standards and helping you save money in the long run. || Fuel-Efficient Injector: High efficient fuel sprays and High Impedance Coil enable fast start up in the cold environments, low fuel consumption, and better performance. || Commodity confidence: Each product has been professionally inspected and professionally packaged to ensure the integrity of the product.

BLLBD Diesel Fuel Injector Nozzle DN0PD650 DN0PD605 DN15PD100 DN15PD609 DN0PDN127 DN0PDN137 DN4PDN165 DN4PDN154 DN0PD2 YDN0PD2 Oem Fuel Injectors Replacement Fuel Injectors(DN15PD100)
BLLBD Accurate adaptation: developed according to the original data, interface, size, pressure value Perfectly , eliminating the installation of oil leakage or ECU error problems, to ensure seamless connection with the vehicle system, to avoid the risk of power loss or failure due to incompatibility. || Easy to install: Adopting the same specification interface design of the original factory, supporting DIY installation No need for professional tools to complete the replacement Regular use of cleaning agents can be maintained, no need for frequent disassembly, saving maintenance costs. || Highly durable material: adopting high-precision processing technology and anti-pollution material, reducing the clogging problem caused by impurities or carbon deposits High temperature and high pressure resistance, adapting to urban congestion, long distance and high speed and other road conditions, to ensure long-term stability Reducing the frequency of replacement || Improve cold-start performance Reduce jerks: precise injection control ensures fuel atomization in low temperature environment Shorten cold-start time, improve idle instability and enhance driving comfort. || Reduced fuel consumption: High-pressure solenoid valve design ensures fuller combustion, thus reducing fuel waste, and overall fuel consumption can be reduced by 5%-10%.
BLLBD Accurate adaptation: developed according to the original data, interface, size, pressure value Perfectly , eliminating the installation of oil leakage or ECU error problems, to ensure seamless connection with the vehicle system, to avoid the risk of power loss or failure due to incompatibility. || Easy to install: Adopting the same specification interface design of the original factory, supporting DIY installation No need for professional tools to complete the replacement Regular use of cleaning agents can be maintained, no need for frequent disassembly, saving maintenance costs. || Highly durable material: adopting high-precision processing technology and anti-pollution material, reducing the clogging problem caused by impurities or carbon deposits High temperature and high pressure resistance, adapting to urban congestion, long distance and high speed and other road conditions, to ensure long-term stability Reducing the frequency of replacement || Improve cold-start performance Reduce jerks: precise injection control ensures fuel atomization in low temperature environment Shorten cold-start time, improve idle instability and enhance driving comfort. || Reduced fuel consumption: High-pressure solenoid valve design ensures fuller combustion, thus reducing fuel waste, and overall fuel consumption can be reduced by 5%-10%.

DN0PD628 DN4PD58 DN0PD21 DN4PDN117 DN0PD650 DN0PD605 DN15PD100 DN15PD609 DN0PDN127 DN0PDN137 Fuel Spray Nozzle(DN0PD21)
ILNCQLPM DN0PD628 DN4PD58 DN0PD21 DN4PDN117 DN0PD650 DN0PD605 DN15PD100 DN15PD609 DN0PDN127 DN0PDN137 Fuel Spray Nozzle || Accurate adaptation, special car special || Strict production standards || Protect the whole car performance || good durability and stability
ILNCQLPM DN0PD628 DN4PD58 DN0PD21 DN4PDN117 DN0PD650 DN0PD605 DN15PD100 DN15PD609 DN0PDN127 DN0PDN137 Fuel Spray Nozzle || Accurate adaptation, special car special || Strict production standards || Protect the whole car performance || good durability and stability
Cross reference number
Zexel num
Bosch num
Firm num
Name
Information:
Procedure
Illustration 1 g06220548
(1) TC Mark (Flywheel Housing)
(2) TC Mark (Flywheel)
Remove valve cover, and injector and rocker arm. Bring the piston of cylinder 4 to TDC.
Illustration 2 g06220554
(3) Dial Gauge
(4) Valve
(5) O-ring
Remove the #4 exhaust valve bridge arm and valve spring. Insert a small O-ring (5) so the valve does not fall into the cylinder.
Set dial gauge (3) on the tip of the valve (4).
Illustration 3 g06220569
(6) Tri - Square
(7) Flywheel Housing
(8) Flywheel
Illustration 4 g06220573
(7) Flywheel Housing
(8) Flywheel
(9) Reference Line
Turn the flywheel counterclockwise and measure the position where the tip of the valve is the highest.
Stop the flywheel at the position where the tip of the valve is the highest. Put a tri - square (6) on the flywheel housing (7) and the flywheel (8) and draw a reference line (9).Do not drop the valve (4) into the cylinder. When measuring the highest position of the tip of the valve, do not rotate the flywheel clockwise. If you go past the highest point of the valve, back up the flywheel slightly and measure the highest point of the valve. The reference line (9) indicates the TDC of the crankshaft.
Illustration 5 g06220579
Rotation Sensor Signal Interface Unit
Application: Use for reading rotation sensor signal.
(1) 9V Battery
(2) Switch
(3) 3-Terminal Regulator
(4) LED
(5) Clip (Red)
(6) Clip (Black)
(A) for Panasonic
(B) for Denso
(C) for Bosch cam angle
(D) for Bosch crank angle
((E)) Connector Side
(a) +9 V
(b) Signal
(c) GND
(d) +5 V
(e) Signal
(f) GND
Schematic to build Rotation Sensor Signal Interface.
Illustration 6 g06220581
(10) Rotation Sensor Signal Interface (Tool not available. Schematic to build tool available. Refer to Step 6.
(11) Tester
Illustration 7 g06220587
(12) Ground Terminal
(13) Output Terminal
(14) Crankshaft Position Sensor
Connect a connector of the rotation sensor signal interface unit (10) to the crankshaft position sensor (14). Connect each clip of the rotation sensor signal interface unit (10) to the same test lead color of the tester (11). Switch on the rotation sensor signal interface unit (10).
Illustration 8 g06220590
(15) Pulsar Gear
(16) 14th Tooth
(17) Missing Teeth
Turn the flywheel and make sure that the voltage of the crankshaft position sensor goes from 0→ 5 V or 5 → 0 V.
Rotate the flywheel and align the crankshaft position sensor to the part of the pulsar gear (15) that is missing teeth (17). The 14th tooth (16) from the missing teeth is standard.
Slowly turn flywheel counterclockwise and stop flywheel at the point where needle of the tester changes momentarily from 0 → 5 V, the 14th tooth.That point is where the crankshaft position sensor detects TDC.
Illustration 9 g06220608
(18) Crankshaft TDC
(19) Detection Point of Crankshaft Position Sensor TDC
Illustration 10 g06220612
(20) Interval
Set the tri - square (6) on the reference line (9) on the flywheel housing side and mark the detection point of crankshaft position sensor TDC (19) on the flywheel.
Measure the interval (20) between the crankshaft TDC (18) and the detection point of the crankshaft position sensor TDC (19).
Calculation of fuel injection timing correction 1.0 mm (0.039 in.): 0.321°.Corrected Angle = 0.321° X actual interval
Overwrite the injection timing correction value on the engine ecm registration website refer to REHS9707, "Registering Diesel Particulate Filter (DPF), Diesel Oxidation Catalyst (DOC),