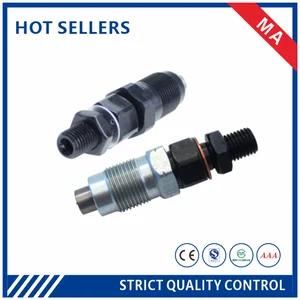
Information nozzle
BOSCH
9 432 610 006
9432610006
ZEXEL
105007-1000
1050071000
MITSUBISHI
MD603900
md603900

Rating:
Compare Prices: .
As an associate, we earn commssions on qualifying purchases through the links below

12PCS XDEP Factory Price PND Type Fuel Injector Nozzle 105007-1000 Part No.DN15PDN100
XDEP Part NO.:DN15PDN100 || Application: Diesel Fuel Injection System, PDN Nozzle Replace for Injector || Guarantee: 6 Months Warranty.100% Tested Before Shipping to Ensure Product Safety,Stability and Durability || Function: High-Quality Material for Long-Lasting Durability. Perfect Match for the Injector and Easy to Install || ips: Please be Sure to Compare Carefully with Photos and Check Part Number before Buying Items, If You are not Sure This Part is Suitable, Please Feel Free to Contact Us, We'll Reply You as Soon as Possible.
XDEP Part NO.:DN15PDN100 || Application: Diesel Fuel Injection System, PDN Nozzle Replace for Injector || Guarantee: 6 Months Warranty.100% Tested Before Shipping to Ensure Product Safety,Stability and Durability || Function: High-Quality Material for Long-Lasting Durability. Perfect Match for the Injector and Easy to Install || ips: Please be Sure to Compare Carefully with Photos and Check Part Number before Buying Items, If You are not Sure This Part is Suitable, Please Feel Free to Contact Us, We'll Reply You as Soon as Possible.

VBKSLVR DN15PDN100 DN15PD100 DN15PD609 DN15PD6 Diesel Engine PD Diesel Engine Injector Nozzle(DN15PD100)
VBKSLVR DN15PDN100 DN15PD100 DN15PD609 DN15PD6 Diesel Engine PD Diesel Engine Injector Nozzle || The design of automobile fuel injectors can accurately control the amount of fuel injection, thereby optimizing fuel economy and helping you save fuel costs || Our automotive fuel injectors are precision manufactured and subject to strict quality control, providing excellent durability and ensuring long-term and stable use || Generally speaking, if the car is in good condition and the fuel quality is good, it can be done every 40,000-60,000 kilometers. Even if the fuel injection nozzle is slightly clogged, you don't need to be too nervous, because the impurities can be sprayed and dissolved when accelerating at a high gear. || It is recommended that car owners should often run at high speeds when driving daily to reduce the possibility of carbon deposits
VBKSLVR DN15PDN100 DN15PD100 DN15PD609 DN15PD6 Diesel Engine PD Diesel Engine Injector Nozzle || The design of automobile fuel injectors can accurately control the amount of fuel injection, thereby optimizing fuel economy and helping you save fuel costs || Our automotive fuel injectors are precision manufactured and subject to strict quality control, providing excellent durability and ensuring long-term and stable use || Generally speaking, if the car is in good condition and the fuel quality is good, it can be done every 40,000-60,000 kilometers. Even if the fuel injection nozzle is slightly clogged, you don't need to be too nervous, because the impurities can be sprayed and dissolved when accelerating at a high gear. || It is recommended that car owners should often run at high speeds when driving daily to reduce the possibility of carbon deposits

105007-1000 Fuel Injection Nozzle 8Pcs
DFGUFG [Product compatibility]: The OE number of this product is 105007-1000 || [Enhanced Fuel Efficiency & Power Output: Precision-engineered fuel injectors optimize spray patterns for improved combustion efficiency, directly boosting mileage while maintaining stable engine performance across all RPM ranges || [Easy to install and affordable]: Each fuel injector meets factory standard specifications, is simple and convenient to install, has higher combustion efficiency, and can effectively reduce fuel consumption || [High-quality materials for better performance]: The injectors are made of high-quality materials and advanced manufacturing processes to ensure durability and service life, allowing your engine to run smoothly for a long time || [Guaranteed Engine Performance]: This product is one of the key components of electronic fuel injection engines, helping to improve engine performance
DFGUFG [Product compatibility]: The OE number of this product is 105007-1000 || [Enhanced Fuel Efficiency & Power Output: Precision-engineered fuel injectors optimize spray patterns for improved combustion efficiency, directly boosting mileage while maintaining stable engine performance across all RPM ranges || [Easy to install and affordable]: Each fuel injector meets factory standard specifications, is simple and convenient to install, has higher combustion efficiency, and can effectively reduce fuel consumption || [High-quality materials for better performance]: The injectors are made of high-quality materials and advanced manufacturing processes to ensure durability and service life, allowing your engine to run smoothly for a long time || [Guaranteed Engine Performance]: This product is one of the key components of electronic fuel injection engines, helping to improve engine performance
You can express buy:
USD 10.49
06-06-2025
06-06-2025
105007-1000 Diesel Engine Fuel Lnjector DN15PDN100 PD Nozzle Engine Common rail Injector Assembly Automotive Parts THYJA12S38

USD 35
10-11-2022
10-11-2022
US $3.00
28-12-2016
28-12-2016
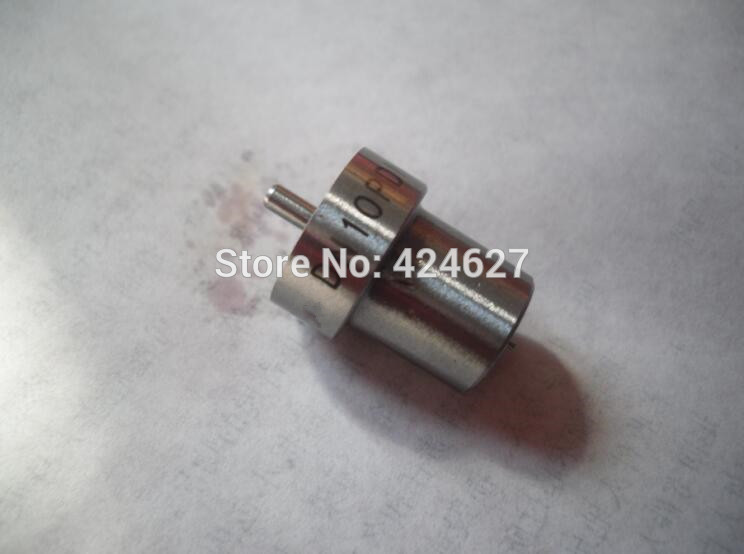
Fuel injector nozzle DN10PDN130 105007-1000 Diesel fuel injection nozzle
Images:
US $3.00

[08-Dec-2016]
USD 20

[13-May-2025]
Include in #2:
104740-3320
as NOZZLE
Cross reference number
Zexel num
Bosch num
Firm num
Name
Information:
Image1.5.1
2. Use 4 new grommets (MCI part number 97-2246-00002 (Dealer Order)) per bus. Grommets are to be installed between the clamp and chassis frame at same location as originals.
3. Clean existing exhaust inlet pipe with wire brush for reuse. Install new Exhaust clamps (Dealer Order).
4. Clean existing exhaust Outlet pipe with wire brush for reuse. Install new Exhaust clamps (Dealer Order).
5. Use a floor jack or transmission jack with CCRT properly secured to lift into place. Place a pipe clamp loosely over the inlet socket. Use the jack to raise the CCRT assembly into position. Insert exhaust pipe elbow into inlet socket. Tighten the clamp bolt to a torque of approximately 50 lb ft. Refer image 1.5.1.
Image1.6.1
6. Provide adequate clearance to Pro Heat exhaust pipe. Mounting brackets will have 1/2 inch slotted bolt holes. Orient to provide needed clearance. Refer image 1.6.1.
Image1.7.1
7. Install Thermocouple.
- Apply a thin coat of anti-seize to the threads of the Male Run Tee and thread it into the boss on the CCRT inlet. Image 1.7.1 shows a completed installation.
- All the parts used from Step 7 to Step 10 are included in the 219-7990 Installation Kit.
Image1.8.1
8. Insert the reducer fitting into the Tee fitting in line with the boss (Image 1.8.1). Tighten the lock nut (also use the Lock Washer) on the Tee until it is finger tight and then tighten it 1 1/4 turns with a 9/16" wrench.
Image1.9.1
9. Insert the thermocouple into the reducer as far as it will go, then pull it back 1/4 inch (Image 1.9.1). Tighten the lock nut finger tight and then tighten 1 1/4 turns with a 7/16" wrench. If necessary, the thermocouple may be bent ONCE to avoid any interference. Do not bend the thermocouple past 90 degrees.
NOTE. JM instructions instruct to insert probe and withdraw one inch. For this installation, insert probe and withdraw 1/4 inch to allow accurate temperature measurement of the exhaust.
Image1.10.1
10. Insert the copper tubing into the fitting on the Tee that is at a 90 degree angle to the boss (Image 1.10.1). Tighten the fitting on the Tee until it is finger tight. Then tighten it 1 1/4 turns with a 9/16" wrench.
Image1.11.1
Image1.11.2
11. Route the cable and copper tube and the secure cable with 6K0806 Cable Straps as shown. It is important to use these cable straps so the tube and cable are oriented in a way that they do not rub against the frame.
Install P brackets every two to three feet as needed. Refer in Image 1.11.2.
12. Install 271-6537 CCRT Diagnostic Module using Bolts (4M5282), Washers (8T4205), nut (6V8185) and Lock Washer (3B4504). Use carbide tip drill bit for drilling in stainless steel.
Image1.13.1
13. Install 282-0031 Remote Display monitor lights along with dealer fabricated Remote Display Bracket. Use self tapping screws (90064A581), Splice (1364877), Washer (4B4274), Locknut (031049) and screw (4B1232).
Image1.14.1
14. Connect power using 3A Fuse.
15. Install existing Pin insulator on the weatherpack plug that connects to the OEM harness at the firewall that provides power to the CRT module.
16. Download