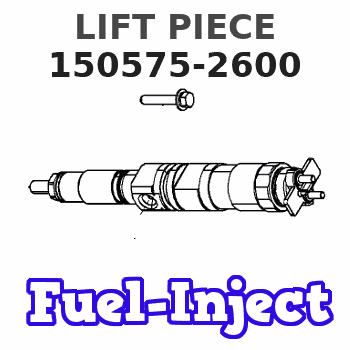
Information lift piece
BOSCH
9 431 610 954
9431610954
ZEXEL
150575-2600
1505752600
HINO
228819140A
228819140a

Rating:
Include in ###:
Cross reference number
Zexel num
Bosch num
Firm num
Name
150575-2600
9 431 610 954
228819140A HINO
LIFT PIECE
C 53PZ LIFT PIECE NH parts NH
C 53PZ LIFT PIECE NH parts NH
150575-2600
9 431 610 954
S228819140A HINO
LIFT PIECE
A C 53PZ LIFT PIECE NH parts NH
A C 53PZ LIFT PIECE NH parts NH
150575-2600
9 431 610 954
ME730467 MITSUBISHI
LIFT PIECE
C 53PZ LIFT PIECE NH parts NH
C 53PZ LIFT PIECE NH parts NH
Information:
Unit: mm (in.)
Measuring clearance between piston ring and groove(b) If the clearance still exceeds the limit after new piston rings have been installed, replace the piston.(3) Clearance between ends of piston ring Put the piston ring in a gauge or in the bore in a new cylinder block and measure the clearance between the ends of the ring with a feeler gauge as shown in the illustration. If the gauge as shown in the illustration. If the clearance exceeds the limit, replace all the rings.
Measuring clearance between ends of piston ring Put the piston ring in the gauge or cylinder squarely with the piston.
Unit: mm (in.)(4) Clearance between piston pin and piston Measure the diameter of the piston pin and the bore in the piston for the pin as shown in the illustration to find the clearance. If the clearance exceeds the limit, replace the piston or pin whichever is badly worn.
Unit: mm (in.)
Measuring piston pin and bore in piston for pin2. Connecting rods Check the connecting rod for bend or twist as follows:(a) Measure "C" and "l". If "C" exceeds 0.05 mm (0.0020 in.) per 100 mm (3.94 in.) of "l", straighten the connecting rod with a press.
Unit: mm (in.)
Checking connecting rod for bend or twist(b) Generally, a connecting rod aligner is used to check the connecting rod for bend or twist. To check the rod for bend, install the cap to the connecting rod and tighten the cap nuts to the specified torque.
Check connecting rod on a connecting rod aligner(c) To check the connecting rod fitted to the piston for bend, put the connecting rod and piston on the surface plate as shown in the illustration, insert a round bear having a diameter equal to that of the crankpin into the bore in the big end of the rod and measure "A" and "B" with a dial indicator. Subtract "A" from "B" to find the bend ("C").
Checking connecting rod for bend with a dial indicator 3. Crankshaft(1) Clearance between crankpin and connecting rod bearing(a) Install the bearing (upper and lower halves) and cap to the big end of the connecting rod and tighten the cap nuts to the specified torque. Measure the bore in the bearing for crankpin as shown in the illustration. (b) Measure the diameter of the crankpin as shown in the illustration to find the clearance between the crankpin and connecting rod bearing.
Unit: mm (in.)
Measuring diameter of crankpin(c) If the clearance exceeds the limit, install a new bearing and check the clearance again. (d) If the clearance still exceeds the limit, grind the crankpin to 0.25 mm (0.0098 in.), 0.50 mm (0.0197 in.) or 0.75 mm (0.0295 in.) undersize and use undersize connecting rod bearing.Crankpin undersizes
Unit: mm (in.)
a) Grind all the crankpins of one crankshaft to the same undersize.b) Finish the crankpin fillets to a radius of 2.5 mm (0.098 in.).
Crankpin fillet radius(2) Clearance between journal and main bearing (a) Install the main bearing (upper and lower halves) and cap to the cylinder
Have questions with 150575-2600?
Group cross 150575-2600 ZEXEL
Hino
150575-2600
9 431 610 954
228819140A
LIFT PIECE
150575-2600
9 431 610 954
S228819140A
LIFT PIECE
Mitsubishi
150575-2600
9 431 610 954
ME730467
LIFT PIECE
