Information injection-pump assembly
BOSCH
9 400 611 800
9400611800
ZEXEL
107691-0203
1076910203
NISSAN-DIESEL
16801Z5615
16801z5615
Rating:
Service parts 107691-0203 INJECTION-PUMP ASSEMBLY:
1.
_
7.
COUPLING PLATE
9.
_
11.
Nozzle and Holder
16600-Z5714
12.
Open Pre:MPa(Kqf/cm2)
16.7{170}/19.6{200}
14.
NOZZLE
Include in #1:
107691-0203
as INJECTION-PUMP ASSEMBLY
Cross reference number
BOSCH
9 400 611 800
9400611800
ZEXEL
107691-0203
1076910203
NISSAN-DIESEL
16801Z5615
16801z5615
Zexel num
Bosch num
Firm num
Name
107691-0203
9 400 611 800
16801Z5615 NISSAN-DIESEL
INJECTION-PUMP ASSEMBLY
FE6TB K 14CG INJECTION PUMP ASSY TICS MD-TI6 TICS
FE6TB K 14CG INJECTION PUMP ASSY TICS MD-TI6 TICS
Calibration Data:
Adjustment conditions
Test oil
1404 Test oil ISO4113 or {SAEJ967d}
1404 Test oil ISO4113 or {SAEJ967d}
Test oil temperature
degC
40
40
45
Nozzle and nozzle holder
105780-8250
Bosch type code
1 688 901 101
Nozzle
105780-0120
Bosch type code
1 688 901 990
Nozzle holder
105780-2190
Opening pressure
MPa
20.7
Opening pressure
kgf/cm2
211
Injection pipe
Outer diameter - inner diameter - length (mm) mm 8-3-600
Outer diameter - inner diameter - length (mm) mm 8-3-600
Overflow valve
134424-4120
Overflow valve opening pressure
kPa
255
221
289
Overflow valve opening pressure
kgf/cm2
2.6
2.25
2.95
Tester oil delivery pressure
kPa
255
255
255
Tester oil delivery pressure
kgf/cm2
2.6
2.6
2.6
RED4 control unit part number
407915-0
590
RED4 rack sensor specifications
mm
19
PS/ACT control unit part no.
407980-2
24*
Digi switch no.
14
Direction of rotation (viewed from drive side)
Right R
Right R
Injection timing adjustment
Direction of rotation (viewed from drive side)
Right R
Right R
Injection order
1-4-2-6-
3-5
Pre-stroke
mm
5.1
5.07
5.13
Beginning of injection position
Drive side NO.1
Drive side NO.1
Difference between angles 1
Cal 1-4 deg. 60 59.75 60.25
Cal 1-4 deg. 60 59.75 60.25
Difference between angles 2
Cyl.1-2 deg. 120 119.75 120.25
Cyl.1-2 deg. 120 119.75 120.25
Difference between angles 3
Cal 1-6 deg. 180 179.75 180.25
Cal 1-6 deg. 180 179.75 180.25
Difference between angles 4
Cal 1-3 deg. 240 239.75 240.25
Cal 1-3 deg. 240 239.75 240.25
Difference between angles 5
Cal 1-5 deg. 300 299.75 300.25
Cal 1-5 deg. 300 299.75 300.25
Injection quantity adjustment
Rack position
(11.3)
PWM
%
51.5
Pump speed
r/min
700
700
700
Average injection quantity
mm3/st.
108
107
109
Max. variation between cylinders
%
0
-4
4
Basic
*
PS407980-224*
V
2.25+-0.
01
PS407980-224*
mm
3.1+-0.0
5
Injection quantity adjustment_02
Rack position
(6.7)
PWM
%
25.6+-2.
8
Pump speed
r/min
445
445
445
Average injection quantity
mm3/st.
11
9.2
12.8
Max. variation between cylinders
%
0
-10
10
PS407980-224*
V
V1+0.05+
-0.01
PS407980-224*
mm
5+-0.03
Remarks
Refer to items regarding the pre-stroke actuator
Refer to items regarding the pre-stroke actuator
Governor adjustment
Pump speed
r/min
1150--
Advance angle
deg.
0
0
0
Remarks
Start
Start
Governor adjustment_02
Pump speed
r/min
1100
Advance angle
deg.
0.3
Governor adjustment_03
Pump speed
r/min
1300
Advance angle
deg.
4
3.7
4.3
Remarks
Finish
Finish
0000001201
CU407980-224*
*
Actuator retarding type
*
Supply voltage
V
24
23.5
24.5
Ambient temperature
degC
23
18
28
Pre-stroke
mm
2
1.95
2.05
Output voltage
V
2.83
2.82
2.84
Adjustment
*
_02
CU407980-224*
*
Supply voltage
V
24
23.5
24.5
Ambient temperature
degC
23
18
28
Pre-stroke
mm
5.1
5.07
5.13
Output voltage
V
1.2
1
1.4
Confirmation
*
Remarks
Output voltage V1
Output voltage V1
_03
CU407980-224*
*
Supply voltage
V
24
23.5
24.5
Ambient temperature
degC
23
18
28
Output voltage
V
3.05
3.05
Confirmation of operating range
*
Test data Ex:
Speed control lever angle
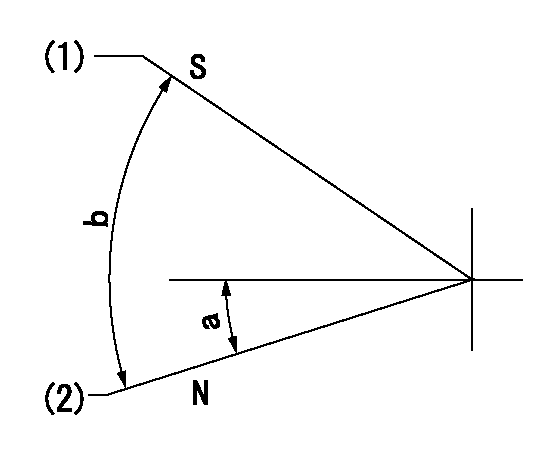
N:Pump normal
S:Stop the pump.
(1)Rack position = aa
(2)Rack position bb
----------
aa=1mm bb=20mm
----------
a=20deg+-5deg b=37deg+-5deg
----------
aa=1mm bb=20mm
----------
a=20deg+-5deg b=37deg+-5deg
0000000901
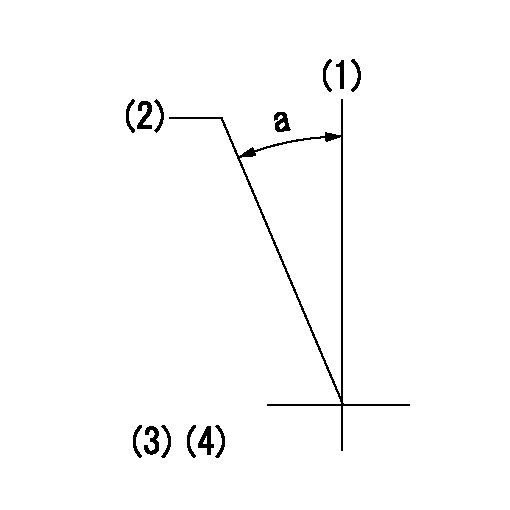
(1)Pump vertical direction
(2)Coupling's key groove position at No 1 cylinder's beginning of injection
(3)Pre-stroke: aa
(4)-
----------
aa=5.1+-0.03mm
----------
a=(20deg)
----------
aa=5.1+-0.03mm
----------
a=(20deg)
Stop lever angle
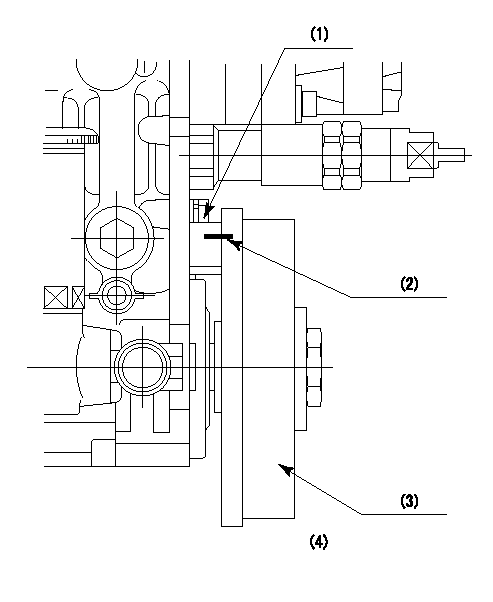
(1)Pointer
(2)Injection timing aligning mark
(3)Fly weight
(4)The actual shape and direction may be different from this illustration.
Operation sequence
1. Turn the prestroke actuator OFF.
2. Turn the camshaft as far as the No.1 cylinder's beginning of injection position.
3. Check that the pointer alignment mark of the injection pump and the alignment mark of the flywheel are matching.
4. If they are not matching, erase the alignment mark on the flywheel side, and stamp an alignment mark on the flywheel position that matches with the pointer side alignment mark.
5. Check again that the coupling's key groove position is in the No.1 cylinder's beginning of injection position.
----------
----------
----------
----------
0000001301
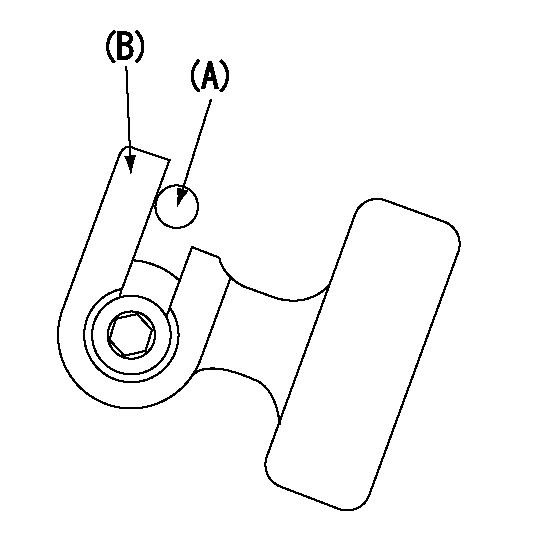
A : Stopper pin
B: Connector
----------
----------
----------
----------
0000001401
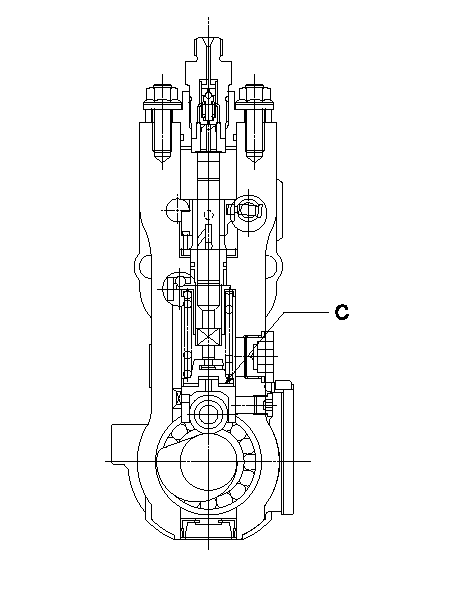
C:Shim
----------
----------
----------
----------
0000001501

A:Sealing position
B:Pre-stroke actuator
1. When installing the pre-stroke actuator on the pump, first tighten the installation bolts loosely, then move the actuator fully counterclockwise (viewed from the drive side).
Temporary tightening torque: 1 - 1.5 N.m (0.1 - 0.15 kgf.m)
2. Move the actuator in the clockwise direction when viewed from the drive side, and adjust so that it becomes the adjustment point of the adjustment value. Then tighten it.
Tightening torque: 7^9 N.m (0.7^0.9 kgf.m)
3. After prestroke actuator installation adjustment, simultaneously stamp both the actuator side and housing side.
----------
----------
----------
----------
0000001701

(PWM) Pulse width modulation (%)
(R) Rack position (mm)
Rack sensor output characteristics
1. Rack limit adjustment
(1)Measure the rack position R2 for PWM a2%.
(2)Confirm that it is within the range R2 = 15+-1 mm.
(3)Measure the rack position R1 at PWM a %.
(4)Confirm that it is within the range R2 - R1 = 10+-0.1 mm.
2. Check the limp home operation.
(1)Move the switch box's limp home switch to the limp home side.
(2)Confirm rack position L1 (mm ) and L2 (mm) for PWM in the above table.
3. Check the pull down operation.
(1)Confirm that the rack position is 19 mm at PWM B%.
(2)In the conditions described in the above table, move the switch box's pull down switch to the pull down side and confirm that the rack position momentarily becomes 1 mm or less.
----------
a1=16.25% a2=72.5% L1=1--mm L2=19++mm A=5 % B=95%
----------
----------
a1=16.25% a2=72.5% L1=1--mm L2=19++mm A=5 % B=95%
----------
Information:
This Revised Service Letter replaces the 20Nov2008 Service Letter. Changes have been made to Parts Needed Description.
TERMINATION DATE
30Nov2010
PROBLEM
The existing governor linkage can separate at the riveted joint on certain C1.6 engines. If the existing governor linkage fails, it can result in loss of engine speed governing.
AFFECTED PRODUCT
Model Identification Number
C1.6 C1M00596-00703, 740-883
PARTS NEEDED
Qty
Part Number Description
1 2152619 GASKET
1 2908469 LEVER AS
1 2952235 GASKET
In order to allow equitable parts availability to all participating dealers, please limit your initial parts order to not exceed 9% of dealership population. This is an initial order recommendation only, and the ultimate responsibility for ordering the total number of parts needed to satisfy the program lies with the dealer.
ACTION REQUIRED
Gain access to engine front cover and fuel pump. Replace the existing governor linkage using the following steps.
Refer to service manual module RENR2424.
Refer to the attached Rework Procedure.
SERVICE CLAIM ALLOWANCES
Product smu/age whichever comes first Caterpillar Dealer Suggested Customer Suggested
Parts % Labor Hrs% Parts % Labor Hrs% Parts % Labor Hrs%
0-2000 hrs,
0-24 mo 100.0% 100.0% 0.0% 0.0% 0.0% 0.0%
This is a 8.0-hour job
PARTS DISPOSITION
Handle the parts in accordance with your Warranty Bulletin on warranty parts handling.
Rework Procedure
Refer to service manual module RENR2424.
1. Remove fuel injection pump. Refer to SMCS 1251-011 (Fuel Injection Pump-Remove).
2. Remove crankshaft pulley. Refer to SMCS 1205-010 (Crankshaft Pulley-Remove and Install).
3. Remove engine front cover. Refer to SMCS 1151-011 (Housing (Front) Remove).
4. Remove fuel injection pump linkage from housing. Refer to SMCS 1151-015 (Housing (Front)-Disassemble).
5. Install new 290-8469 fuel injection pump linkage. Refer to 'Installation of fuel injection pump linkage' within SMCS 1151-016 (Housing (Front)-Assemble).
6. Install engine front cover with new gasket. Refer to SMCS 1151-012 (Housing (Front)-Install).
7. Install crankshaft pulley. Refer to SMCS 1205-010 (Crankshaft Pulley - Remove and Install).
8. Install fuel injection pump. Refer to SMCS 1251-012 (Fuel Injection Pump - Install).
9. Run engine to ensure correct operation. Check for any signs of leaks.
10. Check low and high idle, and reset appropriately.
11. Refit any machine parts that were removed to gain access to engine front cover and fuel pump.
Have questions with 107691-0203?
Group cross 107691-0203 ZEXEL
Nissan-Diesel
Nissan-Diesel
107691-0203
9 400 611 800
16801Z5615
INJECTION-PUMP ASSEMBLY
FE6TB
FE6TB