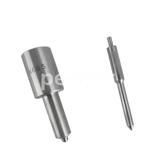
Information injection-pump assembly
ZEXEL
106961-1506
1069611506
ISUZU
1156017218
1156017218
Rating:
Service parts 106961-1506 INJECTION-PUMP ASSEMBLY:
1.
_
6.
COUPLING PLATE
7.
COUPLING PLATE
8.
_
9.
_
11.
Nozzle and Holder
12.
Open Pre:MPa(Kqf/cm2)
15.7(160)/22.1(225)
15.
NOZZLE SET
Include in #1:
106961-1506
as INJECTION-PUMP ASSEMBLY
Cross reference number
ZEXEL
106961-1506
1069611506
ISUZU
1156017218
1156017218
Zexel num
Bosch num
Firm num
Name
Calibration Data:
Adjustment conditions
Test oil
1404 Test oil ISO4113 or {SAEJ967d}
1404 Test oil ISO4113 or {SAEJ967d}
Test oil temperature
degC
40
40
45
Nozzle and nozzle holder
105780-8140
Bosch type code
EF8511/9A
Nozzle
105780-0000
Bosch type code
DN12SD12T
Nozzle holder
105780-2080
Bosch type code
EF8511/9
Opening pressure
MPa
17.2
Opening pressure
kgf/cm2
175
Injection pipe
Outer diameter - inner diameter - length (mm) mm 8-3-600
Outer diameter - inner diameter - length (mm) mm 8-3-600
Overflow valve (drive side)
134424-3520
Overflow valve opening pressure (drive side)
kPa
255
221
289
Overflow valve opening pressure (drive side)
kgf/cm2
2.6
2.25
2.95
Overflow valve (governor side)
134424-2720
Overflow valve opening pressure (governor side)
kPa
255
221
289
Overflow valve opening pressure (governor side)
kgf/cm2
2.6
2.25
2.95
Tester oil delivery pressure
kPa
157
157
157
Tester oil delivery pressure
kgf/cm2
1.6
1.6
1.6
Direction of rotation (viewed from drive side)
Right R
Right R
Injection timing adjustment
Direction of rotation (viewed from drive side)
Right R
Right R
Injection order
1-8-7-6-
5-4-3-10
-9-2
Pre-stroke
mm
4
3.97
4.03
Beginning of injection position
Governor side NO.1
Governor side NO.1
Difference between angles 1
Cal 1-8 deg. 27 26.75 27.25
Cal 1-8 deg. 27 26.75 27.25
Difference between angles 2
Cal 1-7 deg. 72 71.75 72.25
Cal 1-7 deg. 72 71.75 72.25
Difference between angles 3
Cal 1-6 deg. 99 98.75 99.25
Cal 1-6 deg. 99 98.75 99.25
Difference between angles 4
Cal 1-5 deg. 144 143.75 144.25
Cal 1-5 deg. 144 143.75 144.25
Difference between angles 5
Cal 1-4 deg. 171 170.75 171.25
Cal 1-4 deg. 171 170.75 171.25
Difference between angles 6
Cal 1-3 deg. 216 215.75 216.25
Cal 1-3 deg. 216 215.75 216.25
Difference between angles 7
Cal 1-10 deg. 243 242.75 243.25
Cal 1-10 deg. 243 242.75 243.25
Difference between angles 8
Cal 1-9 deg. 288 287.75 288.25
Cal 1-9 deg. 288 287.75 288.25
Difference between angles 9
Cyl.1-2 deg. 315 314.75 315.25
Cyl.1-2 deg. 315 314.75 315.25
Injection quantity adjustment
Adjusting point
B
Rack position
8.1
Pump speed
r/min
700
700
700
Average injection quantity
mm3/st.
85.6
84.1
87.1
Max. variation between cylinders
%
0
-2
2
Basic
*
Fixing the lever
*
Injection quantity adjustment_02
Adjusting point
C
Rack position
7.9+-0.5
Pump speed
r/min
1250
1250
1250
Average injection quantity
mm3/st.
95.9
91.9
99.9
Max. variation between cylinders
%
0
-3
3
Fixing the lever
*
Injection quantity adjustment_03
Adjusting point
D
Rack position
5.4+-0.5
Pump speed
r/min
225
225
225
Average injection quantity
mm3/st.
8
6.6
9.4
Max. variation between cylinders
%
0
-13
13
Fixing the rack
*
Injection quantity adjustment_04
Adjusting point
F
Rack position
-
Pump speed
r/min
150
150
150
Average injection quantity
mm3/st.
137
137
Fixing the lever
*
Remarks
When manual lever is on the boost side
When manual lever is on the boost side
Injection quantity adjustment_05
Adjusting point
G
Rack position
8.1
Pump speed
r/min
1000
1000
1000
Average injection quantity
mm3/st.
94.8
90.8
98.8
Max. variation between cylinders
%
0
-3
3
Fixing the lever
*
Timer adjustment
Pump speed
r/min
750+50
Advance angle
deg.
0
0
0
Load
1/4
Remarks
Start
Start
Timer adjustment_02
Pump speed
r/min
1000+50
Advance angle
deg.
1
0.5
1
Load
3/4
Timer adjustment_03
Pump speed
r/min
(1075)
Advance angle
deg.
1
0.5
1
Load
4/4
Timer adjustment_04
Pump speed
r/min
1150
Advance angle
deg.
3
2.7
3.3
Load
4/4
Timer adjustment_05
Pump speed
r/min
1250
Advance angle
deg.
6
5.4
6.6
Load
4/4
Remarks
Finish
Finish
Test data Ex:
Governor adjustment
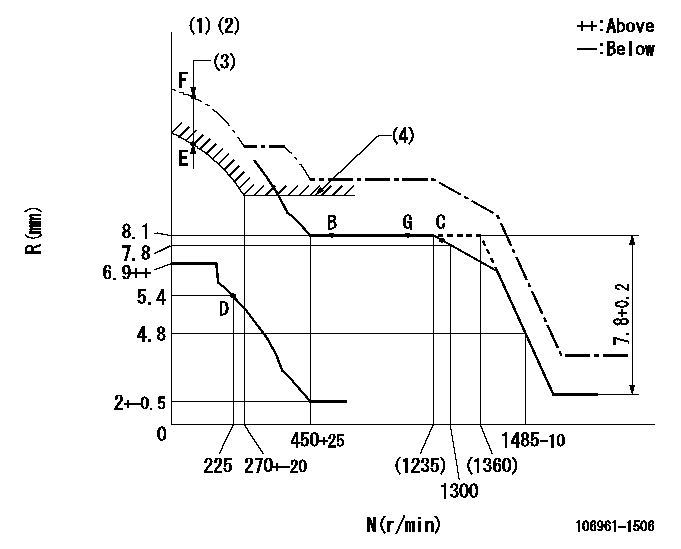
N:Pump speed
R:Rack position (mm)
(1)Supplied with damper spring not set.
(2)Supply solenoid operating voltage DC24V and move the solenoid body so that the excess lever reaches the excess position at the solenoid's maximum stroke.
(3)At excess fuel lever operation: not exceeding EXL
(4)Excess fuel setting for starting: SXL
----------
EXL=2mm SXL=9.2+-0.1mm
----------
----------
EXL=2mm SXL=9.2+-0.1mm
----------
Speed control lever angle

F:Full speed
----------
----------
a=9deg+-5deg
----------
----------
a=9deg+-5deg
0000000901
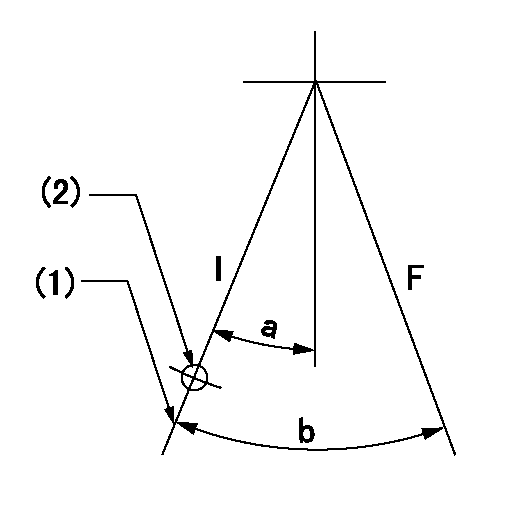
F:Full load
I:Idle
(1)Stopper bolt setting
(2)Use the hole at R = aa
----------
aa=35mm
----------
a=10deg+-5deg b=33deg+-3deg
----------
aa=35mm
----------
a=10deg+-5deg b=33deg+-3deg
Stop lever angle
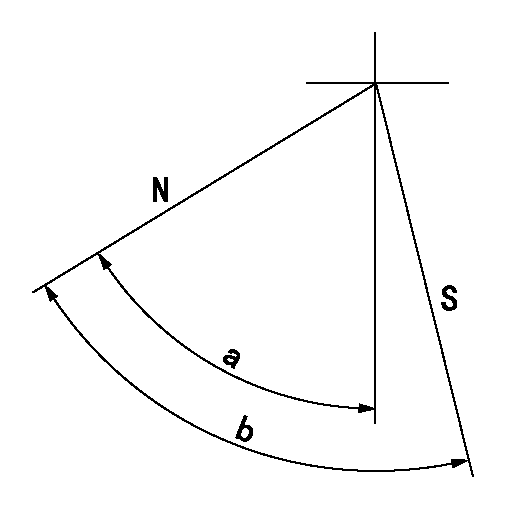
N:Pump normal
S:Stop the pump.
----------
----------
a=60deg+-5deg b=73deg+-5deg
----------
----------
a=60deg+-5deg b=73deg+-5deg
0000001101

N:Normal
B:When boosted
----------
----------
a=(5deg) b=(24deg)
----------
----------
a=(5deg) b=(24deg)
Timing setting
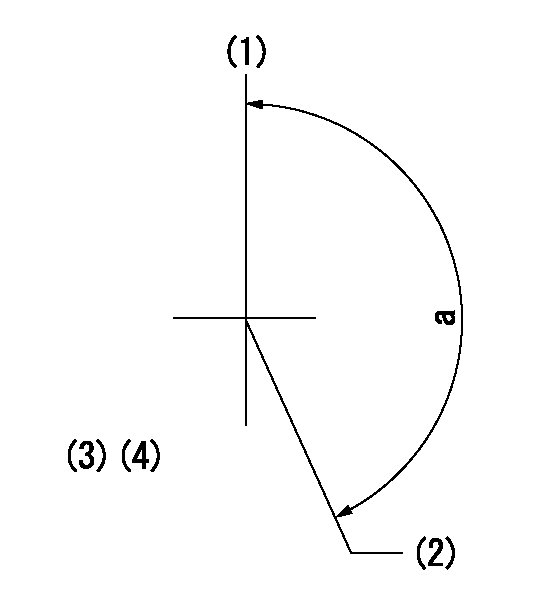
(1)Pump vertical direction
(2)Position of "Z" mark at the No 1 cylinder's beginning of injection (governor side)
(3)B.T.D.C.: aa
(4)-
----------
aa=12deg
----------
a=(170deg)
----------
aa=12deg
----------
a=(170deg)
Information:
Care must be taken to ensure that fluids are contained during performance of inspection, maintenance, testing, adjusting and repair of the product. Be prepared to collect the fluid with suitable containers before opening any compartment or disassembling any component containing fluids.Refer to Special Publication, NENG2500, "Caterpillar Tools and Shop Products Guide" for tools and supplies suitable to collect and contain fluids on Caterpillar products.Dispose of all fluids according to local regulations and mandates.
Remove any coolant lines that may interfere with the installation. Remove any air inlet lines that may interfere with the installation.
Illustration 1 g01006397
Typical example (1) Bolt (2) Washer (3) Air inlet cover
Remove bolt (1) and the washer (2) from the air inlet cover (3). Discard the bolt (1) and the washer (2) .
Disconnect the electrical connector of the injection actuation pressure control valve (7). Remove the injection actuation pressure control valve (7) from the pump. Retain the injection actuation pressure control valve (7) for the reinstallation.Note: Modifications to the tools may need to be made in order to reduce interference with engine components.
Illustration 2 g01007381
Modified 2P-5494 crowfoot wrench
Remove the hose assembly (5), the connector (8), and the elbow (6). Discard these parts.
Illustration 3 g01006381
(4) HEUI pump (5) Flexible oil line (6) Elbow (7) Injection actuation pressure control valve (8) ConnectorInstallation of the 240-0716 Tube Kit
Illustration 4 g01006407
(4) HEUI pump (7) Injection actuation pressure control valve (9) Connector (10) Clip (11) Washer (12) Bolt (13) Spacer (14) Tube assembly (15) O-ring (16) O-ring (17) Elbow
Illustration 5 g01006437
(7) Injection actuation pressure control valve (9) Connector (15) O-ring (16) O-ring (17) Elbow
Apply a light coat of oil to the O-rings (15) and (16) during installation. Install the O-ring (15) on the connector (9). Install the O-ring (16) on the connector (9). Thread the connector (9) into the port on the cylinder head by hand. Tighten to 48 + 5 N m (35 + 4 lb ft).
Apply a light coat of oil to the O-rings (15) and (16) during installation. Install the O-ring (15) on the elbow (17). Install the O-ring (16) on the elbow (17).
Back off the jam nut on the elbow (17) to the top of the threads on the elbow assembly (17). Push the washer tightly against the jam nut. Check that the washer is as tight as possible. Thread the elbow assembly (17) into the port of the HEUI pump (4). Hand tighten the elbow (17) into the port of the HEUI pump until the washer is tight against the HEUI pump (4). Unscrew the elbow assembly (17) no more than one complete turn to 40 degrees.
Align the tube assembly (14) with the connector (9) and the elbow (17). Loosely thread each end of the tube assembly (14) onto the connector (9) and the elbow (17). Position the elbow (17) in order to not create stress in the tube assembly (14) .
Attach the clip (10) to the tube assembly (14). The flat side of the clip (10) must be toward the air inlet cover. Place the washer (11) onto the bolt
