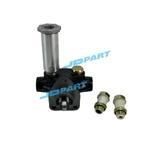
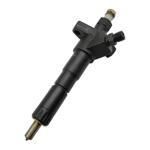
Information injection-pump assembly
BOSCH
9 400 619 940
9400619940
ZEXEL
101608-6402
1016086402
MITSUBISHI
ME441213
me441213
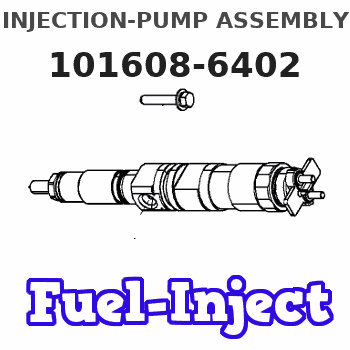
Rating:
Service parts 101608-6402 INJECTION-PUMP ASSEMBLY:
1.
_
6.
COUPLING PLATE
7.
COUPLING PLATE
8.
_
9.
_
11.
Nozzle and Holder
12.
Open Pre:MPa(Kqf/cm2)
17.7(180)
15.
NOZZLE SET
Include in #1:
101608-6402
as INJECTION-PUMP ASSEMBLY
Include in #2:
104740-0454
as _
Cross reference number
BOSCH
9 400 619 940
9400619940
ZEXEL
101608-6402
1016086402
MITSUBISHI
ME441213
me441213
Zexel num
Bosch num
Firm num
Name
101608-6402
9 400 619 940
ME441213 MITSUBISHI
INJECTION-PUMP ASSEMBLY
6D16TL K 14BN INJECTION PUMP ASSY PE
6D16TL K 14BN INJECTION PUMP ASSY PE
Calibration Data:
Adjustment conditions
Test oil
1404 Test oil ISO4113 or {SAEJ967d}
1404 Test oil ISO4113 or {SAEJ967d}
Test oil temperature
degC
40
40
45
Nozzle and nozzle holder
105780-8140
Bosch type code
EF8511/9A
Nozzle
105780-0000
Bosch type code
DN12SD12T
Nozzle holder
105780-2080
Bosch type code
EF8511/9
Opening pressure
MPa
17.2
Opening pressure
kgf/cm2
175
Injection pipe
Outer diameter - inner diameter - length (mm) mm 6-2-600
Outer diameter - inner diameter - length (mm) mm 6-2-600
Overflow valve
131424-5520
Overflow valve opening pressure
kPa
255
221
289
Overflow valve opening pressure
kgf/cm2
2.6
2.25
2.95
Tester oil delivery pressure
kPa
255
255
255
Tester oil delivery pressure
kgf/cm2
2.6
2.6
2.6
Direction of rotation (viewed from drive side)
Left L
Left L
Injection timing adjustment
Direction of rotation (viewed from drive side)
Left L
Left L
Injection order
1-5-3-6-
2-4
Pre-stroke
mm
4.5
4.45
4.55
Beginning of injection position
Governor side NO.1
Governor side NO.1
Difference between angles 1
Cal 1-5 deg. 60 59.5 60.5
Cal 1-5 deg. 60 59.5 60.5
Difference between angles 2
Cal 1-3 deg. 120 119.5 120.5
Cal 1-3 deg. 120 119.5 120.5
Difference between angles 3
Cal 1-6 deg. 180 179.5 180.5
Cal 1-6 deg. 180 179.5 180.5
Difference between angles 4
Cyl.1-2 deg. 240 239.5 240.5
Cyl.1-2 deg. 240 239.5 240.5
Difference between angles 5
Cal 1-4 deg. 300 299.5 300.5
Cal 1-4 deg. 300 299.5 300.5
Injection quantity adjustment
Adjusting point
A
Rack position
11
Pump speed
r/min
1000
1000
1000
Average injection quantity
mm3/st.
109.5
108.5
110.5
Max. variation between cylinders
%
0
-2.5
2.5
Basic
*
Fixing the lever
*
Boost pressure
kPa
62.7
62.7
Boost pressure
mmHg
470
470
Injection quantity adjustment_02
Adjusting point
-
Rack position
8+-0.5
Pump speed
r/min
400
400
400
Average injection quantity
mm3/st.
16.5
15
18
Max. variation between cylinders
%
0
-15
15
Fixing the rack
*
Boost pressure
kPa
0
0
0
Boost pressure
mmHg
0
0
0
Remarks
Adjust only variation between cylinders; adjust governor according to governor specifications.
Adjust only variation between cylinders; adjust governor according to governor specifications.
Injection quantity adjustment_03
Adjusting point
E
Rack position
11.2++
Pump speed
r/min
100
100
100
Average injection quantity
mm3/st.
95
95
105
Fixing the lever
*
Boost pressure
kPa
0
0
0
Boost pressure
mmHg
0
0
0
Rack limit
*
Boost compensator adjustment
Pump speed
r/min
375
375
375
Rack position
9.2
Boost pressure
kPa
10.7
4
17.4
Boost pressure
mmHg
80
30
130
Boost compensator adjustment_02
Pump speed
r/min
375
375
375
Rack position
10.45
Boost pressure
kPa
56
50.6
56
Boost pressure
mmHg
420
380
420
Timer adjustment
Pump speed
r/min
600
Advance angle
deg.
3
2.5
3.5
Load
0/4
Remarks
Start
Start
Timer adjustment_02
Pump speed
r/min
720
Advance angle
deg.
0.5
Load
0/4
Timer adjustment_03
Pump speed
r/min
(850)
Advance angle
deg.
0
0
0
Load
4/4
Remarks
Measure the actual speed.
Measure the actual speed.
Timer adjustment_04
Pump speed
r/min
1075
Advance angle
deg.
1.5
1
2
Load
4/4
Remarks
Finish
Finish
Test data Ex:
Governor adjustment
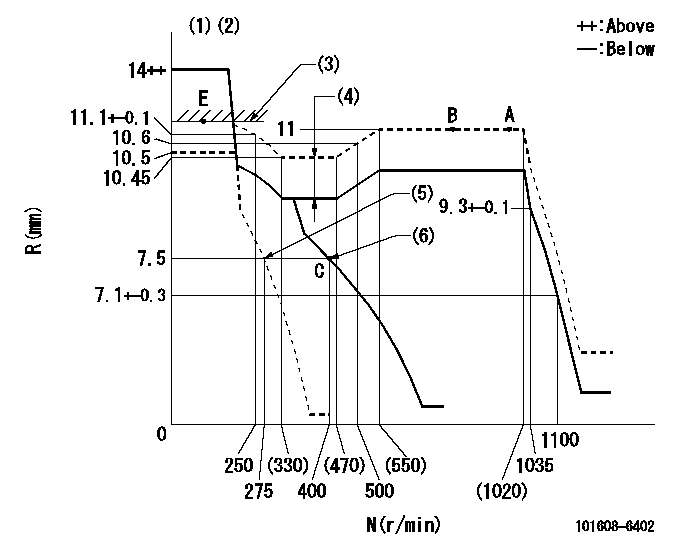
N:Pump speed
R:Rack position (mm)
(1)Target notch: K
(2)Tolerance for racks not indicated: +-0.05mm.
(3)RACK LIMIT
(4)Boost compensator stroke: BCL
(5)Set idle sub-spring
(6)Main spring setting
----------
K=10 BCL=1.25+-0.1mm
----------
----------
K=10 BCL=1.25+-0.1mm
----------
Speed control lever angle
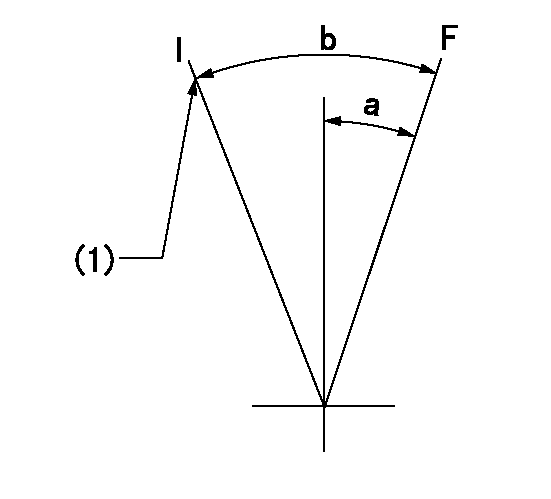
F:Full speed
I:Idle
(1)Stopper bolt setting
----------
----------
a=0deg+-5deg b=18deg+-5deg
----------
----------
a=0deg+-5deg b=18deg+-5deg
Stop lever angle
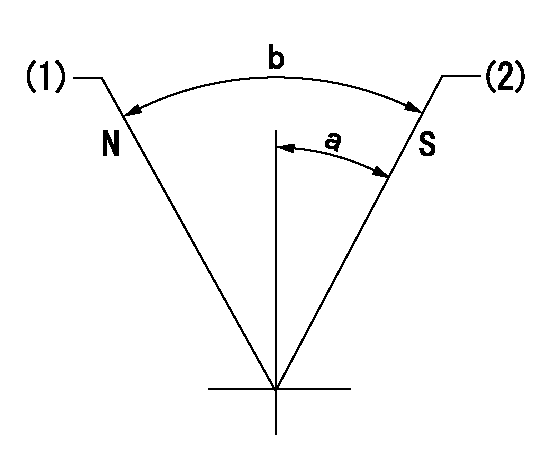
N:Pump normal
S:Stop the pump.
(1)Normal
(2)Pump speed aa and rack position bb (to be sealed at delivery)
----------
aa=0r/min bb=4-0.5mm
----------
a=28deg+-5deg b=(48deg)
----------
aa=0r/min bb=4-0.5mm
----------
a=28deg+-5deg b=(48deg)
0000001501 RACK SENSOR

(VR) measurement voltage
(I) Part number of the control unit
(G) Apply red paint.
(H): End surface of the pump
1. Rack limit adjustment
(1)Mount the joint (B).
(2)Select the shim (D) so that the rack limit's rack position is obtained at that time.
(3)Install the rod (E) to the block (C).
The distance between the pump end face and the rod (E) at rack limit must be L.
2. Rack sensor adjustment (-0020)
(1)Screw in the bobbin (A) until it contacts the joint (B).
(2)Fix the speed control lever at the full side.
(3)Set at speed N.
(4)Adjust the depth that the bobbin (A) is screwed in so that the control unit's rack sensor output voltage is VR+-0.01 (V), then tighten the nut (F). (If equipped with a boost compensator, perform with boost pressure applied.)
(5)Adjust the bobbin (A) so that the rack sensor's output voltage is VR+-0.01.
(6)Apply G at two places.
Connecting part between the joint (B) and the nut (F)
Connecting part between the joint (B) and the end surface of the pump (H)
----------
L=38-0.2mm N=1000r/min Ra=11mm
----------
----------
L=38-0.2mm N=1000r/min Ra=11mm
----------
0000001601 TAMPER PROOF

Tamperproofing-equipped boost compensator cover installation procedure
(A) After adjusting the boost compensator, tighten the bolts to remove the heads.
(1)Before adjusting the governor and the boost compensator, tighten the screw to the specified torque.
(Tightening torque T = T1 maximum)
(2)After adjusting the governor and the boost compensator, tighten to the specified torque to break off the bolt heads.
(Tightening torque T = T2)
----------
T1=2.5N-m(0.25kgf-m) T2=2.9~4.4N-m(0.3~0.45kgf-m)
----------
----------
T1=2.5N-m(0.25kgf-m) T2=2.9~4.4N-m(0.3~0.45kgf-m)
----------
Timing setting

(1)Pump vertical direction
(2)Coupling's key groove position at No 1 cylinder's beginning of injection
(3)B.T.D.C.: aa
(4)-
----------
aa=8deg
----------
a=(3deg)
----------
aa=8deg
----------
a=(3deg)
Information:
Putting cylinder head gasket6. Cylinder head installation Put the cylinder head in position on the cylinder block, making sure the guide bolts are all in alignment with their respective bolt holes in the head.
Installing cylinder head7. Cylinder head bolt tightening (1) Remove the guide bolts and install the bolts that hold the cylinder head to the cylinder block. (2) Tighten the bolts in the number sequence in two or three steps to the specified torque.
Tightening sequence8. Valve push rod installation (1) Put the valve push rod into position through the bore in the cylinder head.(2) Make sure the ball end of the push rod has been put into position over the top of the tappet.
Installing valve push rods9. Rocker shaft assembling (1) Install the rocker arms, brackets and springs on the rocker shaft. Secure the brackets to the shaft by tightening the bolts.(2) Make sure the rocker arms move freely.
Assembling rocker arms10. Rocker shaft assembly installation(1) Install the valve caps in position on the top of the valves. (2) Put the rocker shaft assembly in position on the cylinder head. Tighten the bolts that hold the rocker shaft assembly to the specified torque.
Installing rocker shaft assembly11. Valve clearance adjustment Make reference to "VALVE CLEARANCE" (page 159).
Adjusting valve clearance12. Rocker cover installation (1) Make sure the gasket is put on the rocker cover.(2) Tighten the bolts that hold the rocker cover to the specified torque.
Installing rocker coverAIR INLET SYSTEM AND EXHAUST SYSTEM
1. Air inlet cover installation Tighten the bolts that hold the air inlet cover to the specified torque. 2. Exhaust manifold installation Tighten the bolts that hold the exhaust manifold to the specified torque. FUEL SYSTEM
1. Fuel injection nozzle installation (1) Put the gasket on the nozzle. (2) Put the nozzle assembly in position in the cylinder head and tighten
Have questions with 101608-6402?
Group cross 101608-6402 ZEXEL
Mitsubishi
101608-6402
9 400 619 940
ME441213
INJECTION-PUMP ASSEMBLY
6D16TL
6D16TL
