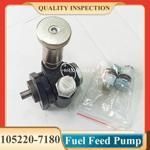
Information injection-pump assembly
BOSCH
9 400 610 733
9400610733
ZEXEL
101607-9740
1016079740
NISSAN-DIESEL
1671395300
1671395300
Rating:
Service parts 101607-9740 INJECTION-PUMP ASSEMBLY:
1.
_
7.
COUPLING PLATE
8.
_
9.
_
11.
Nozzle and Holder
16600-95019
12.
Open Pre:MPa(Kqf/cm2)
19.6{200}
15.
NOZZLE SET
Cross reference number
BOSCH
9 400 610 733
9400610733
ZEXEL
101607-9740
1016079740
NISSAN-DIESEL
1671395300
1671395300
Zexel num
Bosch num
Firm num
Name
9 400 610 733
1671395300 NISSAN-DIESEL
INJECTION-PUMP ASSEMBLY
NE6TA * K 14BF INJECTION PUMP ASSY PE6AD PE
NE6TA * K 14BF INJECTION PUMP ASSY PE6AD PE
Calibration Data:
Adjustment conditions
Test oil
1404 Test oil ISO4113 or {SAEJ967d}
1404 Test oil ISO4113 or {SAEJ967d}
Test oil temperature
degC
40
40
45
Nozzle and nozzle holder
105780-8140
Bosch type code
EF8511/9A
Nozzle
105780-0000
Bosch type code
DN12SD12T
Nozzle holder
105780-2080
Bosch type code
EF8511/9
Opening pressure
MPa
17.2
Opening pressure
kgf/cm2
175
Injection pipe
Outer diameter - inner diameter - length (mm) mm 6-2-600
Outer diameter - inner diameter - length (mm) mm 6-2-600
Overflow valve
131424-1520
Overflow valve opening pressure
kPa
157
123
191
Overflow valve opening pressure
kgf/cm2
1.6
1.25
1.95
Tester oil delivery pressure
kPa
157
157
157
Tester oil delivery pressure
kgf/cm2
1.6
1.6
1.6
Direction of rotation (viewed from drive side)
Right R
Right R
Injection timing adjustment
Direction of rotation (viewed from drive side)
Right R
Right R
Injection order
1-4-2-6-
3-5
Pre-stroke
mm
3.9
3.85
3.95
Beginning of injection position
Drive side NO.1
Drive side NO.1
Difference between angles 1
Cal 1-4 deg. 60 59.5 60.5
Cal 1-4 deg. 60 59.5 60.5
Difference between angles 2
Cyl.1-2 deg. 120 119.5 120.5
Cyl.1-2 deg. 120 119.5 120.5
Difference between angles 3
Cal 1-6 deg. 180 179.5 180.5
Cal 1-6 deg. 180 179.5 180.5
Difference between angles 4
Cal 1-3 deg. 240 239.5 240.5
Cal 1-3 deg. 240 239.5 240.5
Difference between angles 5
Cal 1-5 deg. 300 299.5 300.5
Cal 1-5 deg. 300 299.5 300.5
Injection quantity adjustment
Adjusting point
-
Rack position
13.8
Pump speed
r/min
1400
1400
1400
Average injection quantity
mm3/st.
118
116.4
119.6
Max. variation between cylinders
%
0
-3.5
3.5
Basic
*
Fixing the rack
*
Standard for adjustment of the maximum variation between cylinders
*
Injection quantity adjustment_02
Adjusting point
-
Rack position
9.6+-0.5
Pump speed
r/min
275
275
275
Average injection quantity
mm3/st.
9
7.2
10.8
Max. variation between cylinders
%
0
-10
10
Fixing the rack
*
Standard for adjustment of the maximum variation between cylinders
*
Remarks
Adjust only variation between cylinders; adjust governor according to governor specifications.
Adjust only variation between cylinders; adjust governor according to governor specifications.
Injection quantity adjustment_03
Adjusting point
A
Rack position
R1(13.8)
Pump speed
r/min
1400
1400
1400
Average injection quantity
mm3/st.
118
117
119
Basic
*
Fixing the lever
*
Boost pressure
kPa
33.3
33.3
Boost pressure
mmHg
250
250
Injection quantity adjustment_04
Adjusting point
B
Rack position
R1-0.8
Pump speed
r/min
900
900
900
Average injection quantity
mm3/st.
94.5
91.3
97.7
Fixing the lever
*
Boost pressure
kPa
33.3
33.3
Boost pressure
mmHg
250
250
Injection quantity adjustment_05
Adjusting point
C
Rack position
R2-0.55
Pump speed
r/min
600
600
600
Average injection quantity
mm3/st.
64.5
60.5
68.5
Fixing the lever
*
Boost pressure
kPa
0
0
0
Boost pressure
mmHg
0
0
0
Injection quantity adjustment_06
Adjusting point
I
Rack position
-
Pump speed
r/min
150
150
150
Average injection quantity
mm3/st.
80
80
100
Fixing the lever
*
Boost pressure
kPa
0
0
0
Boost pressure
mmHg
0
0
0
Rack limit
*
Boost compensator adjustment
Pump speed
r/min
600
600
600
Rack position
R2-0.55
Boost pressure
kPa
10.7
9.4
12
Boost pressure
mmHg
80
70
90
Boost compensator adjustment_02
Pump speed
r/min
600
600
600
Rack position
R2(R1-1.
2)
Boost pressure
kPa
20
20
20
Boost pressure
mmHg
150
150
150
Timer adjustment
Pump speed
r/min
920--
Advance angle
deg.
0
0
0
Remarks
Start
Start
Timer adjustment_02
Pump speed
r/min
870
Advance angle
deg.
0.5
Timer adjustment_03
Pump speed
r/min
1400
Advance angle
deg.
2
1.5
2.5
Remarks
Finish
Finish
Test data Ex:
Governor adjustment
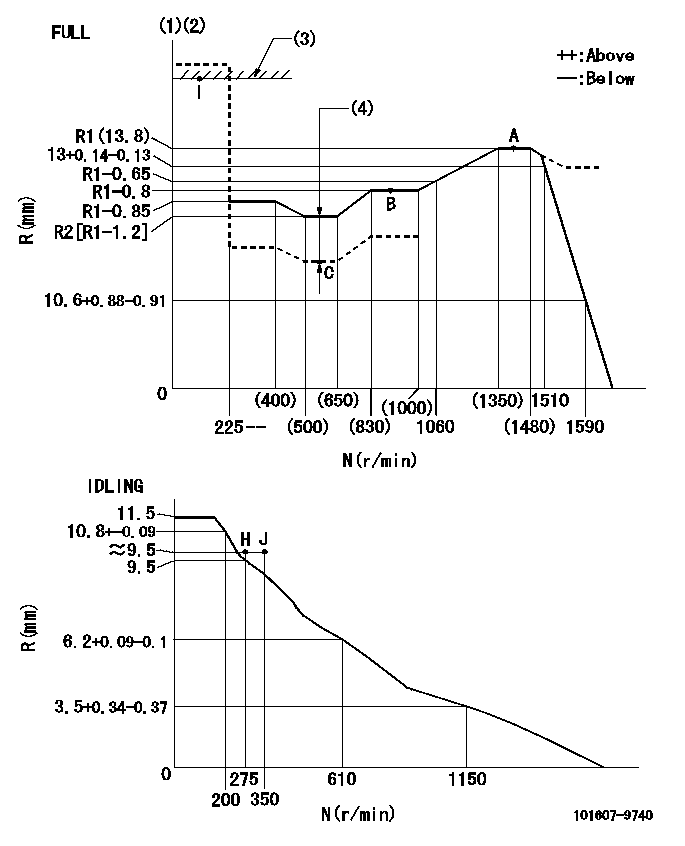
N:Pump speed
R:Rack position (mm)
(1)Torque cam stamping: T1
(2)Tolerance for racks not indicated: +-0.05mm.
(3)RACK LIMIT
(4)Boost compensator stroke: BCL
----------
T1=J98 BCL=0.55+-0.1mm
----------
----------
T1=J98 BCL=0.55+-0.1mm
----------
Speed control lever angle

F:Full speed
I:Idle
(1)Use the hole at R = aa
(2)Stopper bolt set position 'H'
----------
aa=100mm
----------
a=26.5deg+-5deg b=42deg+-3deg
----------
aa=100mm
----------
a=26.5deg+-5deg b=42deg+-3deg
Stop lever angle
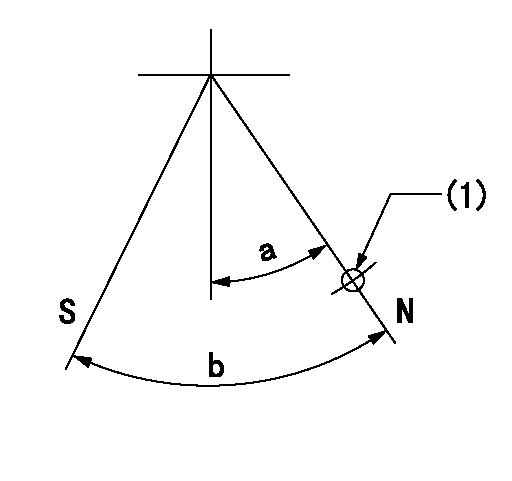
N:Pump normal
S:Stop the pump.
(1)Use the hole at R = aa
----------
----------
a=20deg+-5deg b=40deg+-5deg
----------
----------
a=20deg+-5deg b=40deg+-5deg
0000001501 ACS
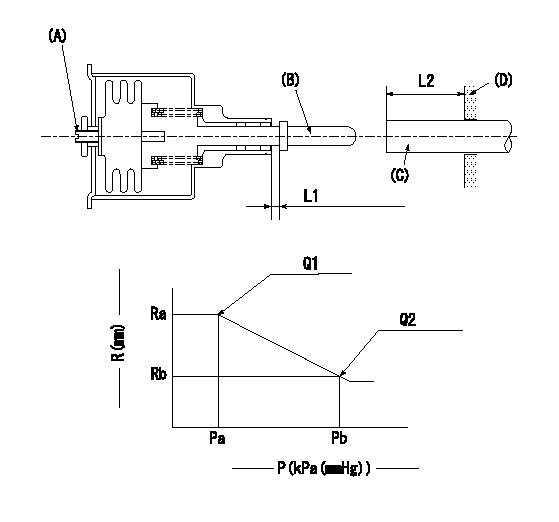
(A) Set screw
(B) Push rod 1
(C) Push rod 2
(D) Cover
1. Aneroid compensator unit adjustment
(1)Select the push rod 2 to obtain L2.
(2)Screw in (A) to obtain L1.
2. Adjustment when mounting the governor.
(1)Set the speed of the pump to N1 r/min and fix the control lever at the full set position.
(2)Screw in the aneroid compensator to obtain the performance shown in the graph above.
(3)As there is hysterisis, measure when the absolute pressure drops.
(4)Hysterisis must not exceed rack position = h1.
----------
N1=1400r/min L1=(1.5)mm L2=11+-0.5mm h1=0.15mm
----------
Ra=R1(13.8)mm Rb=(R1-2.3)mm Pa=(88)+-2.7kPa((660)+-20mmHg) Pb=57.2+-0.7kPa(429+-5mmHg) Q1=118+-1cm3/1000st Q2=77+-3cm3/1000st
----------
N1=1400r/min L1=(1.5)mm L2=11+-0.5mm h1=0.15mm
----------
Ra=R1(13.8)mm Rb=(R1-2.3)mm Pa=(88)+-2.7kPa((660)+-20mmHg) Pb=57.2+-0.7kPa(429+-5mmHg) Q1=118+-1cm3/1000st Q2=77+-3cm3/1000st
Timing setting
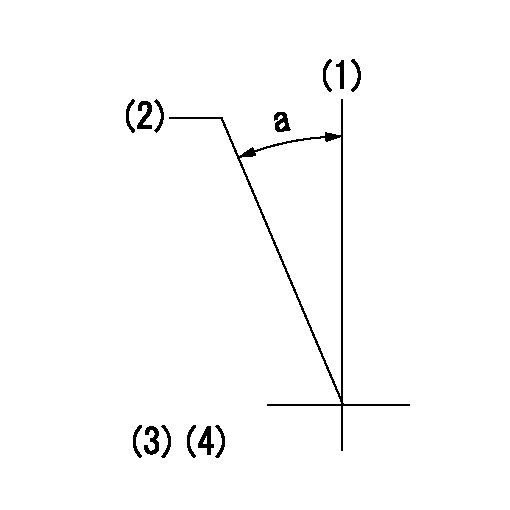
(1)Pump vertical direction
(2)Coupling's key groove position at No 1 cylinder's beginning of injection
(3)-
(4)-
----------
----------
a=(30deg)
----------
----------
a=(30deg)
Information:
Use the following procedure to update the fuel lines group with the new hose assemblies.Note: Follow all the safety precautions before carrying out any work on the machine.Installation of 488-9360 Hose As between Fuel Tank and Primary filter group
Illustration 1 g06107286
View of inner side of left-hand frame
(A) Fuel tank
(1) 488-9360 Hose As
(2) 383-6118 Clip
Remove former 236-5242 Hose As from fuel tank (A) along the left-hand inner frame and replace with 488-9360 Hose As (1). Use two 383-6118 Clips (2) to mount 488-9360 Hose As (1) to the inner frame.
Illustration 2 g06107793
View of hose routing above the steering box assembly
(1) 488-9360 Hose As
(3) 6D-4244 Clip
Continue routing 488-9360 Hose As (1) above the steering box assembly from left to right using two 6D-4244 Clips (3) in place of the former 1S-0994 Clips.
Illustration 3 g06107808
View of hose routing to the primary filter group
(1) 488-9360 Hose As
(3) 6D-4244 Clips
Route 488-9360 Hose As (1) along the frame and up toward the primary filter group using 6D-4244 Clips (3) to secure to the frame.
Illustration 4 g06108256
View of primary filter group location inner side of right-hand frame
(B) Former fitting
(C) Primary filter group
(1) 488-9360 Hose As
(4) 148-8354 Elbow As
If not previously completed, remove former hose (B) along with the related fitting from the connection on primary filter group (C).
Connect 148-8354 Elbow As (4) onto primary filter group (C) where fitting (B) was removed.
Attach 488-9360 Hose As (1) to 148-8354 Elbow As (4).Installation of 488-9362 Hose As Between Fuel Tank and Fuel Return Manifold
Illustration 5 g06108268
View of left inner frame
(D) Former hose 240-8598 Hose As
Remove former return hose assembly (D) from between the fuel tank and the fuel manifold in the engine.Note: Unless specified otherwise, retain all mounting hardware for reuse.
Illustration 6 g06108327
View of new hose route.
(A) Fuel tank
(2) 383-6118 Clip
(5) 488-9362 Hose As
Connect 488-9362 Hose As (5) to fuel tank where the old hose was removed.
Route 488-9362 Hose As (5) back along the left-hand inner frame towards the engine and use two 383-6118 Clips (2) installed previously to secure hose assembly (5) in place.
Illustration 7 g06112935
View of the rear of the engine
(5) 488-9362 Hose As
(6) 9M-8406 Clip
(7) 329-1681 Clip
Finish installing 488-9362 Hose As (5) by routing hose (5) up the rear side of the engine and connecting the hose where former hose (D) was removed.
Secure 488-9362 Hose As (5) using one 9M-8406 Clip (6) and one 329-1681 Clip (7).Installation of 488-9361 Hose As Between Primary Filter Group and Engine
Illustration 8 g06108399
Top view of the engine underneath the hood
(3) 6D-4244 Clip
(8) 488-9361 Hose As
Remove the existing hose assembly between the primary filter group and the engine.
Install 488-9361 Hose As (8) where the former hose was removed.
Use one 6D-4244 Clip (3) to secure hose assembly (8) to the top of the engine.
