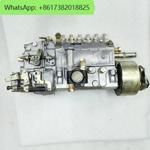
Information injection-pump assembly
ZEXEL
101603-1610
1016031610
MITSUBISHI
ME056251
me056251
Rating:
Service parts 101603-1610 INJECTION-PUMP ASSEMBLY:
1.
_
7.
COUPLING PLATE
8.
_
9.
_
11.
Nozzle and Holder
12.
Open Pre:MPa(Kqf/cm2)
21.6(220)
15.
NOZZLE SET
Cross reference number
ZEXEL
101603-1610
1016031610
MITSUBISHI
ME056251
me056251
Zexel num
Bosch num
Firm num
Name
101603-1610
ME056251 MITSUBISHI
INJECTION-PUMP ASSEMBLY
6D22 * K
6D22 * K
Calibration Data:
Adjustment conditions
Test oil
1404 Test oil ISO4113 or {SAEJ967d}
1404 Test oil ISO4113 or {SAEJ967d}
Test oil temperature
degC
40
40
45
Nozzle and nozzle holder
105780-8140
Bosch type code
EF8511/9A
Nozzle
105780-0000
Bosch type code
DN12SD12T
Nozzle holder
105780-2080
Bosch type code
EF8511/9
Opening pressure
MPa
17.2
Opening pressure
kgf/cm2
175
Injection pipe
Outer diameter - inner diameter - length (mm) mm 6-2-600
Outer diameter - inner diameter - length (mm) mm 6-2-600
Overflow valve opening pressure
kPa
255
221
289
Overflow valve opening pressure
kgf/cm2
2.6
2.25
2.95
Tester oil delivery pressure
kPa
157
157
157
Tester oil delivery pressure
kgf/cm2
1.6
1.6
1.6
Direction of rotation (viewed from drive side)
Right R
Right R
Injection timing adjustment
Direction of rotation (viewed from drive side)
Right R
Right R
Injection order
1-5-3-6-
2-4
Pre-stroke
mm
4.5
4.45
4.55
Beginning of injection position
Governor side NO.1
Governor side NO.1
Difference between angles 1
Cal 1-5 deg. 60 59.5 60.5
Cal 1-5 deg. 60 59.5 60.5
Difference between angles 2
Cal 1-3 deg. 120 119.5 120.5
Cal 1-3 deg. 120 119.5 120.5
Difference between angles 3
Cal 1-6 deg. 180 179.5 180.5
Cal 1-6 deg. 180 179.5 180.5
Difference between angles 4
Cyl.1-2 deg. 240 239.5 240.5
Cyl.1-2 deg. 240 239.5 240.5
Difference between angles 5
Cal 1-4 deg. 300 299.5 300.5
Cal 1-4 deg. 300 299.5 300.5
Injection quantity adjustment
Adjusting point
-
Rack position
9.4
Pump speed
r/min
700
700
700
Each cylinder's injection qty
mm3/st.
107
103.6
110.4
Basic
*
Fixing the rack
*
Injection quantity adjustment_02
Adjusting point
C
Rack position
8+-0.5
Pump speed
r/min
200
200
200
Each cylinder's injection qty
mm3/st.
18.5
15.7
21.3
Fixing the rack
*
Injection quantity adjustment_03
Adjusting point
A
Rack position
R1(9.4)
Pump speed
r/min
700
700
700
Average injection quantity
mm3/st.
107
106
108
Fixing the lever
*
Injection quantity adjustment_04
Adjusting point
B
Rack position
R1(9.4)
Pump speed
r/min
1100
1100
1100
Average injection quantity
mm3/st.
108.5
106
111
Difference in delivery
mm3/st.
9
9
9
Fixing the lever
*
Injection quantity adjustment_05
Adjusting point
E
Rack position
-
Pump speed
r/min
100
100
100
Average injection quantity
mm3/st.
137
117
157
Fixing the lever
*
Remarks
After startup boost setting
After startup boost setting
Timer adjustment
Pump speed
r/min
800
Advance angle
deg.
0.5
Timer adjustment_02
Pump speed
r/min
900
Advance angle
deg.
0.9
0.4
1.4
Timer adjustment_03
Pump speed
r/min
1150
Advance angle
deg.
3
2.5
3.5
Timer adjustment_04
Pump speed
r/min
-
Advance angle
deg.
4
4
5
Remarks
Measure the actual speed, stop
Measure the actual speed, stop
Test data Ex:
Governor adjustment
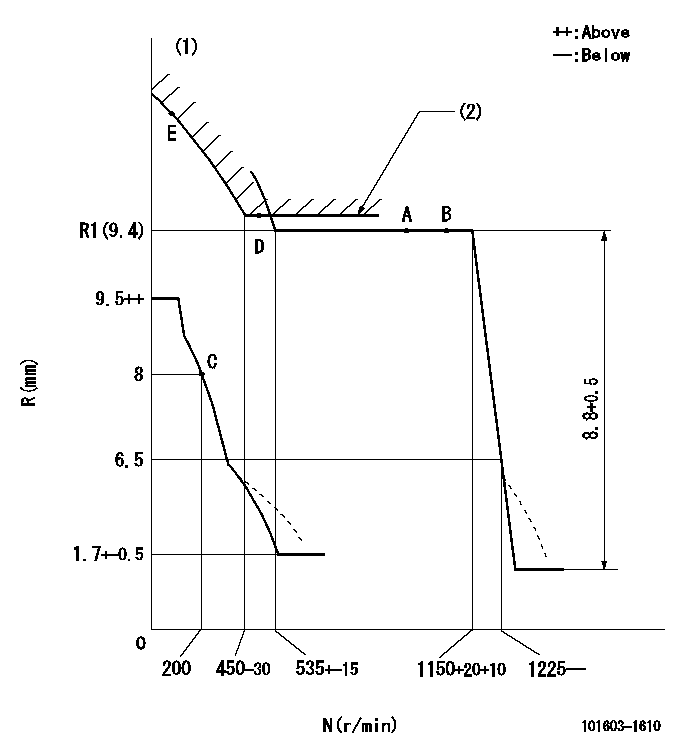
N:Pump speed
R:Rack position (mm)
(1)Beginning of damper spring operation: DL
(2)Excess fuel setting for starting: SXL
----------
DL=6-0.2mm SXL=R1(9.4)+0.2mm
----------
----------
DL=6-0.2mm SXL=R1(9.4)+0.2mm
----------
Speed control lever angle
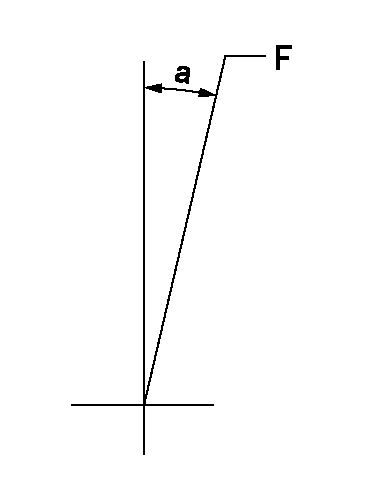
F:Full speed
----------
----------
a=10deg+-5deg
----------
----------
a=10deg+-5deg
0000000901
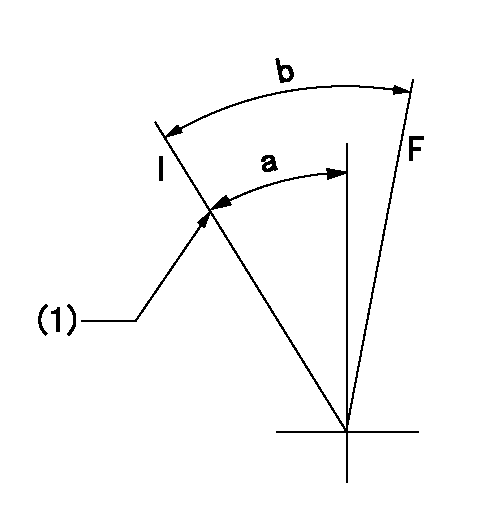
F:Full load
I:Idle
(1)Stopper bolt setting
----------
----------
a=25deg+-5deg b=28.5deg+-3deg
----------
----------
a=25deg+-5deg b=28.5deg+-3deg
Stop lever angle
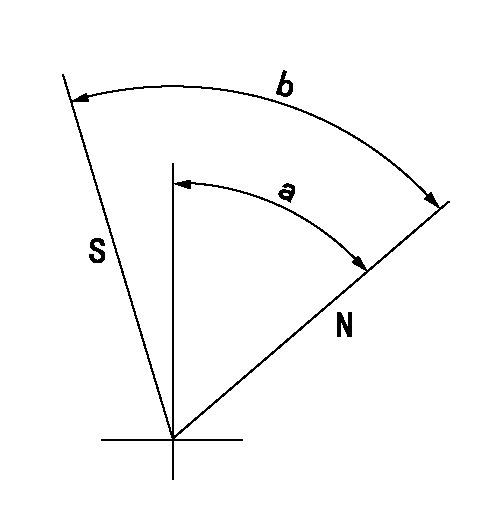
N:Pump normal
S:Stop the pump.
----------
----------
a=(54deg) b=(71deg)
----------
----------
a=(54deg) b=(71deg)
0000001501 MICRO SWITCH
Adjustment of the micro-switch
Adjust the bolt to obtain the following lever position when the micro-switch is ON.
(1)Speed N1
(2)Rack position Ra
----------
N1=325+-5r/min Ra=7.3mm
----------
----------
N1=325+-5r/min Ra=7.3mm
----------
Information:
a) Remove by screwing flywheel attaching bolts uniformly into the bolt holes for removal. Pull out using the special tool, Gear Puller. Do not remove the gear by striking it. b) Heat the gear to about 100°C by a heater, etc. Aligning the crankshaft dowel pin with the dowel pin hole in the gear, insert the shaft into the gear, lightly striking the gear end face with a soft hammer.c) Install the sleeve using the special tool, Oil Seal and Sleeve Installer. [Refer to Item (2) - (b), Section 5.1.3.](3) Reassembly Reassembly
(a) Installation of oil jet (excluding 6D14, 6D15) Fix the oil jet aligning with the locating pin and tighten the check valve to specified torque. Bend lock washer onto the check valve to prevent it from turning.(b) Installation of thrust plate and main bearing 1. Install the thrust plate with its side having no oil groove toward the crankcase.2. Line up the lug of main bearing with the lug groove in crankcase. Note that the upper main bearing has an oil hole, which must not be confused with the lower bearing.3. Apply engine oil to all sliding surfaces.(c) Installation of main bearing cap 1) Fit the lower main bearing into the main bearing cap. At the time, make sure that the main bearing lug is aligned with the main bearing cap lug groove.2) Install also the thrust plate onto the main bearing cap in the rear-end position.3) Make sure that the main bearing cap lug groove and crankcase lug groove are on the same side. 1. Face the side of thrust plate having no oil groove toward the rear end of the crankcase and toward the main bearing cap.2. Use thrust plates of the same size for the rear end of the crankcase and main bearing cap rear end. 4) Tighten the main bearing cap bolt to specification. Then, make sure that the crankshaft turns smoothly by hand.5) Measure the crankshaft end play to determine if it is within the nominal value [Refer to Item (1) - (c), Section 5.1.4.].(d) Reassembly of piston and connecting rod 1) Assemble the piston and the connecting rod, ensuring correct direction as illustrated.2) Insert the piston pin to couple the piston and connecting rod. Mount the snap ring to hold the piston pin in position. The piston pin is a clearance fit in the piston. If the piston pin is hard to fit, heat the piston with a piston heater or hot water. 1. Keep the piston weight difference for one engine within 10 g.2. Use connecting rod assembly of same weight mark for an engine.3. Check to see that the size mark of the piston is same as that of the cylinder liner.4. Apply engine oil to sliding surfaces. 3) The connecting rod bolts do not normally need removal; however, where replacement is necessary for damaged bolt, install new bolts by using the following procedures. Make sure that the connecting rod bolt hole is free from damage and burrs. Then,
(a) Installation of oil jet (excluding 6D14, 6D15) Fix the oil jet aligning with the locating pin and tighten the check valve to specified torque. Bend lock washer onto the check valve to prevent it from turning.(b) Installation of thrust plate and main bearing 1. Install the thrust plate with its side having no oil groove toward the crankcase.2. Line up the lug of main bearing with the lug groove in crankcase. Note that the upper main bearing has an oil hole, which must not be confused with the lower bearing.3. Apply engine oil to all sliding surfaces.(c) Installation of main bearing cap 1) Fit the lower main bearing into the main bearing cap. At the time, make sure that the main bearing lug is aligned with the main bearing cap lug groove.2) Install also the thrust plate onto the main bearing cap in the rear-end position.3) Make sure that the main bearing cap lug groove and crankcase lug groove are on the same side. 1. Face the side of thrust plate having no oil groove toward the rear end of the crankcase and toward the main bearing cap.2. Use thrust plates of the same size for the rear end of the crankcase and main bearing cap rear end. 4) Tighten the main bearing cap bolt to specification. Then, make sure that the crankshaft turns smoothly by hand.5) Measure the crankshaft end play to determine if it is within the nominal value [Refer to Item (1) - (c), Section 5.1.4.].(d) Reassembly of piston and connecting rod 1) Assemble the piston and the connecting rod, ensuring correct direction as illustrated.2) Insert the piston pin to couple the piston and connecting rod. Mount the snap ring to hold the piston pin in position. The piston pin is a clearance fit in the piston. If the piston pin is hard to fit, heat the piston with a piston heater or hot water. 1. Keep the piston weight difference for one engine within 10 g.2. Use connecting rod assembly of same weight mark for an engine.3. Check to see that the size mark of the piston is same as that of the cylinder liner.4. Apply engine oil to sliding surfaces. 3) The connecting rod bolts do not normally need removal; however, where replacement is necessary for damaged bolt, install new bolts by using the following procedures. Make sure that the connecting rod bolt hole is free from damage and burrs. Then,
Have questions with 101603-1610?
Group cross 101603-1610 ZEXEL
Mitsubishi
101603-1610
ME056251
INJECTION-PUMP ASSEMBLY
6D22
6D22
