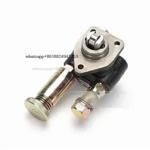
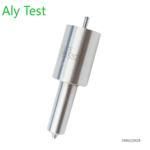
Information injection-pump assembly
ZEXEL
101603-0360
1016030360
ISUZU
1156015332
1156015332
Rating:
Service parts 101603-0360 INJECTION-PUMP ASSEMBLY:
1.
_
7.
COUPLING PLATE
8.
_
9.
_
11.
Nozzle and Holder
12.
Open Pre:MPa(Kqf/cm2)
18.1(185)
15.
NOZZLE SET
Cross reference number
ZEXEL
101603-0360
1016030360
ISUZU
1156015332
1156015332
Zexel num
Bosch num
Firm num
Name
Calibration Data:
Adjustment conditions
Test oil
1404 Test oil ISO4113 or {SAEJ967d}
1404 Test oil ISO4113 or {SAEJ967d}
Test oil temperature
degC
40
40
45
Nozzle and nozzle holder
105780-8140
Bosch type code
EF8511/9A
Nozzle
105780-0000
Bosch type code
DN12SD12T
Nozzle holder
105780-2080
Bosch type code
EF8511/9
Opening pressure
MPa
17.2
Opening pressure
kgf/cm2
175
Injection pipe
Outer diameter - inner diameter - length (mm) mm 6-2-600
Outer diameter - inner diameter - length (mm) mm 6-2-600
Overflow valve
132424-0620
Overflow valve opening pressure
kPa
157
123
191
Overflow valve opening pressure
kgf/cm2
1.6
1.25
1.95
Tester oil delivery pressure
kPa
157
157
157
Tester oil delivery pressure
kgf/cm2
1.6
1.6
1.6
Direction of rotation (viewed from drive side)
Right R
Right R
Injection timing adjustment
Direction of rotation (viewed from drive side)
Right R
Right R
Injection order
1-5-3-6-
2-4
Pre-stroke
mm
3.6
3.55
3.65
Beginning of injection position
Drive side NO.1
Drive side NO.1
Difference between angles 1
Cal 1-5 deg. 60 59.5 60.5
Cal 1-5 deg. 60 59.5 60.5
Difference between angles 2
Cal 1-3 deg. 120 119.5 120.5
Cal 1-3 deg. 120 119.5 120.5
Difference between angles 3
Cal 1-6 deg. 180 179.5 180.5
Cal 1-6 deg. 180 179.5 180.5
Difference between angles 4
Cyl.1-2 deg. 240 239.5 240.5
Cyl.1-2 deg. 240 239.5 240.5
Difference between angles 5
Cal 1-4 deg. 300 299.5 300.5
Cal 1-4 deg. 300 299.5 300.5
Injection quantity adjustment
Adjusting point
-
Rack position
10.9
Pump speed
r/min
1000
1000
1000
Average injection quantity
mm3/st.
60.3
58.7
61.9
Max. variation between cylinders
%
0
-2.5
2.5
Basic
*
Fixing the rack
*
Standard for adjustment of the maximum variation between cylinders
*
Injection quantity adjustment_02
Adjusting point
H
Rack position
9.5+-0.5
Pump speed
r/min
325
325
325
Average injection quantity
mm3/st.
8.7
7.4
10
Max. variation between cylinders
%
0
-14
14
Fixing the rack
*
Standard for adjustment of the maximum variation between cylinders
*
Injection quantity adjustment_03
Adjusting point
A
Rack position
R1(10.9)
Pump speed
r/min
1000
1000
1000
Average injection quantity
mm3/st.
60.3
59.3
61.3
Basic
*
Fixing the lever
*
Injection quantity adjustment_04
Adjusting point
B
Rack position
R1+0.1
Pump speed
r/min
1600
1600
1600
Average injection quantity
mm3/st.
65.2
63.6
66.8
Fixing the lever
*
Injection quantity adjustment_05
Adjusting point
C
Rack position
R1-0.05
Pump speed
r/min
1300
1300
1300
Average injection quantity
mm3/st.
64
62.4
65.6
Fixing the lever
*
Injection quantity adjustment_06
Adjusting point
D
Rack position
R1(10.9)
Pump speed
r/min
650
650
650
Average injection quantity
mm3/st.
46.9
45.3
48.5
Fixing the lever
*
Timer adjustment
Pump speed
r/min
1050--
Advance angle
deg.
0
0
0
Remarks
Start
Start
Timer adjustment_02
Pump speed
r/min
1000
Advance angle
deg.
0.5
Timer adjustment_03
Pump speed
r/min
1300
Advance angle
deg.
1.8
1.3
2.3
Timer adjustment_04
Pump speed
r/min
1600
Advance angle
deg.
4
3.5
4.5
Remarks
Finish
Finish
Test data Ex:
Governor adjustment
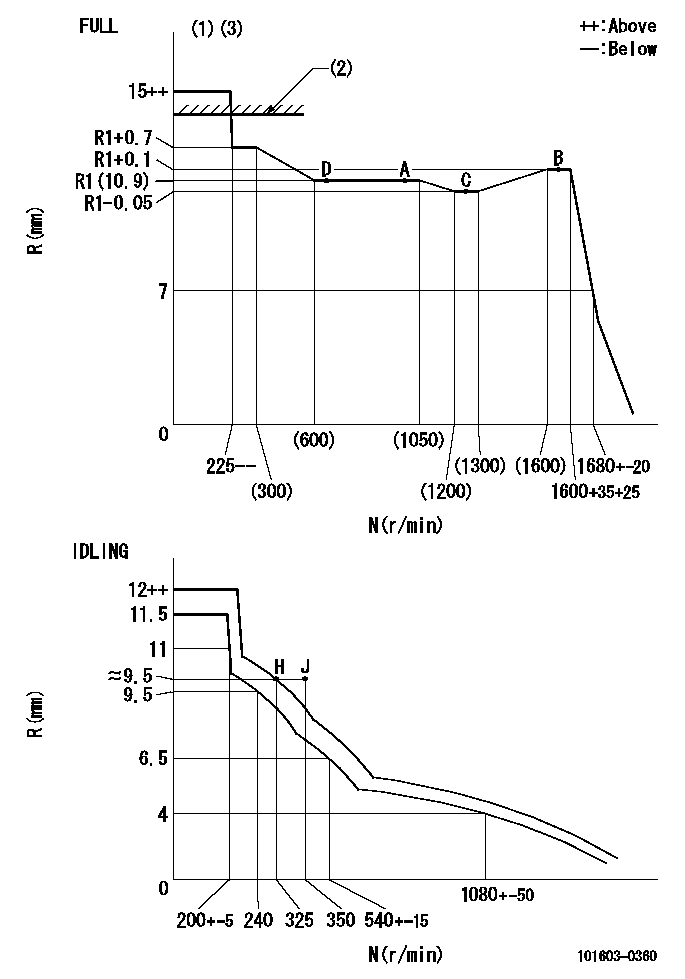
N:Pump speed
R:Rack position (mm)
(1)Torque cam stamping: T1
(2)RACK LIMIT: RAL
(3)Torque control stroke: L1
----------
T1=19 RAL=13.6+0.2mm L1=(1)+-0.05mm
----------
----------
T1=19 RAL=13.6+0.2mm L1=(1)+-0.05mm
----------
Speed control lever angle

F:Full speed
I:Idle
(1)Use the hole at R = aa
(2)Stopper bolt set position 'H'
----------
aa=35mm
----------
a=39deg+-5deg b=39deg+-3deg
----------
aa=35mm
----------
a=39deg+-5deg b=39deg+-3deg
Stop lever angle
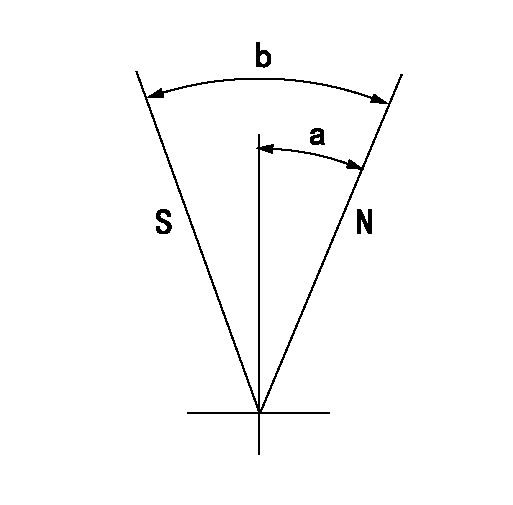
N:Pump normal
S:Stop the pump.
----------
----------
a=25deg+-5deg b=40deg+-5deg
----------
----------
a=25deg+-5deg b=40deg+-5deg
0000001501 VARIABLE TORQUE CONTROL
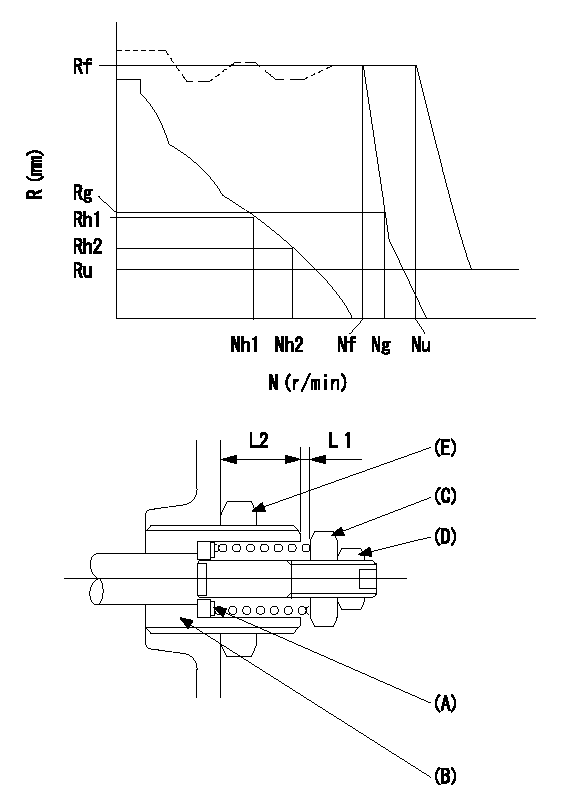
N:Pump speed (r/min)
R:Rack position (mm)
Adjusting shim A
Guide screw B
(c) Nut
(d) Nut
(e) nut
Torque control spring adjustment method for model responding to speed droop
[Advice]
Confirm that adjusting shim (A) thickness t = 1.3~1.5 mm is assembled before beginning adjustment.
(1)Temporary idle lever position setting
1. Refer to the RLD type governor service manual (Publication no. EE13E-11083).
(2)Idling spring adjustment
1. Refer to the RLD type governor service manual (Publication no. EE13E-11083).
(3)Governor spring setting adjustment
1. Temporarily fix so that the governor shaft's guide screw B protrudes L2 (18 mm) from the end of the governor.
2. Set the control lever where it contacts the idle stopper bolt.
3. Increase the speed to Nh2+100 r/min or more.
4. Adjust using the two nuts C and D so that L1 = 0.3+0.5 mm and fix temporarily.
5. Adjust the protrusion L2 of the guide screw (B) so that the rack position at Nh1 is Rh1 and at Nh2 is Rh2. Then fix using the nut (E).
6. Further increase the speed and readjust the two nuts (C) and (D) so that there is no change in L1 until Nf+50 r/min. Then fix temporarily.
[Advice]
When L1 becomes smaller while speed is increasing to Nf+50 r/min, decrease speed by Nh2+100 r/min.
Adjust so that L1 is even smaller, then again increase speed to Nf+50 r/min and confirm that L1 does not change.
(4)Full load position setting
1. Refer to the RLD type governor service manual (Publication no. EE13E-11083).
(5)Torque control spring adjustment
1. Set the control lever so that it contacts the full speed stopper bolt.
2. At the specified speed Nf, adjust using the full speed stopper bolt so that governing begins, then fix temporarily.
3. Increase the speed and adjust using the two nuts (C) and (D) so that the rack position Rg can be obtained at the specified speed Ng. Fix temporarily.
4. Decrease the speed and confirm the governing point (the beginning of governing point) at the specified speed Nf.
5. Set the speed at Nf-50 r/min.
6. Measure the torque control stroke (L1) and adjust to the specified stroke (L1) using the shim (A).
7. After completing shim adjustment, repeat the above adjustment using the two nuts.
8. After confirming the specifications Nf and Ng, fix the two nuts (C) and (D).
9. In this condition, increase the speed and confirm that R = 0 can be obtained.
(6)Full speed lever position setting
1. Set the control lever so that it contacts the full speed stopper bolt.
2. At the specified speed Nu, adjust using the full speed stopper bolt so that governing begins, then fix temporarily
3. Increase the speed and confirm that the specified rack position Ru can be obtained.
4. Adjust using the full speed stopper bolt so that governing begins at the specified speed Nf, then fix.
5. Confirm that the result is the same as that in '(5) Torque control spring adjustment.'
6. Confirm that the control lever operating angle is within the specifications.
(7)Rack limit adjustment
1. Refer to the RLD type governor service manual (Publication no. EE13E-11083).
----------
----------
----------
----------
Timing setting

(1)Pump vertical direction
(2)Position of timer's threaded hole at No 1 cylinder's beginning of injection
(3)B.T.D.C.: aa
(4)-
----------
aa=14deg
----------
a=(60deg)
----------
aa=14deg
----------
a=(60deg)
Information:
Priority PRODUCTIMPROVEMENT PROGRAM FOR INSTALLING AN ADDITIONAL WATER SPRAY NOZZLE ONCERTAIN PM-465 COLD PLANERS
66095612 6635 PI30304
This Program must be administered assoon as possible. When reporting the repair, use "PI30304" as the Partnumber and "7751" as the Group Number, "56" as the Warranty Claim DescriptionCode and "T" as the SIMS Description Code. Exception: If the repair isdone after failure, use "PI30304" as the Part Number, "7751" as the GroupNumber, "96" as the Warranty Claim Description Code, and "Z" as the SIMSDescription Code. The information supplied in this serviceletter may not be valid after the termination date of this program. Donot perform the work outlined in this Service Letter after the terminationdate without first contacting your Caterpillar product analyst.
COMPLETION DATE
TERMINATION DATE
November 30, 2002 May 31, 2003PROBLEM
An additional spray nozzle needs to be installedon certain PM-465 Cold Planers to provide a more even application of waterto the cutter teeth.AFFECTED PRODUCT
Model Identification Number
PM-465 5ZS139-182PARTS NEEDED
Dealers will need to order parts for this Program.
Quantity Part Number Description
2 5D1026 CLAMP-HOSE
1 1G6699 ADAPTER
1 1G8270 BODY-NOZZLE
100 5P1690 HOSE (100 CM)
1 812963 CAP
1 812965 SEAL
1 1159969 CONNECTOR-MA
1 1159970 CONNECTOR-MA
1 2118604 PLATE
1 2118607 TUBE
1 2120911 NOZZLEACTION REQUIRED
Refer to Special Instructions REHS1246 and installthe new spray nozzle and related parts.OWNER NOTIFICATION
U.S. and Canadian owners will receive the attachedOwner Notification.SERVICE CLAIM ALLOWANCES
Caterpillar Dealer Suggested Customer Suggested
Parts Labor Hrs. Parts Labor Hrs. Parts Labor Hrs.
100% 6 0 0 0 0
This is a 6-hour job.
U.S. and Canadian Dealers Only - Eligibledealers may enter a Type 2 SIMS Report.PARTS DISPOSITION
Handle the parts in accordance with your WarrantyBulletin on warranty parts handling.
MAKE EVERY EFFORT TO COMPLETE THIS PROGRAMAS SOON AS POSSIBLE.Attach. (1-Owner Notification)COPY OF OWNER NOTIFICATION FOR U.S. AND CANADIAN OWNERS
XYZ Corporation
3240 Arrow Drive
Anywhere, YZ 99999PRIORITY - PRODUCT IMPROVEMENT PROGRAM FORINSTALLING AN ADDITIONAL WATER SPRAY NOZZLE ON CERTAIN PM-465 COLD PLANERSMODELS INVOLVED - PM-465 COLD PLANERSDear Caterpillar Product Owner:An additional spray nozzle needs to be installedon the products listed below to provide a more even application of waterto the cutter teeth.Contact your local Caterpillar dealer immediatelyto schedule this service. The dealer will advise you of the time requiredto complete this service. Please refer the dealer to their Service Letterdated May 17, 2002 when scheduling this service. You will not be chargedfor the service performed.We regret the inconvenience this may causeyou, but urge you to have this service performed as soon as possible toprevent unscheduled downtime.Caterpillar Inc.Identification #(s)Attached to May 17, 2002 Service Letter
