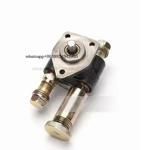
Information injection-pump assembly
BOSCH
9 400 619 937
9400619937
ZEXEL
101405-9510
1014059510
MITSUBISHI-HEAV
3426106050
3426106050
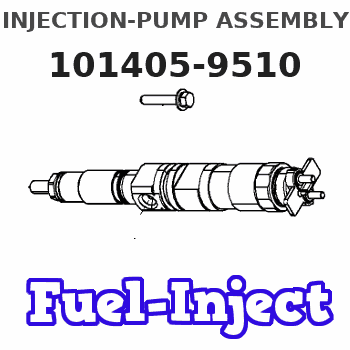
Rating:
Service parts 101405-9510 INJECTION-PUMP ASSEMBLY:
1.
_
5.
AUTOM. ADVANCE MECHANIS
6.
COUPLING PLATE
8.
_
9.
_
11.
Nozzle and Holder
12.
Open Pre:MPa(Kqf/cm2)
21.6{220}
15.
NOZZLE SET
Cross reference number
BOSCH
9 400 619 937
9400619937
ZEXEL
101405-9510
1014059510
MITSUBISHI-HEAV
3426106050
3426106050
Zexel num
Bosch num
Firm num
Name
101405-9510
9 400 619 937
3426106050 MITSUBISHI-HEAV
INJECTION-PUMP ASSEMBLY
S4K-T K 14BD INJECTION PUMP ASSY PE4AD PE
S4K-T K 14BD INJECTION PUMP ASSY PE4AD PE
Calibration Data:
Adjustment conditions
Test oil
1404 Test oil ISO4113 or {SAEJ967d}
1404 Test oil ISO4113 or {SAEJ967d}
Test oil temperature
degC
40
40
45
Nozzle and nozzle holder
105780-8140
Bosch type code
EF8511/9A
Nozzle
105780-0000
Bosch type code
DN12SD12T
Nozzle holder
105780-2080
Bosch type code
EF8511/9
Opening pressure
MPa
17.2
Opening pressure
kgf/cm2
175
Injection pipe
Outer diameter - inner diameter - length (mm) mm 6-2-600
Outer diameter - inner diameter - length (mm) mm 6-2-600
Overflow valve
131424-5720
Overflow valve opening pressure
kPa
255
221
289
Overflow valve opening pressure
kgf/cm2
2.6
2.25
2.95
Tester oil delivery pressure
kPa
255
255
255
Tester oil delivery pressure
kgf/cm2
2.6
2.6
2.6
Direction of rotation (viewed from drive side)
Right R
Right R
Injection timing adjustment
Direction of rotation (viewed from drive side)
Right R
Right R
Injection order
1-3-4-2
Pre-stroke
mm
3.5
3.45
3.55
Rack position
After adjusting injection quantity. R=A
After adjusting injection quantity. R=A
Beginning of injection position
Drive side NO.1
Drive side NO.1
Difference between angles 1
Cal 1-3 deg. 90 89.5 90.5
Cal 1-3 deg. 90 89.5 90.5
Difference between angles 2
Cal 1-4 deg. 180 179.5 180.5
Cal 1-4 deg. 180 179.5 180.5
Difference between angles 3
Cyl.1-2 deg. 270 269.5 270.5
Cyl.1-2 deg. 270 269.5 270.5
Injection quantity adjustment
Adjusting point
A
Rack position
9.1
Pump speed
r/min
975
975
975
Average injection quantity
mm3/st.
93.5
92.5
94.5
Max. variation between cylinders
%
0
-2.5
2.5
Basic
*
Fixing the lever
*
Injection quantity adjustment_02
Adjusting point
D
Rack position
6.6+-0.5
Pump speed
r/min
475
475
475
Average injection quantity
mm3/st.
11.5
10.2
12.8
Max. variation between cylinders
%
0
-14
14
Fixing the rack
*
Injection quantity adjustment_03
Adjusting point
E
Rack position
9.3++
Pump speed
r/min
100
100
100
Average injection quantity
mm3/st.
80
80
85
Fixing the lever
*
Rack limit
*
Test data Ex:
Governor adjustment
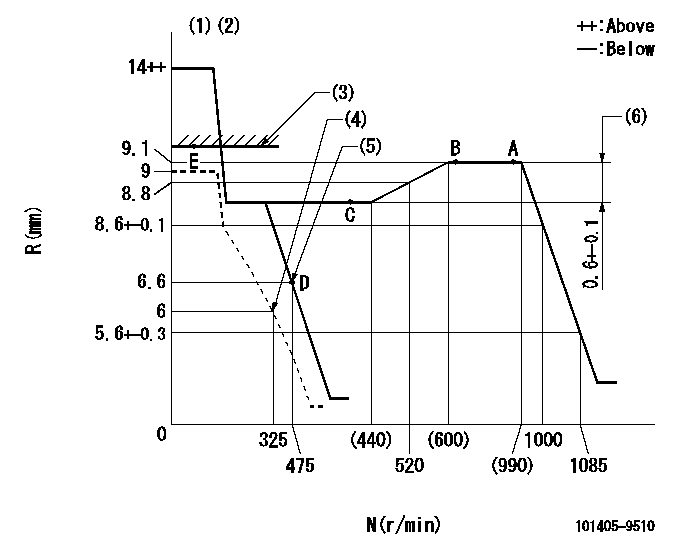
N:Pump speed
R:Rack position (mm)
(1)Target notch: K
(2)Tolerance for racks not indicated: +-0.05mm.
(3)RACK LIMIT
(4)Set idle sub-spring
(5)Main spring setting
(6)Rack difference between N = N1 and N = N2
----------
K=10 N1=975r/min N2=400r/min
----------
----------
K=10 N1=975r/min N2=400r/min
----------
Speed control lever angle
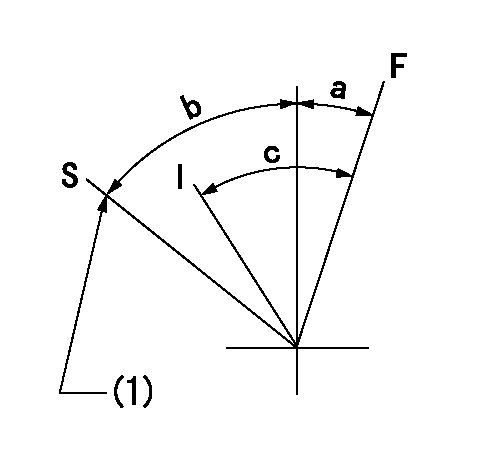
F:Full speed
I:Idle
S:Stop
(1)Stopper bolt setting
----------
----------
a=2deg+-5deg b=31deg+-3deg c=16deg+-5deg
----------
----------
a=2deg+-5deg b=31deg+-3deg c=16deg+-5deg
Stop lever angle
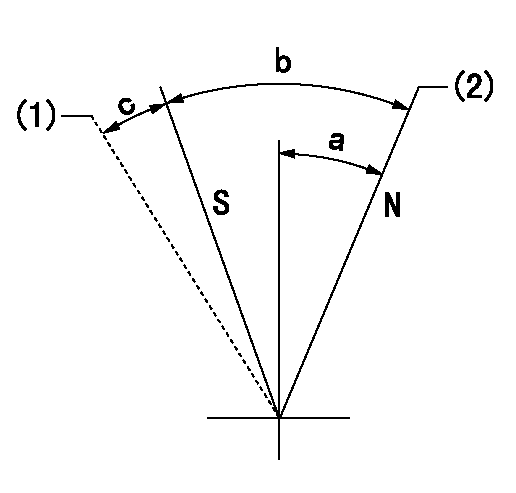
N:Pump normal
S:Stop the pump.
(1)Hold the boss against the stop side
(2)Normal
----------
----------
a=26.5deg+-5deg b=53deg+-5deg c=(9deg)
----------
----------
a=26.5deg+-5deg b=53deg+-5deg c=(9deg)
0000001501 I/P WITH LOAD PLUNGER ADJ
Load plunger-equipped pump adjustment
1. Adjust the variation between cylinders and the injection quantity.
2. At Full point A, adjust the pre-stroke to the specified value.
3. After pre-stroke adjustment, reconfirm that the fuel injection quantity and the variation between cylinders is as specified.
----------
----------
----------
----------
Timing setting

(1)Pump vertical direction
(2)Position of gear mark '3' at No 1 cylinder's beginning of injection
(3)B.T.D.C.: aa
(4)After adjusting the injection quantity, adjust at rack position bb.
----------
aa=6deg bb=9.1mm
----------
a=(110deg)
----------
aa=6deg bb=9.1mm
----------
a=(110deg)
Information:
Calibration
Refer to the complete Oil and Filter change procedure before performing Calibration (if applicable).Your engine may use a dipstick that has a FULL RANGE zone rather than the traditional FULL mark. The FULL RANGE is between the ADD and FULL marks (X-Y). This dipstick allows for variations in engine installations. Engine oil level will vary, depending on angle (front to back tilt) and slant sideways tilt).To determine the correct FULL mark in the FULL RANGE zone and prevent overfilling or under filling the crankcase, it is important to calibrate (or verify the calibration of) the dipstick at the first oil change.To verify the ADD mark and establish the actual FULL mark in the FULL RANGE zone of the dipstick, use the following procedure. This procedure is correct for use with either the non-spacer plate oil pan or the spacer plate oil pan. Sump capacities and oil levels are the same for each oil pan. The engine must rest on a level surface for this procedure.
Hot oil and hot components can cause personal injury. Do not allow hot oil or hot components to contact the skin.
1. Operate the engine until it reaches normal operating temperature.2. Stop the engine. Remove the crankcase drain plug(s). Let the oil drain from the crankcase for 20 minutes.3. Remove the used oil filter(s). Install the new oil filter(s). Install the crankcase drain plug(s) and tighten to 70 14 N m (50 10 lb ft).4. Add 18 L (19 qt) of oil for 3306B engines or 16 L (17 qt) of oil for 3304B engines. Allow the oil to drain back to the sump for a minimum of five minutes.5. Ensure that the oil level gauge is seated. Check the oil level on the oil level gauge. The oil level should be at the ADD mark. If the oil level is not at the existing ADD mark, use an engraving tool to grind off the mark and engrave the new ADD level.6. Add 6 L (6 qt) of oil for 3306B engines or 2.5 L (2.5 qt) of oil for 3304B engines into the sump. Allow enough time for the oil to drain into the sump.7. Ensure that the oil level gauge is seated. Check the oil level on the oil level gauge. The oil level should be at the FULL mark. If the oil level is not at the existing FULL mark, use an engraving tool to grind off the mark and engrave the new FULL level.
Remote mounted or auxiliary oil filters require additional oil. For all information about auxiliary oil filters, refer to the OEM instructions.
8. Add an additional 4 L (4 qt) of oil into the sump for both the 3306B and the 3304B engines. Total fill capacity for the 3306B engine is 27.5 L (29 qt) Total fill capacity for the 3304B engine is 22.5 L (23.5 qt).
To prevent crankshaft or bearing damage, crank the engine with the fuel OFF in order to fill all of the oil
Have questions with 101405-9510?
Group cross 101405-9510 ZEXEL
Mitsubishi-Heav
101405-9510
9 400 619 937
3426106050
INJECTION-PUMP ASSEMBLY
S4K-T
S4K-T
