Information fuel-injection pump
ZEXEL
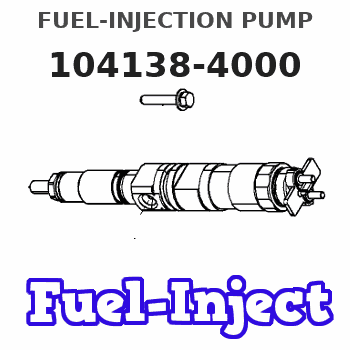
104138-4000
1041384000
ISEKI
62156001320B
62156001320b
Rating:
Compare Prices: .
As an associate, we earn commssions on qualifying purchases through the links below

Aftermarket Fuel Injection Pump Fit Intended For 9410618373 1041384001 62156001320B
Generic Motorcycle Parts || Heavy Equipment Parts || Spare Parts || Fuel Systems
Generic Motorcycle Parts || Heavy Equipment Parts || Spare Parts || Fuel Systems

Fuel Injection Pump for Bosch 9410618373 Zexel 1041384001 Iseki 62156001320B
AUCALIWI Part number:9410618373 || Application:for Bosch 9410618373 Zexel 1041384001 Iseki 62156001320B
AUCALIWI Part number:9410618373 || Application:for Bosch 9410618373 Zexel 1041384001 Iseki 62156001320B

$795.00
09 Dec 2024
CN: qian cheng
Fuel Injection Pump for Bosch 9410618373 Zexel 1041384001 Iseki 62156001320B
ADPelcote Part number:9410618373 || Applications:for Bosch 9410618373 Zexel 1041384001 Iseki 62156001320B
ADPelcote Part number:9410618373 || Applications:for Bosch 9410618373 Zexel 1041384001 Iseki 62156001320B
Cross reference number
Zexel num
Bosch num
Firm num
Name
62156001320B ISEKI
FUEL-INJECTION PUMP
* K 23AD FUEL INJECTION PUMP PFR-4KX PFR
* K 23AD FUEL INJECTION PUMP PFR-4KX PFR
62156001320A ISEKI
FUEL-INJECTION PUMP
A * K 23AD FUEL INJECTION PUMP PFR-4KX PFR
A * K 23AD FUEL INJECTION PUMP PFR-4KX PFR
Information:
1. Make a setting of the fuel injection pump timing. See REMOVE FUEL INJECTION PUMP HOUSING AND GOVERNOR for timing procedure. Tools (A) and (B) will be needed to make a setting of the timing. 2. Remove nuts (1). Remove cover (2) from the timing gear cover. Earlier automatic timing advances had only one bolt. 3. Remove bolts (3) and washer (4). Remove automatic timing advance (5).Install Automatic Timing Advance
1. Put automatic timing advance (1) in position on the drive shaft for the fuel injection pump. On earlier engines, tighten the one bolt to 15 lb. ft. (20 N m). Remove tool (A) and tighten the one bolt to a last torque of 110 10 lb. ft. (149 14 N m). 2. Install washer (2) and bolts (3). Tighten bolts (3) in the following sequence: a) Tighten bolts (3) to a torque of 25 lb. ft. (35 N m).b) Remove tool (A).c) Tighten bolts (3) to a torque of 50 lb. ft. (70 N m).d) Tighten bolts (3) to a torque of: Unit with flat retainer ... 80 5 lb. ft.(110 7 N m)Unit with step retainer ... 100 5 lb. ft.(135 7 N m)
Do not tighten the bolts to final torque until tool (A) is removed.
3. Remove the timing bolt from the flywheel.4. Turn the crankshaft two complete revolutions and check the timing to see that the timing is correct.5. Remove the timing bolt from the flywheel. Remove tool (A) and install the plug in the fuel injection pump housing. 6. Install cover (4) and the nuts that hold the cover to the timing gear cover. Disassemble Automatic Timing Advance
start by:a) remove automatic timing advance 1. Remove ring (2) and gear (1) from flange. 2. Remove springs (3) and counterweights (4) from flange.3. Remove slides from dowels on the flange.Assemble Automatic Timing Advance
1. Install slides (1) on to dowels.2. Install the counterweights (2) on the flange. 3. Install the springs (3).4. Install the gear on flange.5. Install the ring that holds gear and flange together. end by: a) install automatic timing advance