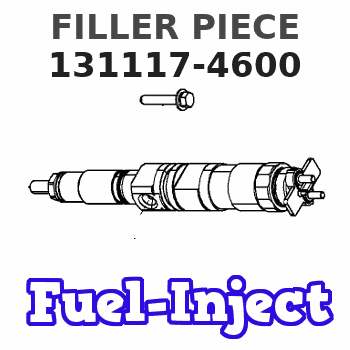
Information filler piece
BOSCH
9 411 612 378
9411612378
ZEXEL
131117-4600
1311174600
NISSAN-DIESEL
16779Z9002
16779z9002
Rating:
Compare Prices: .
As an associate, we earn commssions on qualifying purchases through the links below

Dynamic Friction Company 3000 Semi-Metallic Brake Pads 1311-1746-00-Rear Set
Dynamic Friction Company Brake Pads: Includes (4) Dynamic Friction Company Rear 3000 Semi-Metallic Brake Pads for improved braking performance || Reliable Semi-Metallic Formula: Designed for passenger vehicles and light-duty trucks with consistent braking performance || Long-Lasting Durability: Provides stable friction, long pad wear, and rotor-friendly performance across various conditions || Clean & Quiet Braking: Engineered for low dust and noise, ensuring a smooth and quiet ride || Compatible for (verify fitment details with AmazonConfirmFit bar above): 2014-2021 Ram ProMaster 2500, ProMaster 3500
Dynamic Friction Company Brake Pads: Includes (4) Dynamic Friction Company Rear 3000 Semi-Metallic Brake Pads for improved braking performance || Reliable Semi-Metallic Formula: Designed for passenger vehicles and light-duty trucks with consistent braking performance || Long-Lasting Durability: Provides stable friction, long pad wear, and rotor-friendly performance across various conditions || Clean & Quiet Braking: Engineered for low dust and noise, ensuring a smooth and quiet ride || Compatible for (verify fitment details with AmazonConfirmFit bar above): 2014-2021 Ram ProMaster 2500, ProMaster 3500
Include in ###:
Cross reference number
Zexel num
Bosch num
Firm num
Name
131117-4600
9 411 612 378
16779Z9002 NISSAN-DIESEL
FILLER PIECE
C 14FL STOPPER parts(A,AD) Others
C 14FL STOPPER parts(A,AD) Others
Information:
Disassembly and Reassembly of General Parts
Oil seals
When installing oil seals, observe the following.Installation of Oil Seals to Housings
(a) Check the seal lip for scratches and damage, and be sure to position the lip correctly.(b) Apply a small amount of grease to the periphery (housing contact surface) of the oil seal before installation.(c) Use an oil seal driver that guides the seal lip and presses the seal periphery, as shown in the diagram on the right. Striking the oil seal directly with a hammer causes seal damage and results in oil leaks.
Oil seal driverInstallation of Oil Seals to Shafts
(a) Apply grease to the oil seal lip.(b) Use an oil seal guide similar to the one shown in the diagram when installing an oil seal over the stepped portion, splines, threads or key grooves.
Oil seal guideO-rings
Use an O-ring guide similar to the one shown in the diagram when installing an O-ring over the stepped portion, splines, threads or key grooves. Be sure to apply a small amount of grease to the O-ring before installation.
O-ring guideBearings
Bearing Driver(1) When installing a bearing, be sure to push the inner or outer race that fits into the installation position. (When the inner race fits into the installation position, push the inner race into position. When the outer race fits into the installation position, push the outer race into position.) Be sure to use a bearing driver similar to the one shown in the diagram.(2) Use of a press minimizes the impact on the bearing and ensures proper installation.
Using press for bearing installationLock Plates
Be sure to bend lock plates. The diagram on the right shows the methods of bending representative lock plates.
Bending lock plateSplit Pins and Spring Pins
Generally, new split pins should be installed whenever split pins are removed. Be sure to bend split pins. Be sure to check spring pins for secure installation.Engine Inspection Record Sheet
1. Measurement of Cylinder Bore Diameter2. Measurement of Clearance between Valve Stem and Valve Guide, and Valve Stem Diameter3. Measurement of Valve Sinkage, Seat Width and Valve Margin4. Measurement of Distortion of Cylinder Head Bottom Surfaces5. Measurement of Oil Clearance of Connecting Rod Bearing6. Measurement of Rocker Arm Inside Diameter and Shaft Diameter7. Measurement of Piston Pin Bore Diameter and Piston Pin Diameter8. Measurement of Valve Clearance9. Measurement of Injection Pressure of Fuel Injection Nozzle10. Measurement of Clearance between Camshaft Journal Bore Diameter and Camshaft Bushing11. Measurement of Crankshaft End PlayEngine Inspection Record Sheet No. 1 Engine Inspection Record Sheet No. 2 Engine Inspection Record Sheet No. 3 Engine Inspection Record Sheet No. 4 Engine Inspection Record Sheet No. 5 Engine Inspection Record Sheet No. 6 Engine Inspection Record Sheet No. 7 Engine Inspection Record Sheet No. 8 Engine Inspection Record Sheet No. 9 Engine Inspection Record Sheet No. 10 Engine Inspection Record Sheet No. 11
Have questions with 131117-4600?
Group cross 131117-4600 ZEXEL
Nissan-Diesel
131117-4600
9 411 612 378
16779Z9002
FILLER PIECE