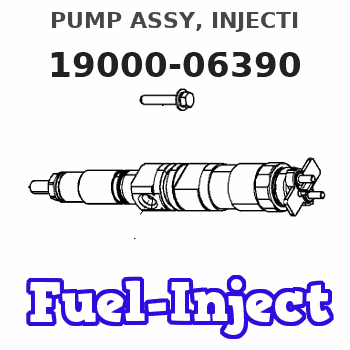
Information pump assy, injecti
Nozzle:
0935002080
Rating:
KIT List:
| Body assy, injecti | 1904400360 |
| Governor assy, mec | 1908900190 |
| Timer assy, automa | 0918030060 |
| Pump assy, fuel fe | 1922900060 |
Components :
| 001. | PUMP ASSY, INJECTI | 19000-06390 |
| 002. | BODY ASSY, INJECTI | 09010-03922 |
| 003. | COVER, BEARING | 09020-10410 |
| 004. | GOVERNOR ASSY, MEC | 09080-07170 |
| 005. | TIMER ASSY, AUTOMA | 09180-01210 |
| 006. | PUMP ASSY, FUEL FE | 09210-00920 |
| 007. | COUPLING ASSY | 09250-00270 |
Scheme ###:
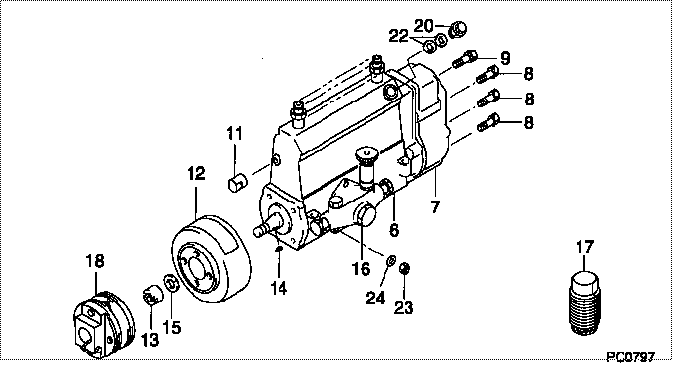
| 000. | [01] | 19000-06390 | PUMP ASSY, INJECTI | 22010-2980 |
| 006. | [01] | 09010-03922 | BODY ASSY, INJECTI | 22110-1590A |
| 007. | [01] | 09080-07170 | GOVERNOR ASSY, MEC | 22310-2170 |
| 008. | [06] | 94904-71150 | BOLT, W/WASHER | 6 306 1001 00 |
| 009. | [01] | 94904-73910 | BOLT, W/WASHER | 22815-2820A |
| 011. | [01] | 09001-80290 | COVER, CONTROL RAC | 22114-1020A |
| 012. | [01] | 09180-01210 | TIMER ASSY, AUTOMA | 22510-1190A |
| 013. | [01] | 09001-20180 | NUT, TIMER ROUND | 22511-1070A |
| 014. | [01] | 94913-00210 | KEY, WOODRUFF | 22895-1010A |
| 015. | [01] | 94901-50590 | WASHER, SPRING | 22877-1620A |
| 016. | [01] | 09210-00920 | PUMP ASSY, FUEL FE | 22570-1250A |
| 017. | [01] | 09006-10011 | COVER, PRIMING PUM | 6 053 1552 60 |
| 018. | [01] | 09250-00270 | COUPLING ASSY | 22610-1080A |
| 020. | [01] | 09031-00130 | VALVE ASSY, OVERFL | 22107-1090A |
| 022. | [02] | 94901-02480 | WASHER | 22847-1940A |
| 023. | [03] | 90160-06051 | NUT, HEXAGON | 22825-1480A |
| 024. | [03] | 90258-06001 | WASHER, SPRING | 28219-1110A |
Include in #3:
19000-06390
as PUMP ASSY, INJECTI
Cross reference number
| Part num | Firm num | Firm | Name |
| 19000-06390 | 22010-2980 | PUMP ASSY, INJECTI | |
| 22010-2980 | HINO | PUMP ASSY, INJECTI |
Information:
Start By:a. remove crankshaft vibration damper and pulley
Keep all parts clean from contaminants. Contaminants put into the system may cause rapid wear and shortened component life.
When replacement of the front seal is made, a replacement of the wear sleeve must also be made.
1. Remove the two bolts, washers, clamp (1), retainer (2) and the O-ring seal.2. Use tool (A) and a press to remove seal (3).3. Install the O-ring seal, retainer (2) and the two bolts, washers, and clamp (1). 4. Install tool (C) in the bore of retainer (2) as shown.5. Install tool (B) between tool (C) and the wear sleeve. Turn tool (B) with a wrench until the edge of the tool makes a flat place (crease) in the wear sleeve. Do this in two or more places until the wear sleeve is loose.6. Remove tool (C) and the wear sleeve by hand.Install Crankshaft Front Seal And Wear Sleeve
1. Install crankshaft front seal (1) and wear sleeve (2) with tool (A) as follows:a. Put clean engine oil on the seal lip of seal (1) and on the outside diameter of wear sleeve (2). Install seal (1) on wear sleeve (2) as shown.b. Use 6V1541 Quick Cure Primer to clean the outside diameter of crankshaft (3) and the inside diameter of wear sleeve (2).c. Put 9S3265 Retaining Compound on the outside diameter of crankshaft (3) and the inside diameter of wear sleeve (2). Make sure the lip of the seal is toward the engine and the outside diameter bevel of the wear sleeve is toward the outside of the engine.d. Put wear sleeve (2) with seal (1) on the front of the crankshaft as shown in illustration B20159P1. Install tool (A). Tighten the bolt in tool (A) until the inside surface of the installer in tooling (A) makes contact with the end of the crankshaft.End By:a. install crankshaft vibration damper and pulley