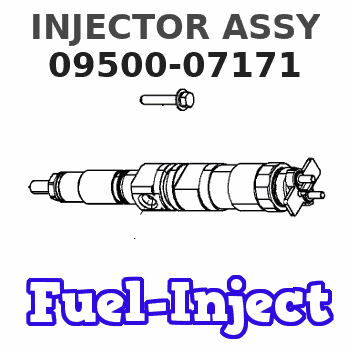
Information injector assy
Rating:
Compare Prices: .
As an associate, we earn commssions on qualifying purchases through the links below

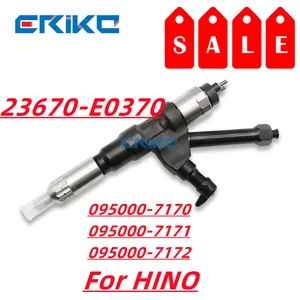
095000-7172 23670-E0370 095000-7171 1PCS Injector Compatible With Hino Truck P11C Engine Excavator Accessories
YERCBX The fuel injection pattern can be adjusted to achieve the fuel injection pattern || Low speed high torque: It can maintain high torque output even at low speeds || Reduce maintenance costs: The system structure is simple || The fuel injection timing can be flexibly adjusted according to the engine operating conditions || It can be matched with small, medium and heavy-duty diesel engines and has a wide range of applications
YERCBX The fuel injection pattern can be adjusted to achieve the fuel injection pattern || Low speed high torque: It can maintain high torque output even at low speeds || Reduce maintenance costs: The system structure is simple || The fuel injection timing can be flexibly adjusted according to the engine operating conditions || It can be matched with small, medium and heavy-duty diesel engines and has a wide range of applications

Seapple 1X Fuel Injector 095000-7171 0950007171 For Hino Diesel Engine P11C
Seapple Part Name: Fuel Injector || Part Number: 095000-7171 0950007171 Note: Please check the fitment carefully before purchase. Or just tell us the part number you need. || Engine Model: P11C || Applicable: For Hino Diesel Engine P11C || Package included: 1X Fuel Injector 095000-7171 0950007171
Seapple Part Name: Fuel Injector || Part Number: 095000-7171 0950007171 Note: Please check the fitment carefully before purchase. Or just tell us the part number you need. || Engine Model: P11C || Applicable: For Hino Diesel Engine P11C || Package included: 1X Fuel Injector 095000-7171 0950007171

DLLA150P991 095000-7170 095000-7171 Diesel Fuel Injector
XGOSOZNW Easy to maintain: The design of the fuel injector is easy to disassemble and clean, making it convenient for car owners to perform regular maintenance || Reduce noise: Fuel injectors can reduce engine noise during operation and enhance driving quietness || Reduce fuel consumption: It can reduce unnecessary fuel waste, thereby lowering the fuel consumption of vehicles || Fast response speed: The fuel injector can quickly open and close, meeting the immediate fuel demand of the engine || compatibility: DLLA150P991 095000-7170 095000-7171 Diesel Fuel Injector
XGOSOZNW Easy to maintain: The design of the fuel injector is easy to disassemble and clean, making it convenient for car owners to perform regular maintenance || Reduce noise: Fuel injectors can reduce engine noise during operation and enhance driving quietness || Reduce fuel consumption: It can reduce unnecessary fuel waste, thereby lowering the fuel consumption of vehicles || Fast response speed: The fuel injector can quickly open and close, meeting the immediate fuel demand of the engine || compatibility: DLLA150P991 095000-7170 095000-7171 Diesel Fuel Injector
You can express buy:
USD 159.99
19-05-2025
19-05-2025
095000-7170 Injector Diesel 23670-E0370 23670 E0370 Diesel Fuel Injector 23670E0370 095000-7171 095000-7172 for Hino 700 5eries
USD 159.99
19-05-2025
19-05-2025
095000-7170 Injector Diesel 23670-E0370 23670 E0370 Diesel Fuel Injector 23670E0370 095000-7171 095000-7172 for Hino 700 5eries
USD 154.9
19-05-2025
19-05-2025
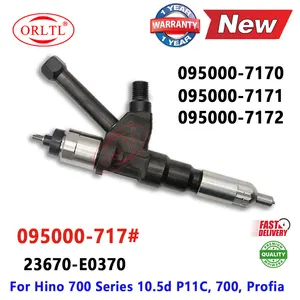
ORLTL NEW Diesel Injector 095000-7170 095000-7171 Nozzle 095000-7172 23670-E0370 23670E0370 23670 E0370 For for HINO P11C
Images:
USD 8.99

[19-May-2025]
USD 159.99

[19-May-2025]
USD 159.99

[13-May-2025]
USD 638.96

[13-May-2025]
Components :
| 001. | INJECTOR ASSY | 09500-07171 |
Scheme ###:

| 000. | [01] | 09500-07171 | INJECTOR ASSY | 23670-E0370 |
Include in #3:
09500-07171
as INJECTOR ASSY
Cross reference number
| Part num | Firm num | Firm | Name |
| 09500-07171 | 23670-E037 | INJECTOR ASSY |
Information:
Start By:a. remove flywheel
Keep all parts clean from contaminants. Contaminants put into the system may cause rapid wear and shortened component life.
When a replacement of the rear seal is made, a replacement of the wear sleeve is to be made also. 1. Remove the crankshaft rear seal with tool (A). 2. Install tool (C) as shown.3. Install tool (B) between tool (C) and the wear sleeve. Turn tool (B) until the edge of the tool makes a flat place (crease) in the wear sleeve. Do this in two or more places until the wear sleeve in loose.4. Remove tool (C) and the wear sleeve by hand. The following steps are for the installation of the crankshaft rear seal and wear sleeve. 5. Install the crankshaft rear seal and wear sleeve with tooling (A) as follows:a. Put locator (1) in position on the crankshaft and install the three bolts that hold it in place.b. Put clean engine oil on the seal lip of seal (6) and on the outside diameter of wear sleeve (2).c. Install seal (6) on wear sleeve (2) from the end of the wear sleeve that has the bevel on the outside diameter. Make sure the lip of the seal is toward the inside of the engine and the bevel that is on the outside diameter of the wear sleeve is toward the outside of the engine when installed.d. Use 6V1541 Quick Cure Primer to clean the outside diameter of the crankshaft flange (3) and the inside diameter of wear sleeve (2).e. Put 9S3265 Retaining Compound on the outside diameter of crankshaft flange (3) and the inside diameter of wear sleeve (2). Make sure the lip of the seal is toward the inside of the engine and the outside diameter bevel of the wear sleeve is toward the outside of the engine.f. Put wear sleeve (2) with seal (6) on locator (1). Put installer (4) on locator (1) and install nut (5). Put lubrication on the face of the washer and the nut.g. Tighten nut (5) until installer (4) comes in contact with locator (1).h. Remove tooling (A) and check the wear sleeve and seal for correct installation.End By:a. install flywheel