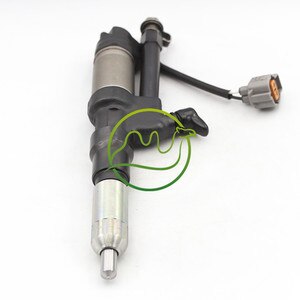
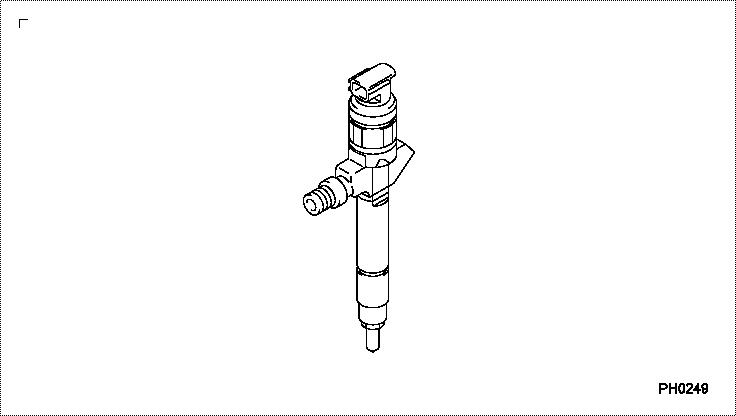
Information injector assy

Rating:
Compare Prices: .
As an associate, we earn commssions on qualifying purchases through the links below

Common Rail Injector 095000-7200 095000-7160 095000-624X 095000-6244 095000-6243 Diesel Nozzle Reman - (Style: A, Color: 095000-7200)
Generic Color: 095000-7200
Generic Color: 095000-7200

Genuine Common Rail Diesel Fuel Injector Assembly 095000-7160 095000-7161 095000-7162 16620-HA30 16620HA30 RF8P-13-H50
BNDVTRBSO 1 Accurate injection can improve combustion efficiency and make your car more dynamic. || 2 The installation process is simple and convenient, and can be completed without professional technicians. || 3 strong compatibility: it is suitable for many different types of automobile engines, and has wide compatibility, which is convenient for the owner to choose when changing the nozzle. || 4 Stable performance: It can maintain stable performance under different working temperatures and pressures, and improve the reliability and safety of automobiles. || 5 Quick response: It can quickly respond to the instructions of the engine, adjust the fuel injection quantity in time, and output power smoothly, no matter whether it is accelerating rapidly or driving at a constant speed.
BNDVTRBSO 1 Accurate injection can improve combustion efficiency and make your car more dynamic. || 2 The installation process is simple and convenient, and can be completed without professional technicians. || 3 strong compatibility: it is suitable for many different types of automobile engines, and has wide compatibility, which is convenient for the owner to choose when changing the nozzle. || 4 Stable performance: It can maintain stable performance under different working temperatures and pressures, and improve the reliability and safety of automobiles. || 5 Quick response: It can quickly respond to the instructions of the engine, adjust the fuel injection quantity in time, and output power smoothly, no matter whether it is accelerating rapidly or driving at a constant speed.
You can express buy:
USD 500
07-10-2022
07-10-2022
High Quality Injector 095000-7160 0950007160 095000-1211 0950001211
Components :
| 001. | INJECTOR ASSY | 09500-07160 |
| 001. | INJECTOR ASSY | 09500-07160 |
| 001. | INJECTOR ASSY | 09500-07160 |
Scheme ###:
| 000. | [01] | 09500-07160 | INJECTOR ASSY | RF8P 13 H50 |
| 000. | [01] | 09500-07160 | INJECTOR ASSY | RF8P 13 H50A |
| 000. | [01] | 09500-07160 | INJECTOR ASSY | MQ912449 |
| 000. | [01] | 09500-07160 | INJECTOR ASSY | MQ913152 |
| 000. | [01] | 09500-07160 | INJECTOR ASSY | 16620HA30A |
| 000. | [01] | 09500-07160 | INJECTOR ASSY | 16620HA30C |
| 000. | [01] | 09500-07160 | INJECTOR ASSY | 16620HA00B |
Include in #3:
09500-07160
as INJECTOR ASSY
09500-07160
09500-07160
09500-07160
09500-07160
09500-07160
09500-07160
Cross reference number
| Part num | Firm num | Firm | Name |
| 09500-07160 | RF8P 13 H5 | INJECTOR ASSY | |
| 16620HA30C | NISSAN MOTOR | INJECTOR ASSY | |
| 16620HA30A | NISSAN MOTOR | INJECTOR ASSY | |
| 16620HA00B | NISSAN MOTOR | INJECTOR ASSY | |
| MQ912449 | MITSUBISHI | INJECTOR ASSY | |
| MQ913152 | MITSUBISHI | INJECTOR ASSY | |
| RF8P 13 H50 | MAZDA | INJECTOR ASSY | |
| RF8P 13 H50A | MAZDA | INJECTOR ASSY |
Information:
start by:a) remove pistons 1. Remove bearings (3) from the connecting rod and connecting rod cap.2. Remove retainer ring (1) with tool (A).3. Remove pin (2) and connecting rod (4) from the piston. 4. Remove the piston rings (5) from the piston with tool (B). Clean the piston ring grooves on the pistons with an acceptable ring groove cleaning tool. See USE OF PISTON PIN BEARING REMOVAL AND INSTALLATION TOOLS, SPECIAL INSTRUCTIONS, Form No. SMHS7295.5. Heat the connecting rod (4) in an oven to a temperature of 350°-500°F (177°-260°C). Never use a direct flame to heat a connecting rod. 6. Put connecting rod (4) in position on the base plate of tooling (C). Put a new rod pin bearing (6) on the adapter part of tooling (C). The old bearing is pushed out by tooling (C) as the new bearing is installed.7. Use tooling (C) to push the new bearing into the connecting rod until the push adapter of tooling (C) makes full contact with the connecting rod surface.8. Use a pin boring machine to make the rod pin bearing the correct size. The bore in the new rod pin bearing must be 2.0012 .0003 in. (50.830 0.008 mm).9. Check the clearance between the ends of the piston rings. See PISTONS AND RINGS in SPECIFICATIONS.10. Install the oil ring spring in the oil ring groove of the piston. The oil ring is to be installed over the spring with the oil ring end gap 180° from the oil ring spring joint. 11. Install the oil ring on the piston with tool (B).12. Install the second (intermediate) piston ring with the side that has the identification "UP-2" toward the top of the piston with tool (B).13. Install the first (top) piston ring with the side that has the identification "UP-1" toward the top of the piston with tool (B). After the installation of all three piston rings, put the piston rings in position so the end gaps are 120° apart. 14. Put the piston in position on connecting rod (4). Put clean engine oil on pin (2) and install the pin. Install retainer rings (1) with tool (A). Make sure the retainer rings are in the grooves of the piston.15. Install bearings (3) in the connecting rod and connecting rod cap.end by:a) install pistons