Information injector assy

Rating:
Compare Prices: .
As an associate, we earn commssions on qualifying purchases through the links below

4Pcs Compatible with Denso New Fuel Injector Nissan X-Trail Almera 2.2 Dci YD22 095000-5130 095000-5135 16600-AW400
EWAIDI Part Number:095000-5130 095000-5135 16600-AW400 || Warranty:1year || This product is fully compatible with Denso Nissan vehicles, designed for X-Trail and Almera models with the 2.2 Dci YD22 engine. It meets strict requirements for optimal performance and function, making it an ideal choice for maintenance and repair to ensure smooth operation of your Nissan vehicle. || The Fuel Injector is vital in a vehicle's fuel system, injecting fuel into the engine for optimized efficiency, performance, and emissions. It operates at high pressure to ensure proper combustion and engine function, playing a key role in overall vehicle performance and efficiency. This durable component is essential for modern vehicles to function properly. || Please ensure that this product is compatible with your vehicle before making a purchase by verifying the part number and checking the photos. Keep in mind that the color of the actual product may vary slightly from what is shown on the display due to lighting differences.
EWAIDI Part Number:095000-5130 095000-5135 16600-AW400 || Warranty:1year || This product is fully compatible with Denso Nissan vehicles, designed for X-Trail and Almera models with the 2.2 Dci YD22 engine. It meets strict requirements for optimal performance and function, making it an ideal choice for maintenance and repair to ensure smooth operation of your Nissan vehicle. || The Fuel Injector is vital in a vehicle's fuel system, injecting fuel into the engine for optimized efficiency, performance, and emissions. It operates at high pressure to ensure proper combustion and engine function, playing a key role in overall vehicle performance and efficiency. This durable component is essential for modern vehicles to function properly. || Please ensure that this product is compatible with your vehicle before making a purchase by verifying the part number and checking the photos. Keep in mind that the color of the actual product may vary slightly from what is shown on the display due to lighting differences.

6PCS 095000-5130 095000-5135 16600-AW400 Fuel Injector Fits for 2.2 Dci YD22
EWAIDI Part Number:095000-5130 095000-5135 16600-AW400 || Application:Fits for 2.2 Dci YD22 || The Fuel Injector is a vital part of the engine's fuel delivery system, ensuring precise fuel distribution for optimal engine performance. It plays a crucial role in enhancing fuel efficiency, reducing emissions, and maximizing engine power. Regular maintenance is necessary to prevent clogs and malfunctions that can affect performance. Dependable Fuel Injector operation is essential for a smooth driving experience and engine longevity. || Please note that the application information given is for informational purposes only. It is important to verify the part number and compare it with the old parts before making a purchase. || Good Value Option-This item offers consistent performance, reliable functionality, simple installation, and quick responsiveness.
EWAIDI Part Number:095000-5130 095000-5135 16600-AW400 || Application:Fits for 2.2 Dci YD22 || The Fuel Injector is a vital part of the engine's fuel delivery system, ensuring precise fuel distribution for optimal engine performance. It plays a crucial role in enhancing fuel efficiency, reducing emissions, and maximizing engine power. Regular maintenance is necessary to prevent clogs and malfunctions that can affect performance. Dependable Fuel Injector operation is essential for a smooth driving experience and engine longevity. || Please note that the application information given is for informational purposes only. It is important to verify the part number and compare it with the old parts before making a purchase. || Good Value Option-This item offers consistent performance, reliable functionality, simple installation, and quick responsiveness.

4PCS 095000-5130 095000-5135 16600-AW400 Fuel Injector Fits for 2.2 Dci YD22 0950005130 0950005135 16600AW400
EWAIDI Part Number:095000-5130 095000-5135 16600-AW400 || Application:Fits for 2.2 Dci YD22 || The Fuel Injector is a vital part of the engine's fuel delivery system, responsible for precisely spraying fuel into the combustion chamber for optimal engine performance. It plays a crucial role in fuel efficiency, emissions control, and engine power. Regular maintenance and cleaning are necessary to prevent clogs and malfunctions that can affect engine performance. A properly functioning Fuel Injector is essential for vehicle operation and engine longevity. || Please note that the application information given is for informational purposes only. It is important to verify the part number and compare it with the old parts before making a purchase. || Good Value Option-This item offers consistent performance, reliable functionality, simple installation, and quick responsiveness.
EWAIDI Part Number:095000-5130 095000-5135 16600-AW400 || Application:Fits for 2.2 Dci YD22 || The Fuel Injector is a vital part of the engine's fuel delivery system, responsible for precisely spraying fuel into the combustion chamber for optimal engine performance. It plays a crucial role in fuel efficiency, emissions control, and engine power. Regular maintenance and cleaning are necessary to prevent clogs and malfunctions that can affect engine performance. A properly functioning Fuel Injector is essential for vehicle operation and engine longevity. || Please note that the application information given is for informational purposes only. It is important to verify the part number and compare it with the old parts before making a purchase. || Good Value Option-This item offers consistent performance, reliable functionality, simple installation, and quick responsiveness.
You can express buy:
USD 84.41
19-05-2025
19-05-2025
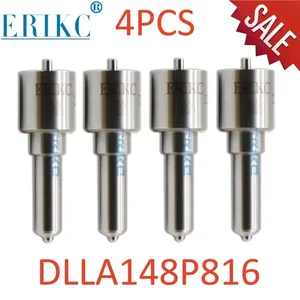
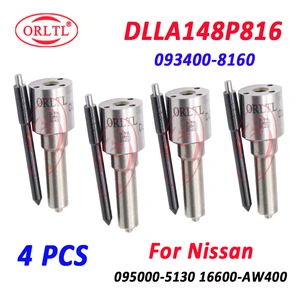
4pcs DIESEL DLLA148P816 0934008160 FUEL Injector Nozzle DLLA 148 P 816 FOR 16600-AW400 Nissan 095000-5131 095000-5132
USD 19.99
13-05-2025
13-05-2025
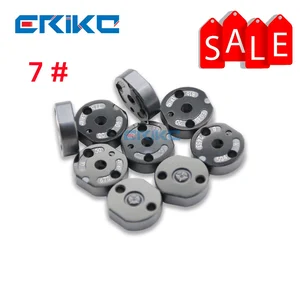
ERIKC 7# Valve Plate for DENSO 095000-513# 095000-5135 095000-5130 095000-5131 095000-5132 095000-5133 095000-5134,
USD 65.8
13-05-2025
13-05-2025
4 PCS 16600-AW400 DIESEL DLLA148P816 0934008160 FUEL Injector Nozzle DLLA 148 P 816 FOR Nissan 095000-5131 095000-5132 ORLTL
Images:
USD 19.99

[13-May-2025]
USD 19.99

[13-May-2025]
USD 118.74

[19-May-2025]
USD 118.74

[19-May-2025]
Include in #3:

Cross reference number
| Part num | Firm num | Firm | Name |
| 09500-05131 | 16600AW400 | INJECTOR ASSY |
Information:
START BY:a. remove flywheel (BrakeSaver) 1. Disconnect BrakeSaver lubrication oil line (1) from the fitting in the BrakeSaver housing. 2. Disconnect the oil line from fitting (5).3. Remove two short bolts (2) and two longer bolts (4) that hold manifold (3) to the BrakeSaver housing. Remove manifold (3) from the BrakeSaver control valve.4. Remove the O-ring seals from the manifold. The two longer bolts (4) from the manifold can be used as forcing screws to remove the BrakeSaver from the flywheel housing. 5. Install a 3/8"-16 NC forged eyebolt in the top of the BrakeSaver housing, and fasten a hoist to it.6. Install tooling (A) on the BrakeSaver housing and rotor. Tooling (A) holds the BrakeSaver housing and rotor assembly together at removal. This prevents damage to the rotor rings and seals.7. Remove bolts (6) that hold BrakeSaver housing (7) to the flywheel housing.8. Use bolts (4) as forcing screws, and tighten the bolts evenly to remove BrakeSaver housing (7) from the flywheel housing. The weight is 86 kg (190 lb.).Install BrakeSaver
1. Install tooling (A) on the BrakeSaver housing and rotor. Tooling (A) holds the BrakeSaver housing and rotor assembly together at installation. This prevents damage to the rotor rings and seals.2. Install a 3/8"-16 NC forged eyebolt in the top of the BrakeSaver housing, and fasten a hoist to it.3. Install two 5/8"-18 guide bolts (3) in the crankshaft as shown. Make sure dowel (2) is in alignment with the dowel hole in the rotor assembly, and put BrakeSaver housing (1) in position in the flywheel housing.4. Install the three bolts that hold the BrakeSaver housing to the flywheel housing. Remove tooling (A) and guide pins (3). 5. Connect the oil line to fitting (6).6. Inspect the O-ring seals for damage, and make replacements if needed. Install O-ring seals (4) and (5). Put clean engine oil on the O-ring seals.7. Install manifold (7) into the BrakeSaver control valve, and install the four bolts that hold the manifold to the BrakeSaver housing. 8. Connect BrakeSaver lubrication oil line (8) to the fitting in the BrakeSaver housing.END BY:a. install flywheel (BrakeSaver)Disassemble BrakeSaver
START BY:a. remove BrakeSaver1. Remove tooling (A) from the BrakeSaver housing and rotor. Tooling (A) prevents damage to the rotor seals and rings during removal of the BrakeSaver housing. 2. Remove bolts (1) from gear plate (2). Remove the plate. 3. Put alignment marks on stator (3) and housing (4) for assembly purposes. Remove bolts (5) and the stator. 4. Turn the stator over, and remove spiral ring (6). 5. Turn the stator over again. Remove sleeve assembly (9). Remove O-ring seal (7) and lip-type seal (8) from the sleeve. 6. Remove O-ring seal (11) and the six smaller O-ring seals from the oil holes on the housing.7. Remove rotor assembly (12).8. Remove seal ring (10) from both sides of the rotor. 9. Remove carrier (13) and wear sleeve (14) with tooling (B) from both sides of the rotor. 10. Remove spiral ring (15). Turn the housing over,