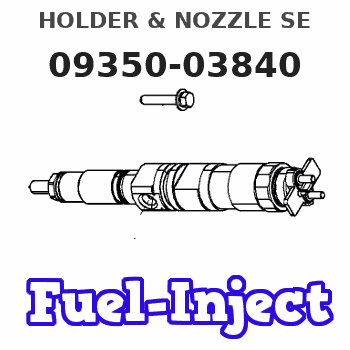
Information holder & nozzle se
Rating:
Compare Prices: .
As an associate, we earn commssions on qualifying purchases through the links below

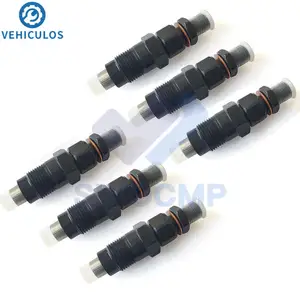
Bulubiu 4PCS Fuel Injector 729004-53101 Fit for Yanmar 4 CYL 3TNV84 3TNV88 4TNV84 4TNV88 diesel Engine aftermarket part Replace OE 093500-3840 72900453101
Bulubiu 【OE part number】Fuel Inject 729004-53101、093500-3840、72900453101 || 【Product Features】 Exquisite manufacturing, complex design, large dynamic flow range, anti clogging and anti pollution capabilities, good atomization performance, precise control of fuel injection efficiency and quantity, improving combustion efficiency and reducing emissions || 【Material Characteristics】 This product is made of metal, plastic, and rubber, endowing the syringe with corrosion resistance, sealing performance, and the ability to adapt to different environments, ensuring the reliability and durability of the syringe || 【Precautions】 Before purchasing, please carefully check the OE number and model in the title or product description, and confirm whether the accessories match your car to avoid shopping inconvenience || 【Friendly Reminder】 Please do not provide a post office box/APO/FPO address, otherwise we will not be able to arrange delivery personnel
Bulubiu 【OE part number】Fuel Inject 729004-53101、093500-3840、72900453101 || 【Product Features】 Exquisite manufacturing, complex design, large dynamic flow range, anti clogging and anti pollution capabilities, good atomization performance, precise control of fuel injection efficiency and quantity, improving combustion efficiency and reducing emissions || 【Material Characteristics】 This product is made of metal, plastic, and rubber, endowing the syringe with corrosion resistance, sealing performance, and the ability to adapt to different environments, ensuring the reliability and durability of the syringe || 【Precautions】 Before purchasing, please carefully check the OE number and model in the title or product description, and confirm whether the accessories match your car to avoid shopping inconvenience || 【Friendly Reminder】 Please do not provide a post office box/APO/FPO address, otherwise we will not be able to arrange delivery personnel

6pcs 093500-3840 093100-3840 093400-5060 MM43594101 Engine Injectors Fuel for M1TSUBISH1 S4L-31/S6S with 3 Months
Generic Is customized: Yes || Origin: Mainland China || Certification: None || For DIY supplies: ELECTRICAL || Model number: for M1TSUBISH1 S4L-31 S6S Engine
Generic Is customized: Yes || Origin: Mainland China || Certification: None || For DIY supplies: ELECTRICAL || Model number: for M1TSUBISH1 S4L-31 S6S Engine

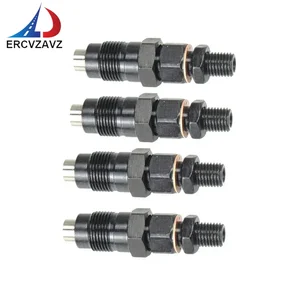
COPACHI 3pcs Fuel Injector Replace OE MM435-94101 Compatible with Mitsubishi L2E L3E S3L S4L S3L2 S4L2 S4S Diesel Engine After-Market Parts
COPACHI PART NAME: Fuel Injector. OE PART NUMBER: MM435-94101, MM435-94101, 093500-3840, 0935003840 || CONFIRM YOUR PARTS: Please be sure to confirm the PART NUMBER/MAKE/MODEL/YEAR before purchasing to make sure the part is suitable for your vehicle || QUALITY CONTROL: We will conduct strict quality inspection and testing before shipment, and package the items well to ensure that the products are delivered to you in good condition || PRODUCT FEATURES: High-quality materials, OE standards, professional manufacturing, long service life, easy installation and operation, safe and reliable, stable performance, effective operation, direct replacement || AFTER-SALES SERVICE: If you encounter any problems during the use of the product, please send us the detailed specific instructions or pictures first, and we can provide corresponding services according to your needs
COPACHI PART NAME: Fuel Injector. OE PART NUMBER: MM435-94101, MM435-94101, 093500-3840, 0935003840 || CONFIRM YOUR PARTS: Please be sure to confirm the PART NUMBER/MAKE/MODEL/YEAR before purchasing to make sure the part is suitable for your vehicle || QUALITY CONTROL: We will conduct strict quality inspection and testing before shipment, and package the items well to ensure that the products are delivered to you in good condition || PRODUCT FEATURES: High-quality materials, OE standards, professional manufacturing, long service life, easy installation and operation, safe and reliable, stable performance, effective operation, direct replacement || AFTER-SALES SERVICE: If you encounter any problems during the use of the product, please send us the detailed specific instructions or pictures first, and we can provide corresponding services according to your needs
You can express buy:
USD 146.31
14-06-2025
14-06-2025
6PCS Fuel Injectors 093500-3840 MM43594101 For MITSUBISHI S4L-31/S6S Engine Injectors 100% New
USD 96.94
14-06-2025
14-06-2025
4 Pc MM435-94101 093500-3840 Fuel Injectors For Mitsubishi L2E L3E S3L S4L S3L2 S4L2 S4S Diesel Engine Common Injectors
USD 18.84
23-05-2025
23-05-2025
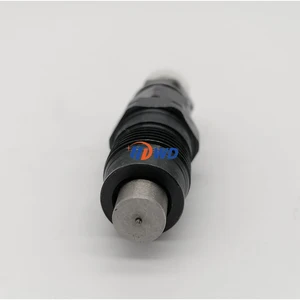
MM435-94101 MM43594101 093500-3840 Fuel Injector for Mitsubishi S3L2 L2C L2E L3E L3E L3E2 S4L2 S4Q2 S4S
Images:
USD 99.68

[19-May-2025]
USD 58.67

[19-May-2025]
USD 79.94

[13-May-2025]
USD 61.39

[13-May-2025]
Components :
| 001. | HOLDER & NOZZLE SE | 09350-03840 |
Scheme ###:
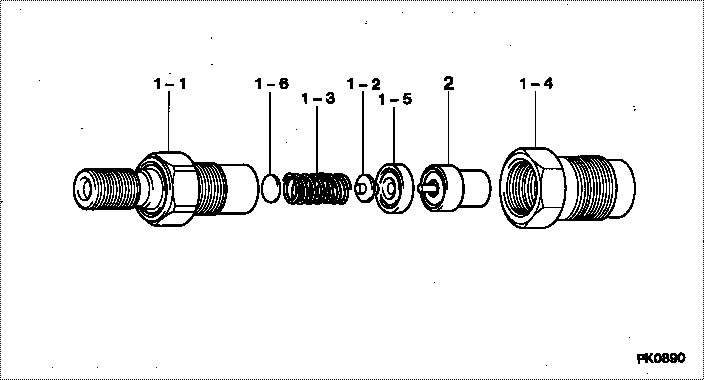
| 000. | [01] | 09350-03840 | HOLDER & NOZZLE SE | MM43594101 |
| 001. | [01] | 09310-03840 | HOLDER ASSY, NOZZL | |
| 001-001. | [01] | 09311-03840 | BODY SUB-ASSY, NOZ | |
| 001-002. | [01] | 09312-10380 | PIN, NOZZLE HOLDER | |
| 001-003. | [01] | 09312-70310 | SPRING, NOZZLE HOL | |
| 001-004. | [01] | 09316-41351 | NUT, NOZZLE RETAIN | |
| 001-004. | [01] | 09316-40950 | NUT, NOZZLE RETAIN | |
| 001-005. | [01] | 09317-40070 | DISTANCE PIECE | |
| 001-006. | [1C] | 09317-51980 | WASHER | |
| 001-006. | [1C] | 09317-51970 | WASHER | |
| 001-006. | [1C] | 09317-51960 | WASHER | |
| 001-006. | [1C] | 09317-51950 | WASHER | |
| 001-006. | [1C] | 09317-51940 | WASHER | |
| 001-006. | [1C] | 09317-51930 | WASHER | |
| 001-006. | [1C] | 09317-51920 | WASHER | |
| 001-006. | [1C] | 09317-51910 | WASHER | |
| 001-006. | [1C] | 09317-51900 | WASHER | |
| 001-006. | [1C] | 09317-51990 | WASHER | |
| 001-006. | [1C] | 09317-52000 | WASHER | |
| 001-006. | [1C] | 09317-54050 | WASHER | |
| 001-006. | [1C] | 09317-54040 | WASHER | |
| 001-006. | [1C] | 09317-54030 | WASHER | |
| 001-006. | [1C] | 09317-54020 | WASHER | |
| 001-006. | [1C] | 09317-54010 | WASHER | |
| 001-006. | [1C] | 09317-54000 | WASHER | |
| 001-006. | [1C] | 09317-53990 | WASHER | |
| 001-006. | [1C] | 09317-53980 | WASHER | |
| 001-006. | [1C] | 09317-52010 | WASHER | |
| 001-006. | [1C] | 09317-51890 | WASHER | |
| 001-006. | [1C] | 09317-51880 | WASHER | |
| 001-006. | [1C] | 09317-51870 | WASHER | |
| 001-006. | [1C] | 09317-51750 | WASHER | |
| 001-006. | [1C] | 09317-51740 | WASHER | |
| 001-006. | [1C] | 09317-51730 | WASHER | |
| 001-006. | [1C] | 09317-51720 | WASHER | |
| 001-006. | [1C] | 09317-51710 | WASHER | |
| 001-006. | [1C] | 09317-51700 | WASHER | |
| 001-006. | [1C] | 09317-51690 | WASHER | |
| 001-006. | [1C] | 09317-51680 | WASHER | |
| 001-006. | [1C] | 09317-51670 | WASHER | |
| 001-006. | [1C] | 09317-51760 | WASHER | |
| 001-006. | [1C] | 09317-51770 | WASHER | |
| 001-006. | [1C] | 09317-51860 | WASHER | |
| 001-006. | [1C] | 09317-51850 | WASHER | |
| 001-006. | [1C] | 09317-51840 | WASHER | |
| 001-006. | [1C] | 09317-51830 | WASHER | |
| 001-006. | [1C] | 09317-51820 | WASHER | |
| 001-006. | [1C] | 09317-51810 | WASHER | |
| 001-006. | [1C] | 09317-51800 | WASHER | |
| 001-006. | [1C] | 09317-51790 | WASHER | |
| 001-006. | [1C] | 09317-51780 | WASHER | |
| 002. | [01] | 09340-05060 | NOZZLE ASSY |
Include in #3:
09350-03840
as HOLDER & NOZZLE SE
Include as Nozzle:
0920000780
as Nozzle
Cross reference number
| Part num | Firm num | Firm | Name |
| 09350-03840 | MM43594101 | HOLDER & NOZZLE SE | |
| MM43594101 | MITSUBISHI | HOLDER & NOZZLE SE |
Information:
Start By:a. remove oil pump1. Check the connecting rods and caps for their identification and location. 2. Turn the crankshaft until the connecting rod caps are in the position shown.3. Remove bolts (1) and the and the bearing caps. Remove the lower half of the bearing from the cap.4. Push the connecting rod away from the crankshaft. Remove the upper half of the bearing from the connecting rod. Install the bearings dry when the clearance checks are made. Put clean engine oil on the bearings for final assembly.5. Install the upper half of the bearing in the connecting rod.6. Pull the connecting rod slowly on to the crankshaft.7. Install the lower half of the bearing in the cap. Be sure the tabs in the back of bearings are in the tab grooves of the connecting rod and cap.The serviceman must be very careful to use Plastigage, tool (A) correctly. The following points must be remembered:... Make sure that the backs of the bearings and the bores are clean and dry.... Make sure that the bearing locking tabs are properly seated in their slots.... The crankshaft must be free of oil where the Plastigage touches it.... Put a piece of Plastigage (A) on the crown of the bearing half that is in the cap. Do not allow the Plastigage to extend over the edge of the bearing.... Install the bearing cap using the correct torque-turn specifications. Do not use an impact wrench. Be careful not to dislodge the bearing when the cap is installed.... Do not turn the crankshaft with the Plastigage installed.... Carefully remove the cap but do not remove the Plastigage. Measure the width of the Plastigage while it is in the bearing cap or on the crankshaft journal. Do this by using the correct scale on the package. Record the measurements.... Remove the Plastigage before reinstalling the cap.When using Plastigage, the readings can sometimes be unclear. For example, all parts of the Plastigage are not the same width. Measure the major widths to make sure that they are within the specification range. Also, experience has shown that when checking clearances tighter than 0.10 mm (.004") the readings may be low by 0.013 to 0.025 mm (.0005 to .0010"). Out-of-round journals can give faulty readings. Also, journal taper may be indicated when one end of the Plastigage is wider that the other.For complete details concerning measuring bearing clearances, see Engine Bearings And Crankshafts, Form No. SEBD0531. 8. Use Plastigage (A) to check the bearing clearance.9. Put Plastigage (A) on the bearing.10. Put 2P2506 Thread Lubricant on the threads of the rod bolts. Be sure the cylinder numbers on the rod cap and rod are the same and are on the same side of connecting rod. Numbers are on the same side of the rod and cap as are the bearing tab slots. If new rods are installed, put the cylinder number on the rod and cap. Do not turn the crankshaft when Plastigage (A) is in position.