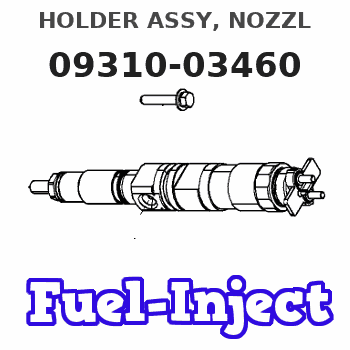
Information holder assy, nozzl
Rating:
Compare Prices: .
As an associate, we earn commssions on qualifying purchases through the links below

$141.79
27 Aug 2024
CN: CAR REFINE
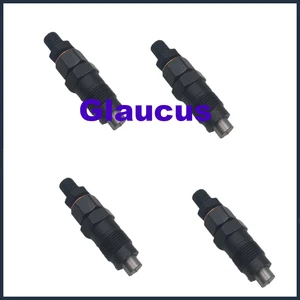
4PCS Fuel Injector Mechanism fits 093100-3460 093500-3460 for Mitsubishi Engine 4D65T 4D56
Podafu Item Type: Fuel Injector || Part Code: 093100-3460 || Applicable Models: Compatible with Mitsubishi Engine 4D65T 4D56 || Provides consistent fuel delivery to ensure smooth engine operation. || Extends the engine's peak performance, thereby improving the vehicle's dependability.
Podafu Item Type: Fuel Injector || Part Code: 093100-3460 || Applicable Models: Compatible with Mitsubishi Engine 4D65T 4D56 || Provides consistent fuel delivery to ensure smooth engine operation. || Extends the engine's peak performance, thereby improving the vehicle's dependability.

$152.00
27 Aug 2024
CN: BCXFORK
BCXFORK 4PCS Fuel Injector 093100-3460 093500-3460 fits for Mitsubishi Engine 4D65T 4D56
BCXFORK NOTE Before placing an order, please verify that your part number matches the one in the listing. Some Fuel Injectors may look similar. If you're unsure, you can leave us a message and provide a picture of your old fuel injector for verification. || Note: We can provide various engine parts. If you need any additional parts, please leave us a message with the list of items you need. || Manufacturer Warranty 1 Year || Part Number: 093100-3460 093500-3460 || This item fits for Mitsubishi Engine 4D65T 4D56
BCXFORK NOTE Before placing an order, please verify that your part number matches the one in the listing. Some Fuel Injectors may look similar. If you're unsure, you can leave us a message and provide a picture of your old fuel injector for verification. || Note: We can provide various engine parts. If you need any additional parts, please leave us a message with the list of items you need. || Manufacturer Warranty 1 Year || Part Number: 093100-3460 093500-3460 || This item fits for Mitsubishi Engine 4D65T 4D56
You can express buy:
USD 126
13-05-2025
13-05-2025
fuel injector Injection Nozzle for Mitsubishi engine 4D65T 4D56 093500-3460 093100-3460 093400-5370 DN0PD37 MD080288
Include in #3:
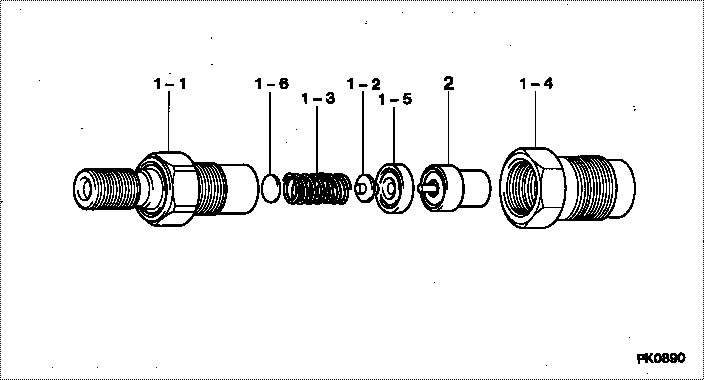
Cross reference number
| Part num | Firm num | Firm | Name |
| 09310-03460 | HOLDER ASSY, NOZZL |
Information:
1. Remove oil supply tube (1) from the turbocharger and the oil filter base.2. Remove four bolts (3), and remove oil drain tube (2) and elbow (4) from the turbocharger. Separate the elbow from the drain tube. Remove the O-ring seal from the tube. 3. Remove four nuts and bolts (6). Remove bolt (5) and remove tube (7).4. Remove the O-ring seal from tube (7). 5. Remove bolts (9), elbow (8) and pipe (10). 6. The weight of the turbocharger is approximately 24 kg (53 lb.). Fasten a nylon strap and a hoist to the turbocharger, and remove four bolts (12) and nuts that hold it to the exhaust manifold. Remove turbocharger (11). The following steps are for the installation of the turbocharger.7. Inspect all gaskets and O-ring seals for damage, and make a replacement if needed.8. Install a gasket between the turbocharger and exhaust manifold. Put 5P3931 Anti-Seize Compound on the threads of bolts (12). Put turbocharger (11) in position and install bolts and nuts (12). Tighten the bolts to a torque of 55 5 N m (41 4 lb. ft.).9. Apply 5P3931 Anti-Seize Compound to the male ends of pipe (10) and bolts (9). Install pipe (10) and elbow (8). Tighten bolts (9) to a torque of 55 5 N m (41 4 lb. ft.).10. Lubricate the O-ring seals with clean oil and install tube (7). Install bolts (5) and (6).11. Install the O-ring seal on tube (2). Lubricate the O-ring seal with clean oil and install tube (2) in elbow (4). Put the gaskets in position on the block and on the turbocharger, and install tube (2) with bolts (3).12. Put a gasket in position between oil supply tube (1) and the turbocharger. Install oil supply tube (1).Disassemble Turbocharger (Schwitzer 4MF)
Start By:a. remove turbocharger1. Put identification marks on the two housings and the cartridge assembly for use at assembly. 2. Remove two clamps (3) and make a separation of compressor housing (1) and turbine housing (2) from the cartridge assembly.
When the nut is loosened, do not put a side force on the shaft.
3. Put cartridge assembly (4) in position on tooling (A). Remove the nut from the shaft. 4. Use a press to push the shaft assembly out of the cartridge assembly. Remove compressor wheel (5). 5. Remove seal ring (8) and shroud (7) from shaft assembly (6). 6. Remove snap ring (9) with tool (B). 7. Use two screwdrivers to remove insert (10) from the cartridge housing. 8. Remove O-ring seal (12) from the insert.9. Remove sleeve (11) from the insert. Remove the seal ring from the sleeve. 10. Remove deflector (13) from the housing. 11. Remove ring (14) from the cartridge housing. 12. Remove sleeve (15) and bearing (16) from the cartridge housing. 13. Remove ring (17). 14. Use tool (C) to remove snap ring (19), bearing (18) and snap ring (20) from the cartridge housing. 15. Turn the cartridge housing over. Use tool (C) to remove snap ring