Information pump assy, fuel fe
Rating:
KIT List:
| Pump assy, fuel fe | 1922900060 |
| Pump assy, fuel fe | 1922900060 |
| Pump assy, fuel fe | 1922900060 |
Scheme ###:

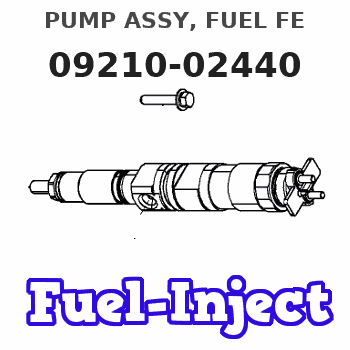
| 000. | [01] | 09210-02440 | PUMP ASSY, FUEL FE | |
| 002. | [01] | 09212-00410 | HOUSING SUB-ASSY, | |
| 002-001. | [01] | 09216-80150 | ROD, FEED PUMP PUS | |
| 002-002. | [01] | 94915-02700 | SEAL, OIL | |
| 003. | [02] | 09212-10011 | VALVE, FEED PUMP C | |
| 004. | [02] | 09212-40010 | SPRING, FEED PUMP | |
| 005. | [02] | 09212-50010 | GASKET, CHECK VALV | |
| 006. | [01] | 09212-60010 | PLUG, FEED PUMP CH | |
| 007. | [01] | 09213-00260 | PUMP SUB-ASSY, PRI | |
| 008. | [01] | 09217-10011 | PISTON, FEED PUMP | |
| 009. | [01] | 09217-40030 | TAPPET, FEED PUMP | |
| 010. | [01] | 09217-60010 | ROLLER, FEED PUMP | |
| 011. | [01] | 09217-80010 | PIN, FEED PUMP TAP | |
| 012. | [02] | 09217-90050 | BLOCK, FEED PUMP T | |
| 013. | [01] | 09218-20030 | SPRING, FEED PUMP | |
| 014. | [01] | 09218-40021 | PLUG, FEED PUMP PI | |
| 015. | [01] | 09013-90030 | O-RING | |
| 016. | [01] | 09007-30060 | NIPPLE, ELBOW | |
| 018. | [01] | 94901-81240 | WASHER, COPPER PLA | |
| 020. | [01] | 94907-20940 | RING, SNAP |
Include in #3:
Cross reference number
| Part num | Firm num | Firm | Name |
| 09210-02440 | PUMP ASSY, FUEL FE |
Information:
Necessary Parts
Installation Procedure for Components of Automatic Ether Injection System
If the machine is equipped with an earlier version ether starting aid group, remove the entire system with the exception of the in-cab, dash mounted, 8C9812 Switch and the tubing to the turbocharger outlet adapters. This consists of two nozzles, two tubes from the nozzles to a tee, and the tee.All electrical wiring from the earlier system must also be removed, including the wiring to the 8C9812 Switch.Installation of Components on the Mounting Plate
The mounting plate provides a mounting location for the solenoid valves, ether cylinders, reset switches (and the reset switch brackets), and the shuttle valve. 1. Install 5P2948 Connectors (2) and (6) in the two inlet ports of 8E1415 Shuttle Valve Assembly (7). Install 5P6315 Elbow (5) in the outlet port of shuttle valve assembly (7).2. Use two 7X0459 Screws (3) and two 4B4274 Washers (4) to fasten 8E1415 Shuttle Valve Assembly (7) in position on 8X3710 Plate Assembly (1). The outlet of the elbow should be facing away from 8X3710 Plate Assembly (1). 3. Install a 5P0598 Clamp through slot (A) of each 9X7137 Ether Valve Assembly mounting plate (8). Remove plug (B) at the bottom of each solenoid valve. 4. Install filter (10) in fitting (9). Ensure filter (10) is seated correctly in orifice fitting (9) before installing the fitting.5. Install 7X1063 Orifice Fitting (9) (left hand thread) in the hole at each location where plug (B) was removed.6. Position 7X1063 Orifice Fitting (9) so the opening faces "OUT" away from 9X7137 Ether Valve Assembly mounting plate (8). The ether valve assembly at the left location (C) is referred to as Ether Assembly No. 1 and it must be installed first as this procedure indicates.7. Connect 8X5014 Wire Assembly (12) to 3T3133 Reset Switch (13), then attach the switch to 6Y9788 Plate (11). (The 8X5014 Wire Assembly must face away from the mounting holes on the back of the 6Y9788 Plate.)8. Mount the Ether Assembly No. 1 and 6Y9788 Plate (11) to 8X3710 Plate Assembly (1) as shown. Use four 8T9043 Bolts and four 8T4224 Washers to fasten the complete unit in position. 9. Fasten 9G9154 Clip (14), 9G9150 Clip (15) and 9G9152 Clip (16) to the lower left boss on 8X3710 Plate Assembly (1) using 4L6454 Bolt with 8T4896 Washer as shown. Do not mount Ether Assembly No. 2 to 8X3710 Plate Assembly (1) at this time.Installation of the 8X3710 Plate Assembly
1. Remove the three bolts and washers, at locations marked (X), on the upper right corner of the radiator shield. 2. Mount 8X3710 Plate Assembly (1) to right front corner of the radiator using the top two of the three bolts and washers, at locations marked (X). Use the holes in 8X3710 Plate Assembly (1) at locations marked (Y).3. Use the remaining bolt and washer to mount a 9G9150 Clip to 8X3710 Plate Assembly (1), at location marked (Z), and then fasten to the radiator. 4. Connect 8X5013 Wire Assembly (4) to 3T3133