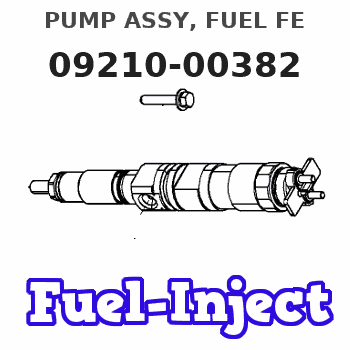
Information pump assy, fuel fe
Rating:
Scheme ###:
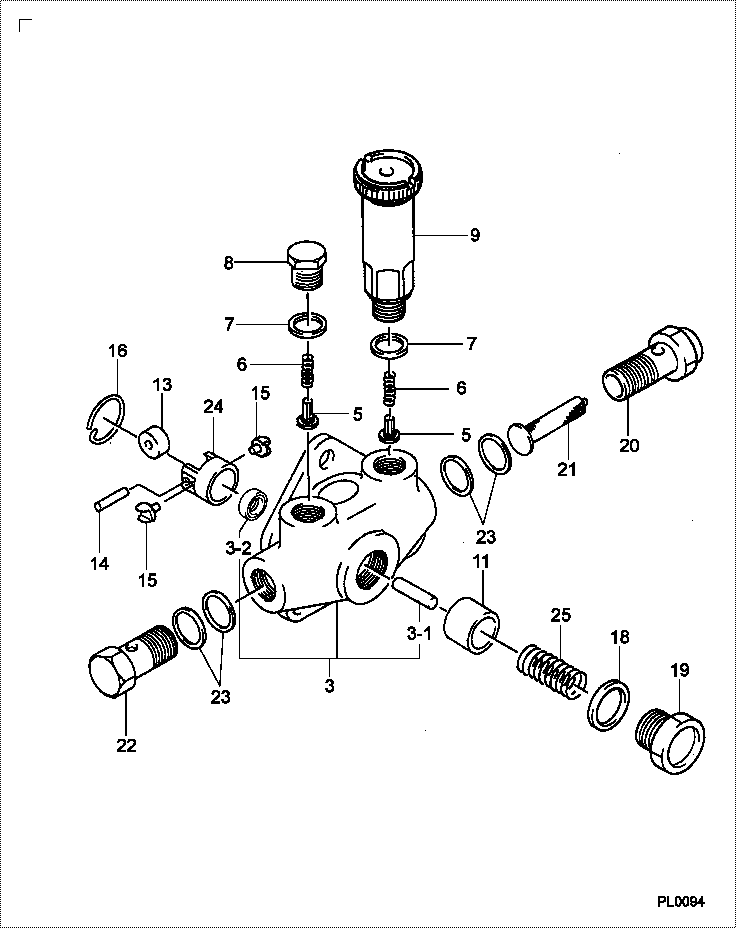
| 000. | [01] | 09210-00382 | PUMP ASSY, FUEL FE | |
| 003. | [01] | 09212-00072 | HOUSING SUB-ASSY, | 22502-46020-000 |
| 003-001. | [01] | 09216-80150 | ROD, FEED PUMP PUS | |
| 003-001. | [1C] | 09216-80070 | ROD, FEED PUMP PUS | 22517-87305-000 |
| 003-001. | [1C] | 09216-80060 | ROD, FEED PUMP PUS | 22517-87304-000 |
| 003-001. | [1C] | 09216-80050 | ROD, FEED PUMP PUS | 22517-87303-000 |
| 003-001. | [1C] | 09216-80040 | ROD, FEED PUMP PUS | 22517-87302-000 |
| 003-001. | [1C] | 09216-80030 | ROD, FEED PUMP PUS | 22517-87301-000 |
| 003-001. | [1C] | 09216-80010 | ROD, FEED PUMP PUS | 22517-77020-000 |
| 003-002. | [01] | 94915-00970 | SEAL, OIL | 90099-15026-000 |
| 003-002. | [01] | 94915-02700 | SEAL, OIL | |
| 005. | [02] | 09212-10011 | VALVE, FEED PUMP C | 22515-77020-000 |
| 006. | [02] | 09212-40010 | SPRING, FEED PUMP | 22514-77020-000 |
| 007. | [02] | 09212-50010 | GASKET, CHECK VALV | 22513-77020-000 |
| 008. | [01] | 09212-60010 | PLUG, FEED PUMP CH | 22512-77020-000 |
| 009. | [01] | 09213-00050 | PUMP SUB-ASSY, PRI | 22501-77020-000 |
| 011. | [01] | 09217-10011 | PISTON, FEED PUMP | 22518-77020-000 |
| 013. | [01] | 09217-60010 | ROLLER, FEED PUMP | 22525-77020-000 |
| 014. | [01] | 09217-80010 | PIN, FEED PUMP TAP | 22526-77020-000 |
| 015. | [02] | 09217-90050 | BLOCK, FEED PUMP T | 22527-56010-000 |
| 016. | [01] | 94907-20940 | RING, SNAP | 22528-77020-000 |
| 018. | [01] | 94901-81240 | WASHER, COPPER PLA | 22522-67010-000 |
| 019. | [01] | 09218-40021 | PLUG, FEED PUMP PI | 22521-77020-000 |
| 020. | [01] | 09222-30070 | SCREW, FUEL PIPE H | 22535-46010-000 |
| 021. | [01] | 09222-00040 | FILTER, FEED PUMP | 22529-76010-000 |
| 022. | [01] | 94918-00310 | SCREW, HOLLOW | 90099-18010-000 |
| 023. | [04] | 09022-20050 | WASHER, FUEL PIPE | |
| 024. | [01] | 09217-40030 | TAPPET, FEED PUMP | 22524-77021-000 |
| 025. | [01] | 09218-20030 | SPRING, FEED PUMP |
Include in #3:
09210-00382
as PUMP ASSY, FUEL FE
Cross reference number
| Part num | Firm num | Firm | Name |
| 09210-00382 | PUMP ASSY, FUEL FE |
Information:
Battery
Every 250 hours check the electrolyte level of each cell and the general condition of the battery. Maintain the electrolyte level to the base of each vent well. The make-up water must be one of the following (in order of preference):1. Distilled water.2. Odorless, tasteless drinking water.3. Iron free water.
Never add acid or electrolyte.
Cleaning Battery
Mix a weak solution of baking soda and water. Apply the solution with a soft bristle brush. Be careful not to get cleaning solution into the battery.
CLEANING BATTERY TERMINALSThoroughly rinse the battery and battery tray with clean water. Apply grease to the battery cable clamps and terminals and to all threads.Testing The Electrolyte Solution
The general condition of a battery can be determined by measuring the specific gravity of the electrolyte solution and adjusting the reading to 80°F (27°C). If the electrolyte level is too low to allow taking a hydrometer reading, add make-up water to the correct level and then charge the battery 2 to 4 hours before taking a reading.1. Insert the hydrometer into a cell. Fill the hydrometer barrel while holding it vertically. The float must not drag on the wall of the barrel.2. Read the hydrometer: 1.265 - 100% charged1.225 - 75% charged1.190 - 50% charged1.155 - 25% charged1.120 - Discharged1.000 - Water3. Test each cell in the same manner.4. If there is more than .050 (50 gravity points) variation between the highest and lowest reading, the battery should be replaced.5. Adjust the readings to 80°F (27°C). a. For every 10°F (5.5°C) the electrolyte temperature is above 80°F (27°C), add .004 (4 gravity points) to the specific gravity readings.b. For every 10°F (5.5°C) the electrolyte temperature is below 80°F (27°C), subtract .004 (4 gravity points) from the specific gravity reading.The corrected reading is of most importance during cold weather when the hydrometer reading is always corrected to a lower specific gravity reading. A low reading signifies the battery has less available power to crank the engine and that booster batteries may be required.
TESTING ELECTROLYTE SOLUTIONInstalling Battery
1. Be sure the battery tray is clean and free of foreign objects.2. Be sure terminal posts and cable clamps are clean.3. Place the battery in the tray. Tighten the hold down clamps evenly until the battery is snug. Do not overtighten.4. Connect the "hot" terminal first. Be sure the top of the cable terminal is pushed down even with the top of the terminal post. Tighten the clamp firmly.
Always connect the "hot" terminal first to minimize arcing. Otherwise injury or damage could result.
5. Connect the "grounded" terminal last. Be sure the top of the cable terminal is pushed down even with the top of the terminal post. Tighten the clamp firmly.6. Apply a thin coating of grease over the cable clamps. terminals and hold down fasteners.Checking Charge Rate
1. After starting the engine, the ammeter indicator should register to the right of zero, but should never be "pegged".2. After the engine has been running, the indicator should be just to the right of zero. If the