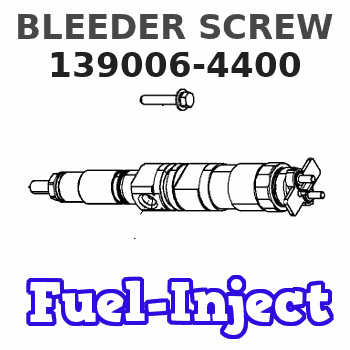
Information bleeder screw
BOSCH
9 411 610 583
9411610583
ZEXEL
139006-4400
1390064400
ISUZU
8943132030
8943132030

Rating:
Include in ###:
Cross reference number
Zexel num
Bosch num
Firm num
Name
139006-4400
9 411 610 583
8943132030 ISUZU
BLEEDER SCREW
C 90HY BOLT Standard parts Others
C 90HY BOLT Standard parts Others
139006-4400
9 411 610 583
ME741014 MITSUBISHI
BLEEDER SCREW
C 90HY BOLT Standard parts Others
C 90HY BOLT Standard parts Others
139006-4400
9 411 610 583
1938289TA1 NISSAN
BLEEDER SCREW
C 90HY BOLT Standard parts Others
C 90HY BOLT Standard parts Others
139006-4400
9 411 610 583
16788G5500 NISSAN
BLEEDER SCREW
A C 90HY BOLT Standard parts Others
A C 90HY BOLT Standard parts Others
139006-4400
9 411 610 583
1926287G01 NISSAN-DIESEL
BLEEDER SCREW
C 90HY BOLT Standard parts Others
C 90HY BOLT Standard parts Others
139006-4400
9 411 610 583
RF1G13V52 MAZDA
BLEEDER SCREW
C 90HY BOLT Standard parts Others
C 90HY BOLT Standard parts Others
Information:
Start By:a. remove cylinder head assemblyb. remove rear seal carrierc. remove front housing and camshaft idler gear assemblyd. remove pistons and connecting rod assemblies 1. Fasten lifting straps and a hoist to each end of the crankshaft as shown. Remove bolts (2), the washers and main bearing caps (3). Carefully remove crankshaft (1) from the cylinder block. The weight of the crankshaft for the 3114 Engine is 36 N m (80 lb ft). The weight of the crankshaft for 3116 Engines is 59 N m (130 lb ft). 2. Remove main bearings (4) from the cylinder block. Remove the main bearings from the main bearing caps. The following steps are for the installation of the crankshaft.3. Check the condition of the main bearings. Refer to "Guideline For Reusable Parts, Main & Connecting Rod Bearings", Form No. SEBF8009 and SEBD0531 as guide for checking bearing condition. Number four main bearing in 3114 Engines and number six main bearing in 3116 Engines are thrust bearings.4. Clean the bearing surfaces in the cylinder block for the main bearings. Apply clean engine oil on the upper main bearing half. Do not put oil on the back side of the bearing. Install the upper main bearing halves (bearings with the oil holes) in the cylinder block. Be sure the tab on the back side of the bearing engages with the groove in the cylinder block.5. Put clean engine oil on the crankshaft bearing journals. Fasten lifting straps and a hoist to crankshaft (1), and carefully install it in the cylinder block.6. Clean the bearing surface of the main bearing caps. Install the lower main bearing halves in the crankshaft main bearing caps. Be sure the tab on the back side of the bearing engages with the groove in the main bearing cap. Apply clean engine oil on the lower main bearing half. Do no put oil on the back side of the bearing.7. Install the main bearing caps as follows:
Install the main bearing caps with the sequence number to the right, 1 through 5 (for the 4 cylinder) and 1 through 7 (for the 6 cylinder), front to rear.
a. Put main bearing caps (2) in position in the cylinder block with the sequence numbers in the correct positions.b. Apply clean engine oil to the threads of the main bearing cap mounting bolts and on the washer contact faces. When the bolts for the rear main bearing cap are tightened, slide the main bearing cap as far forward as possible (toward Front of engine) until the cap is against the bolts. Holding the main bearing cap in this position, tighten the bolts. This will prevent interference between the rear main bearing cap and the rear seal carrier.c. Install main bearing cap mounting bolts (1) and the washers. Tighten both bolts of each main bearing cap to a torque of 54 7 N m (40 5 lb ft).d. Tighten the bolts and additional 1/4 90 5 degrees ( turn). 8.
Have questions with 139006-4400?
Group cross 139006-4400 ZEXEL
Isuzu
139006-4400
9 411 610 583
8943132030
BLEEDER SCREW
Mitsubishi
139006-4400
9 411 610 583
ME741014
BLEEDER SCREW
Nissan
139006-4400
9 411 610 583
1938289TA1
BLEEDER SCREW
139006-4400
9 411 610 583
16788G5500
BLEEDER SCREW
Nissan-Diesel
139006-4400
9 411 610 583
1926287G01
BLEEDER SCREW
Mazda
139006-4400
9 411 610 583
RF1G13V52
BLEEDER SCREW
